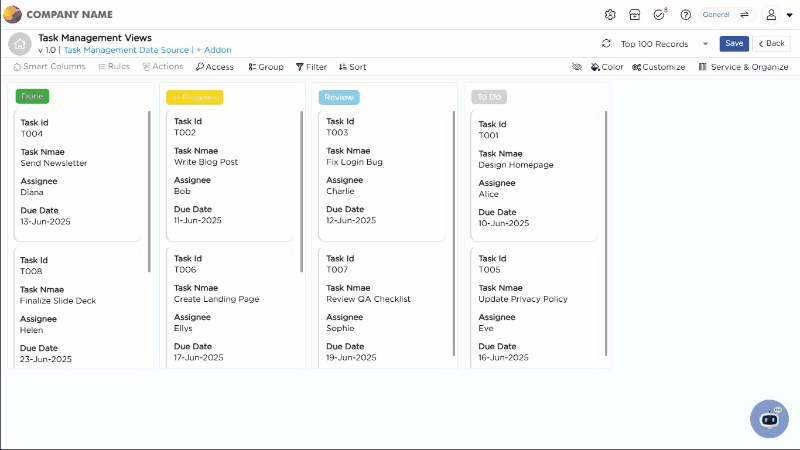
Once the Kanban view is created, the next step is to configure the board structure. This involves organizing and reordering the columns, integrating the service with the view, and mapping Kanban elements to the service. By linking the service, any changes made on the Kanban board are automatically updated in the data tables.
The configuration process begins on a dedicated page with three main customization options:
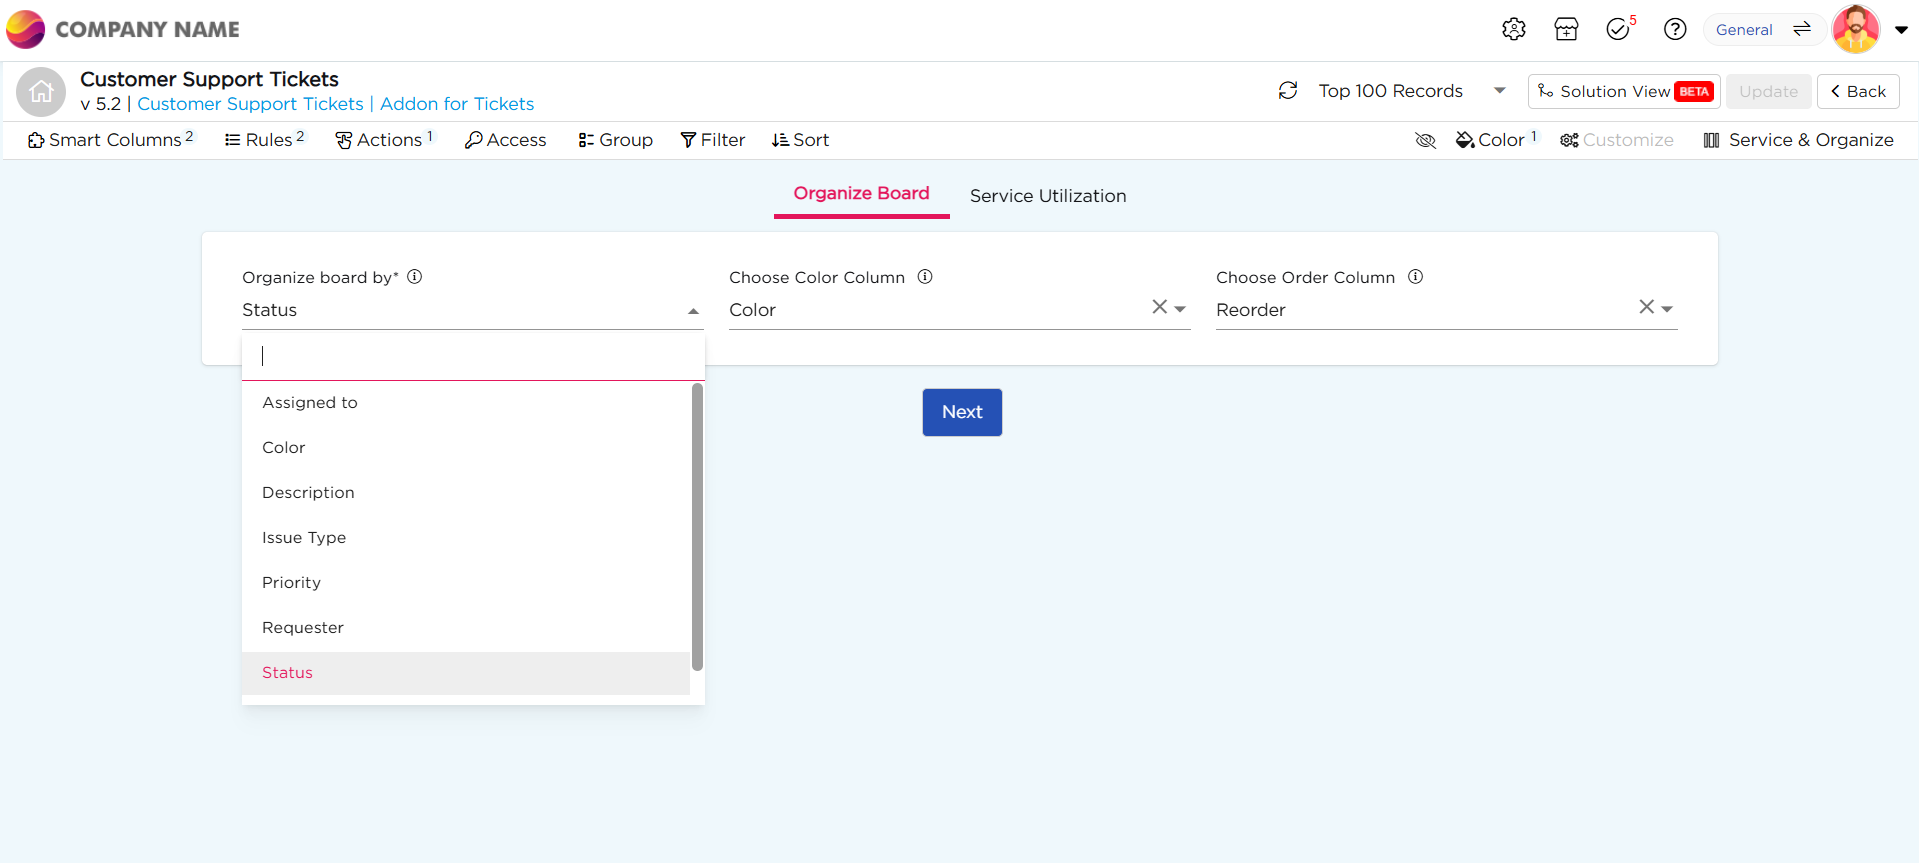
Select a column from the data source to organize the Kanban board. The board will be arranged according to the values in the chosen column, essentially defining the progression of a process from beginning to end. For this use case, we will choose the "Status" column, as its values will determine how the board is structured.
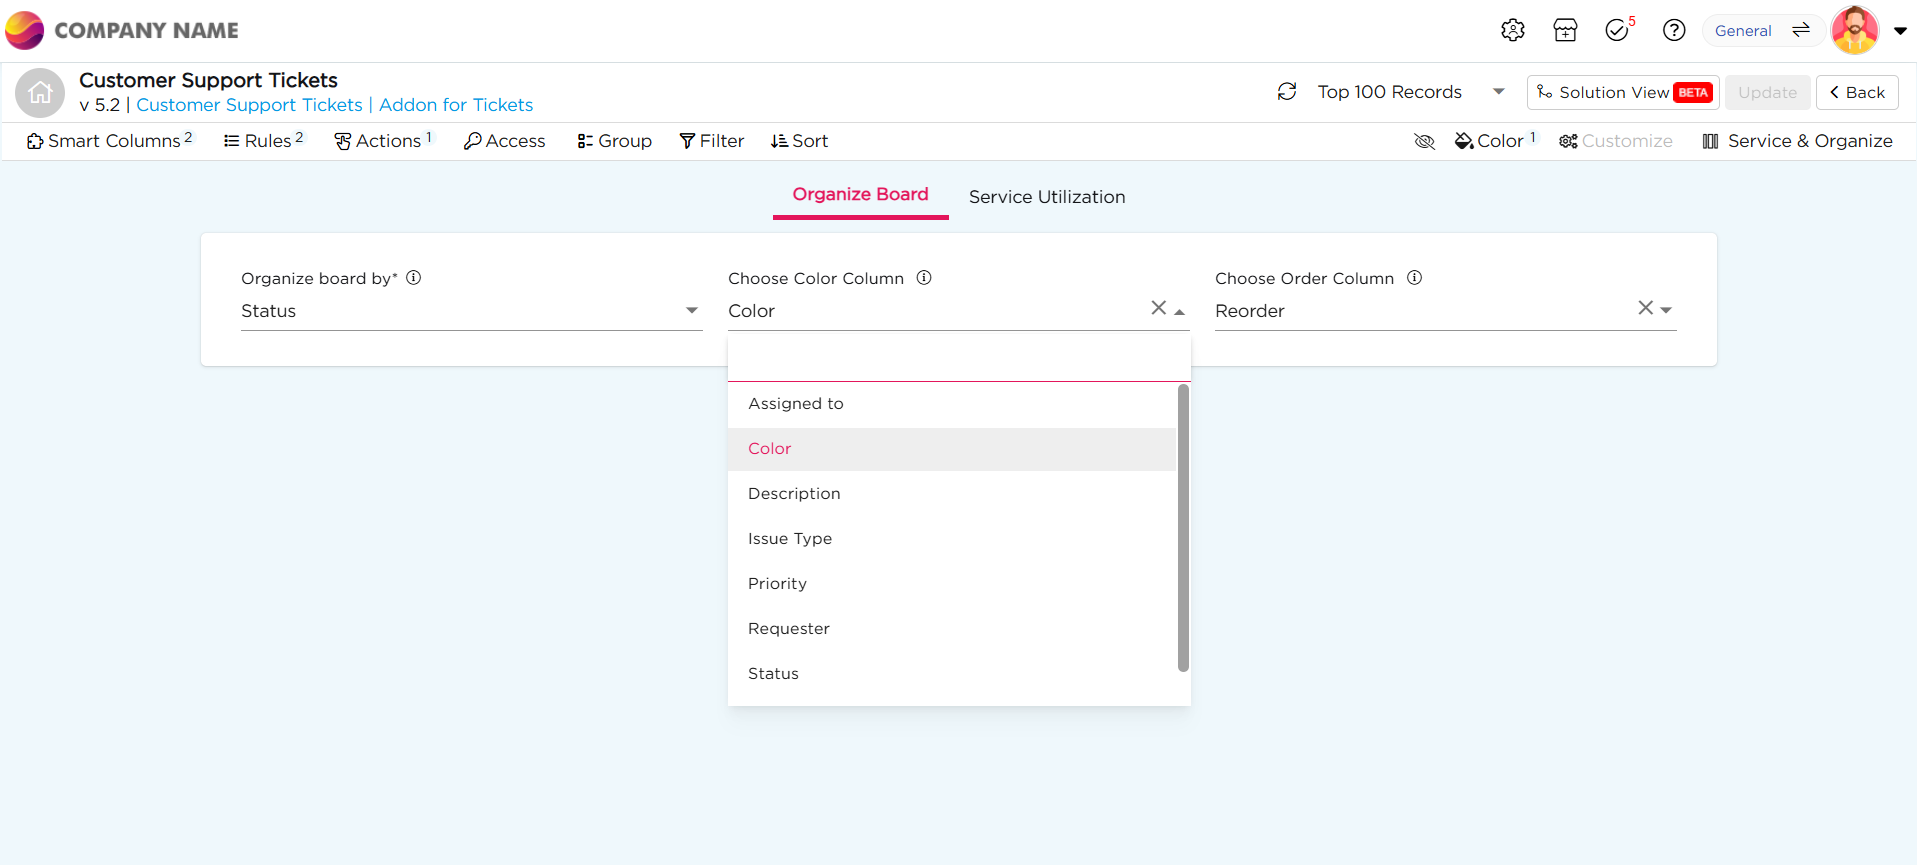
Assign distinct colors to the values in the Status column. The Color Column should be predefined in the Data Table, ensuring it is available in the Data Source. When configuring the Kanban board, simply select this Color Column from the dropdown. The assigned colors will automatically apply to the corresponding Status values, visually distinguishing each stage.
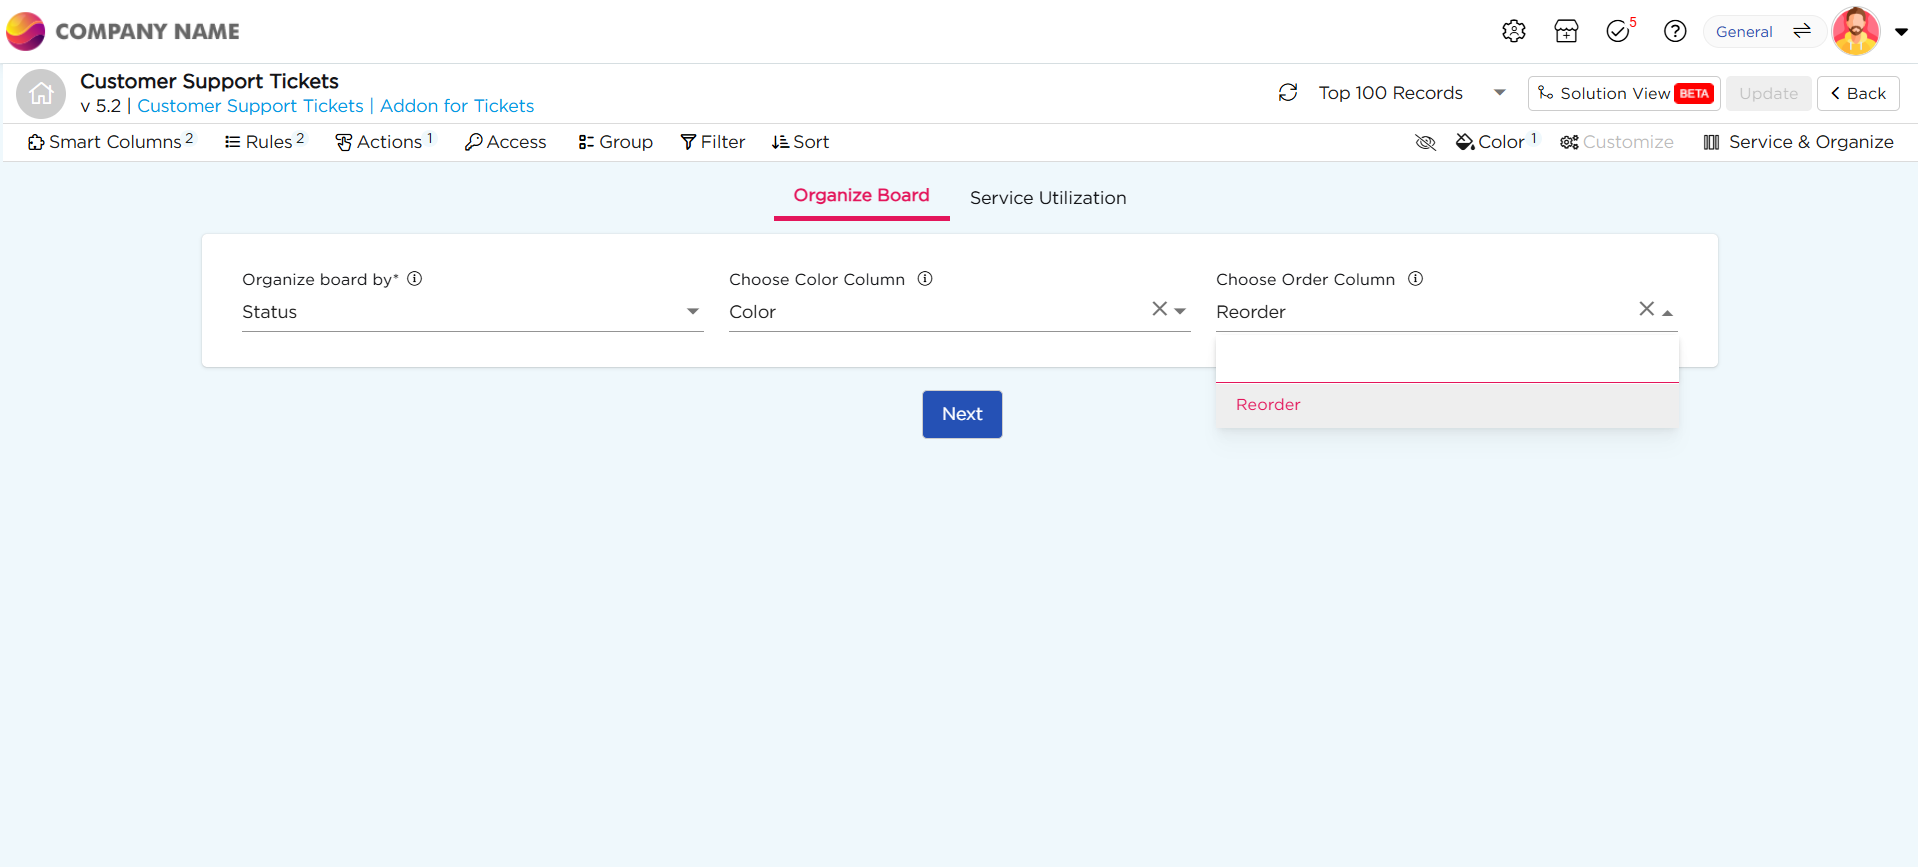
By default, the columns in the Kanban board are derived from the selected Data Source column (e.g., Status). However, these values are arranged alphabetically, which may not reflect the actual workflow sequence.
Note
To ensure the board follows a logical progression, you can create a custom Order Column using add-ons. This allows you to define the exact sequence of stages so that the Kanban board aligns with your process flow.
For instance, in a customer support workflow, stages may include:
Open → In Progress → Testing → Resolved → Closed
By default, a Kanban board might alphabetically arrange them as:
Closed → Hold → In Progress → Open → Resolved
Since this order doesn't align with the natural support process, a custom Order Column ensures the process is correctly structured, keeping your board organized and efficient.
To alter this default flow, follow the process below
How to adjust the alphabetical order to match your process flow?
Start to create an add-on.
Click + Addon, on the title bar, located just below the title of your view.
A pop-up appears, saying "Select Add-on", click on "+ Create Add-on."
Upon clicking on it, it will redirect you to the add-on creation page.
Access Smart Columns: In the Add-On creation page, click on Smart Columns in the top menu.
Add a Smart Column: Click on + Add Smart Column to create a new smart column.
Set Column Details:
Column Name: Name the column as Order.
Element Type: Select Number for the element type.
Save: Save the column without assigning any value to it at this stage.
Step 2: Write Rules for Custom Ordering
Define Ordering Rules: To determine the custom order of columns in your Kanban view, you need to write rules that specify how the columns will be arranged based on the values in the Order column.
Example Rule: If the stages in your process are "Open" and "In Progress", the rules would be as follows:
Assign a value of 1 to "Open" to ensure it appears first.
Assign a value of 2 to "In Progress" to place it second.
Use If-Else Logic: If the value is "Open", set the Order value to 1. Else If the value is "In Progress", set the Order value to 2.
Apply the same logic to each stage in the process, assigning values to define the order. By setting these rules, you control the sequence in which the columns appear on the Kanban board, ensuring they align with the workflow you’ve defined.