.png)
Lookups
- 1 Minute to read
- Contributors


Lookups
- 1 Minute to read
- Contributors
Article summary
Did you find this summary helpful?
Thank you for your feedback!
A Lookup is a feature that allows you to store a list of predefined values, such as countries or weekdays, which can then be easily accessed and selected from a drop-down menu when filling out forms or creating apps.
EXAMPLE
A Country lookup could contain values like India, Australia, UK, USA, etc., while a Weekdays lookup could contain values like Sunday, Monday, Tuesday, etc.
Lookups are useful for setting a list of predefined values in a drop-down field when creating a form or an app.
How to create a Lookup?
A Lookup can be created in two ways. The first method is through manual entry, which involves using the Admin Menu -> Database -> Lookups. The second method is by creating a lookup through Excel, which allows you to import values from an Excel file.
Admin Menu -> Database -> Lookups.
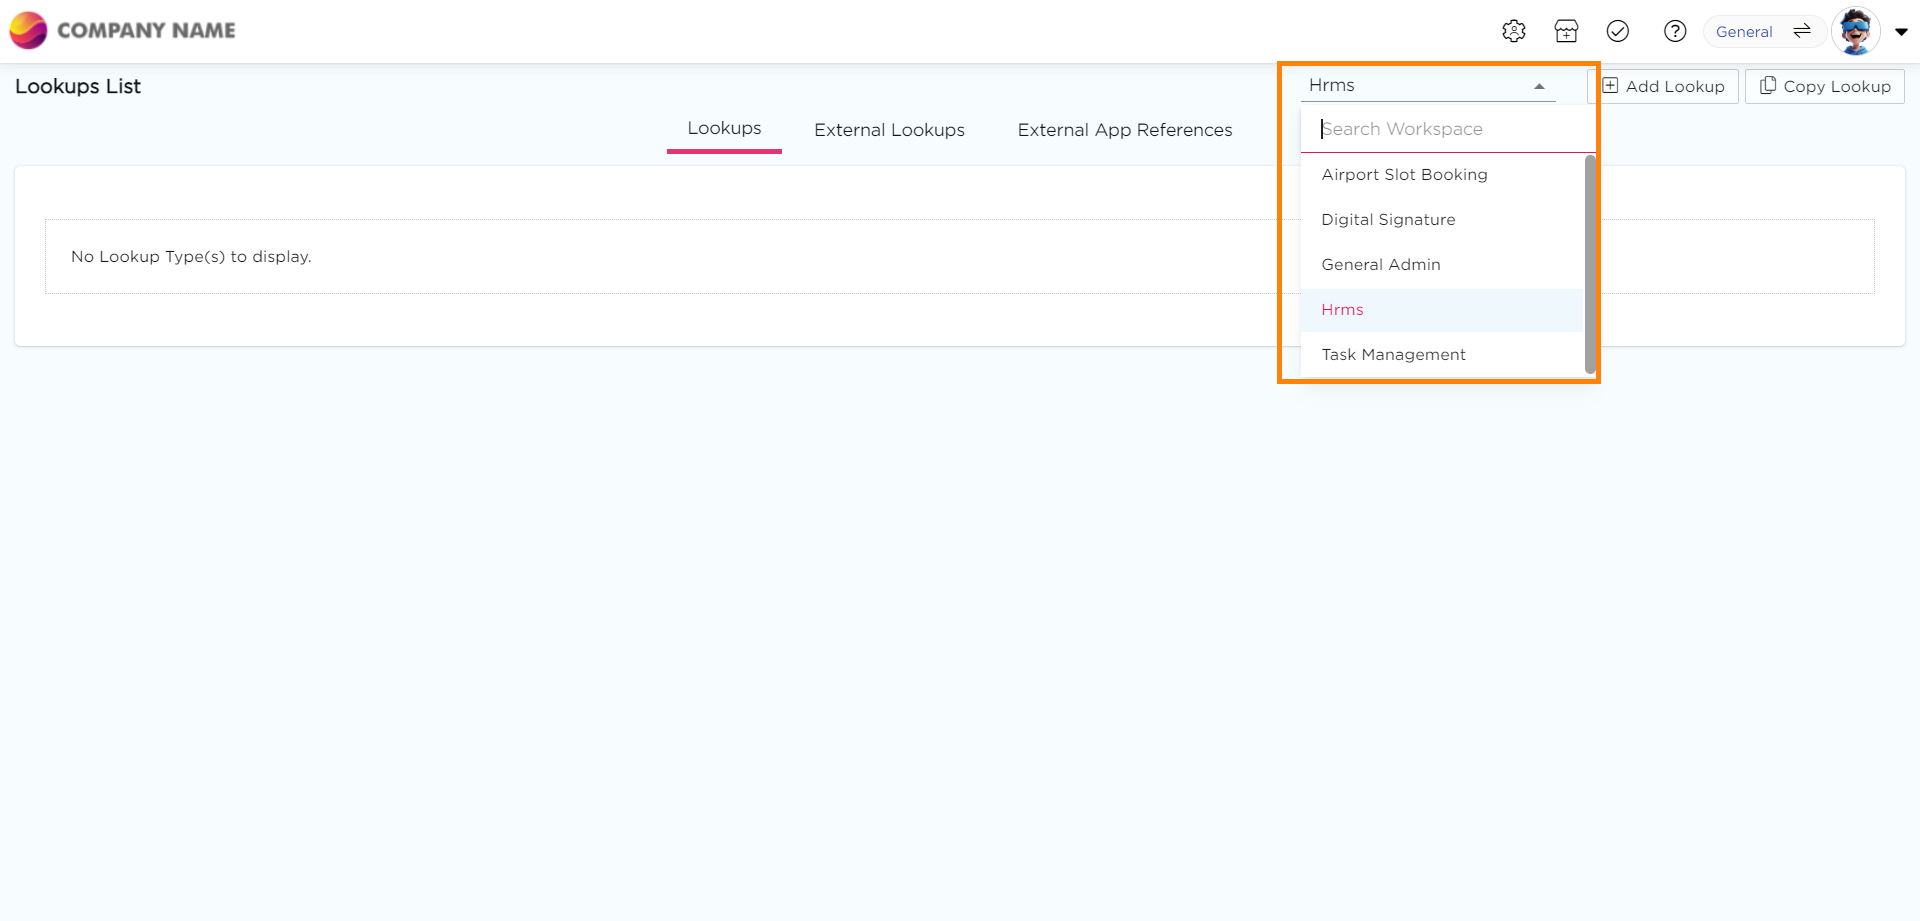
You will be taken to the Lookups List page.
Click on the Select Workspace drop-down and choose a Workspace. (The lookup created in the selected workspace will be restricted only in that particular workspace.)
Click on the Add Lookup button.
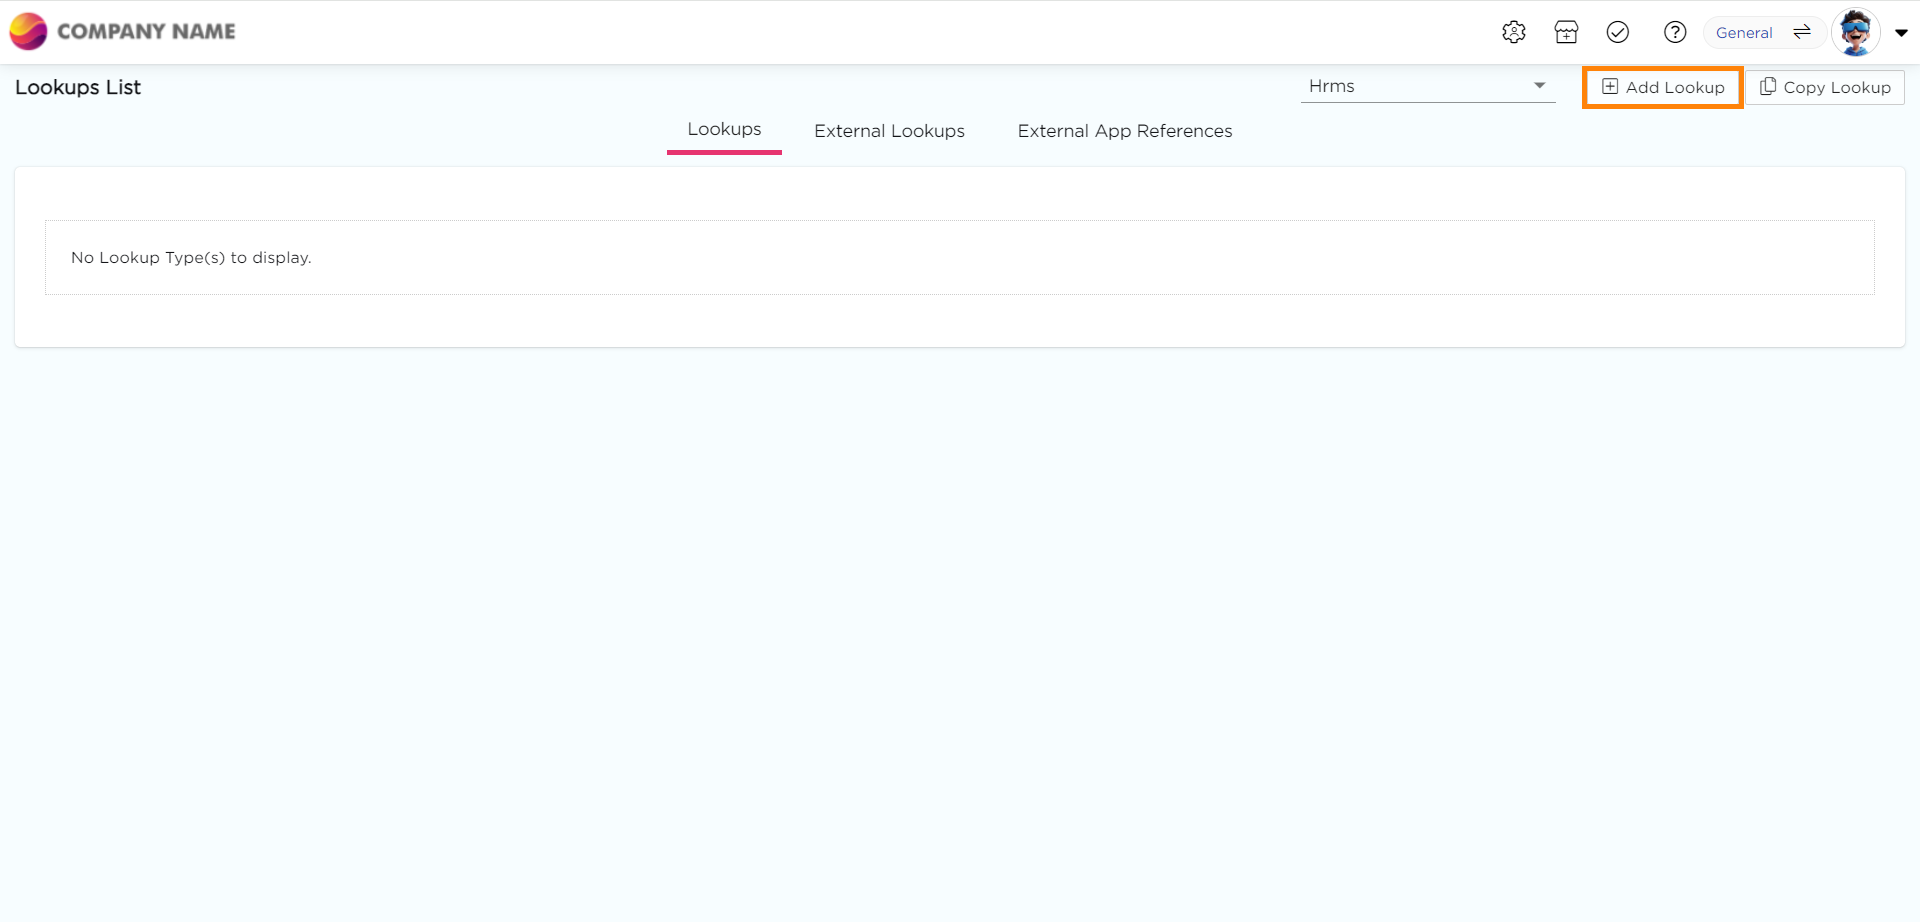
A pop-up will appear. Enter the Lookup Name and click Save. The lookup will be saved.
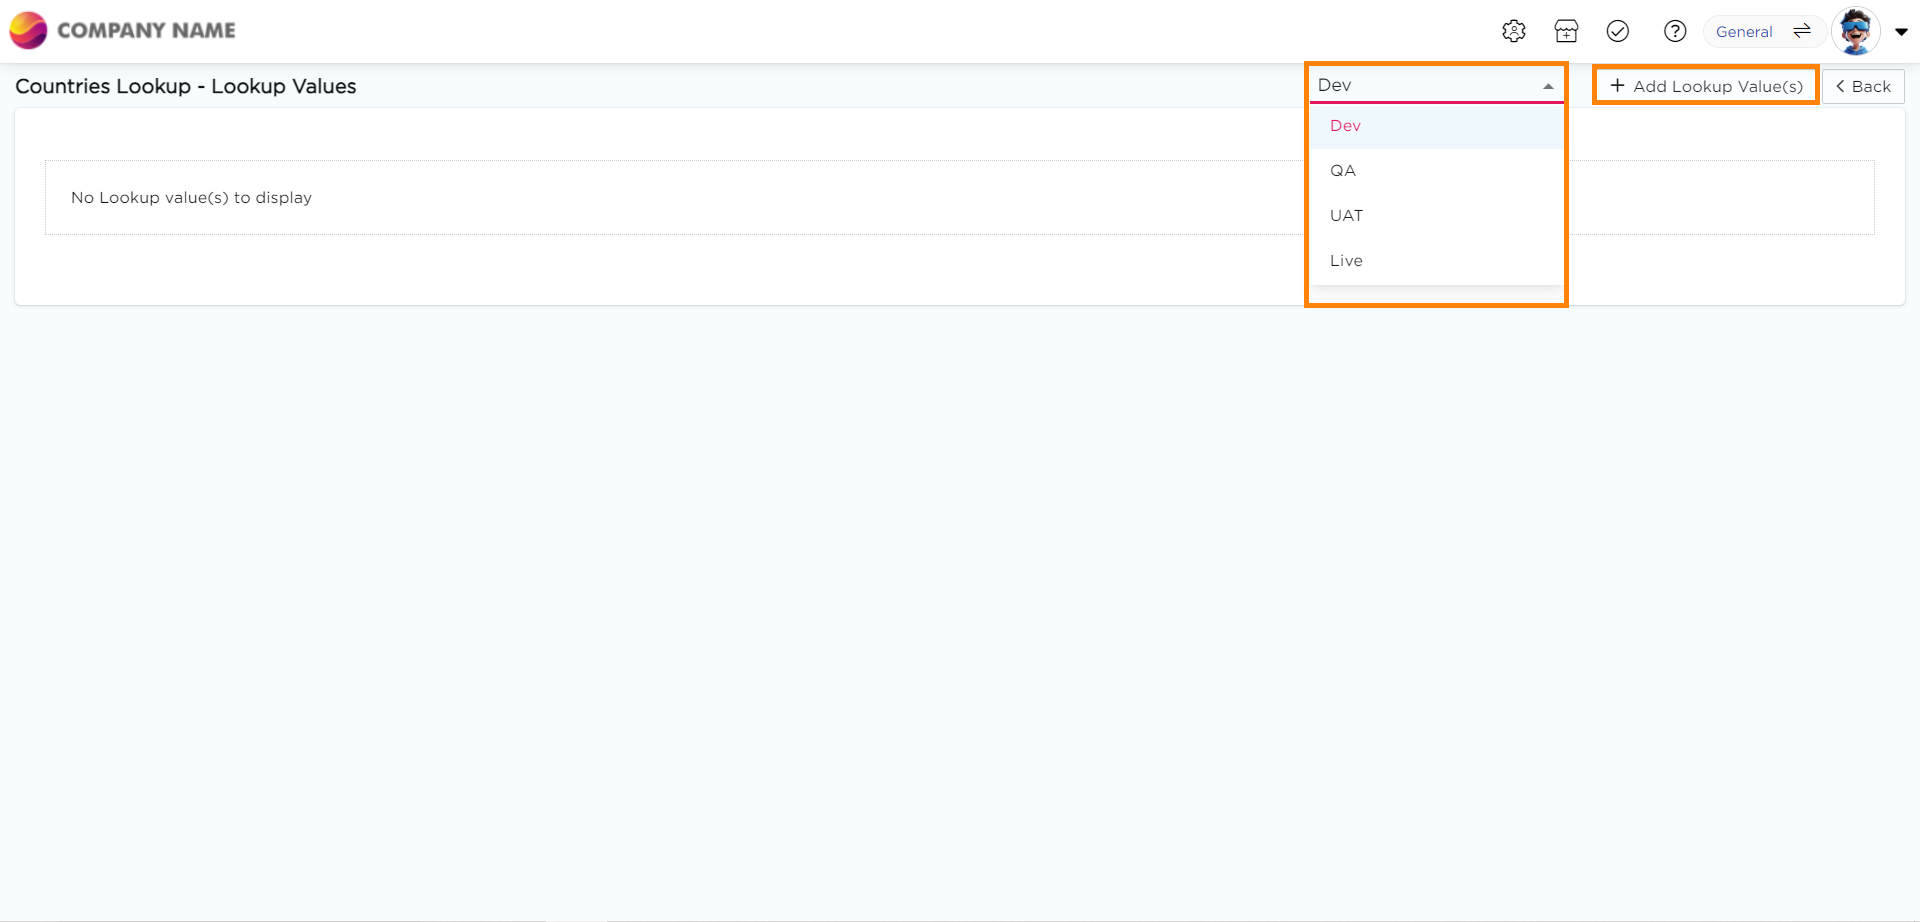
Click on the Lookup to add values to it.
You will be taken to the lookup values page. Choose the sandbox environment. (When you select a sandbox environment, any values added to the lookup will only be saved for that specific environment.)
Click on the + Add Lookup Value(s) button.
Another pop-up will appear. Enter the values in the fields and click Add to add a new field to the list.
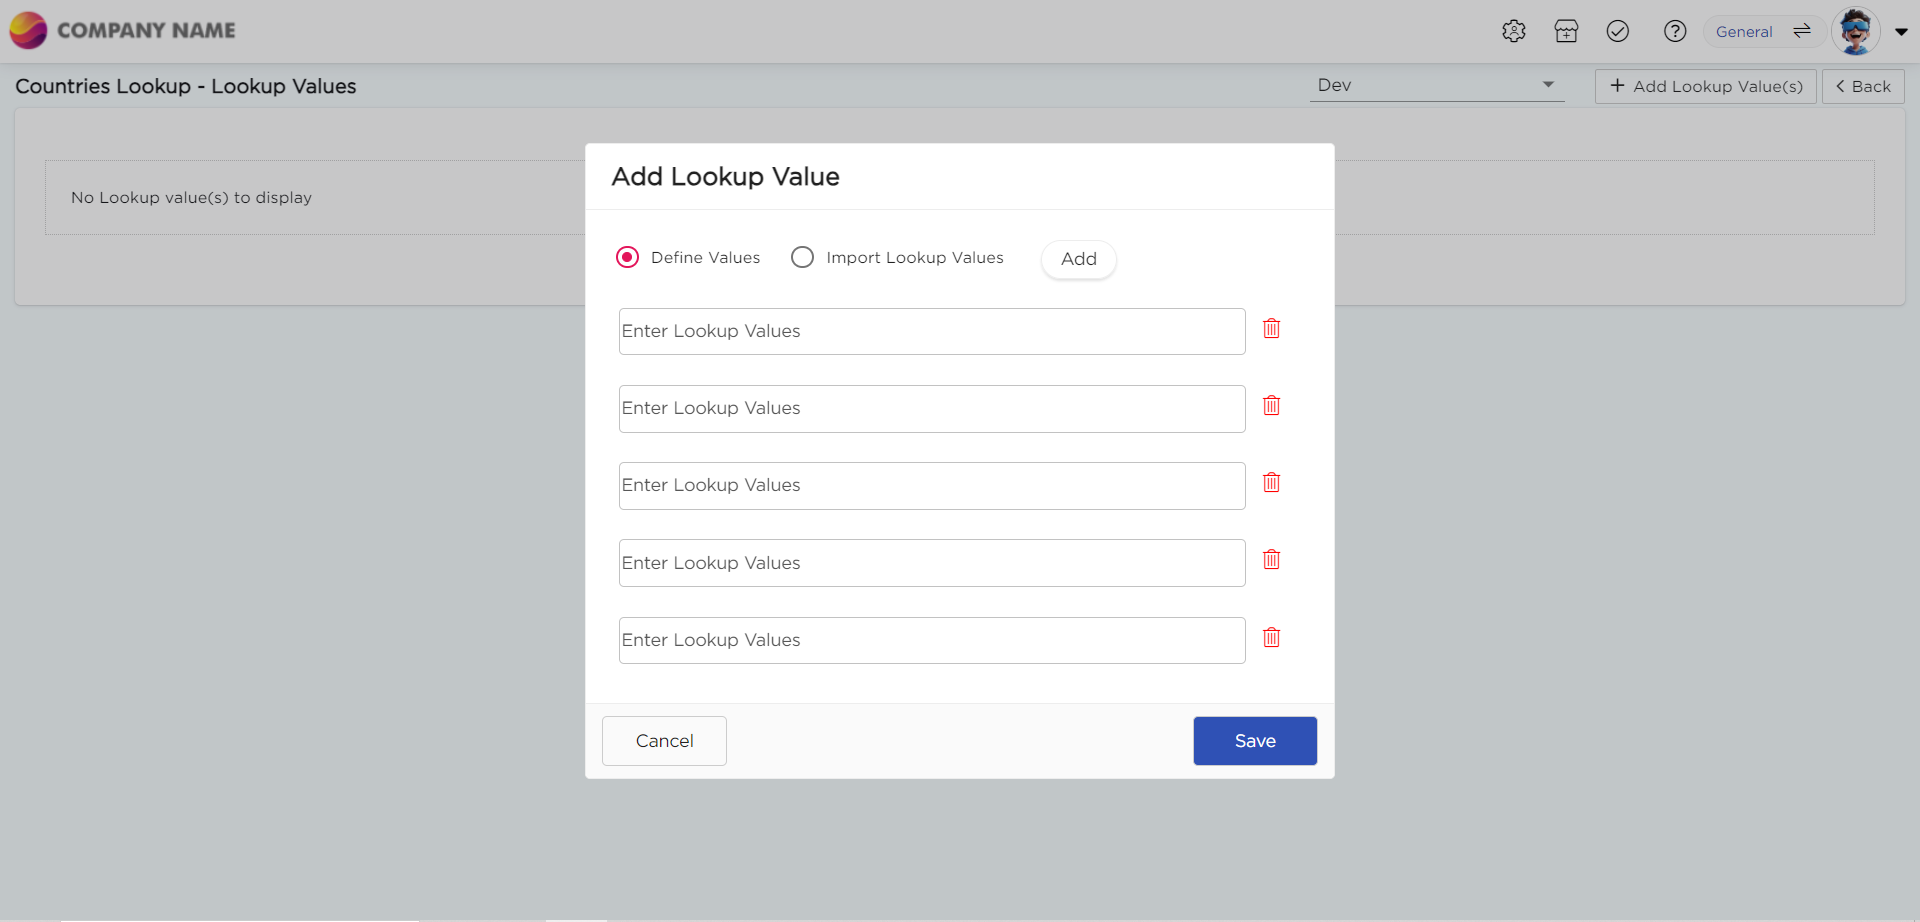
Click Save to save the values.


Creating a lookup through Excel
On the Add Lookup Value pop-up, select the Import Lookup Values option.
The pop-up will display Download and Upload Excel buttons.
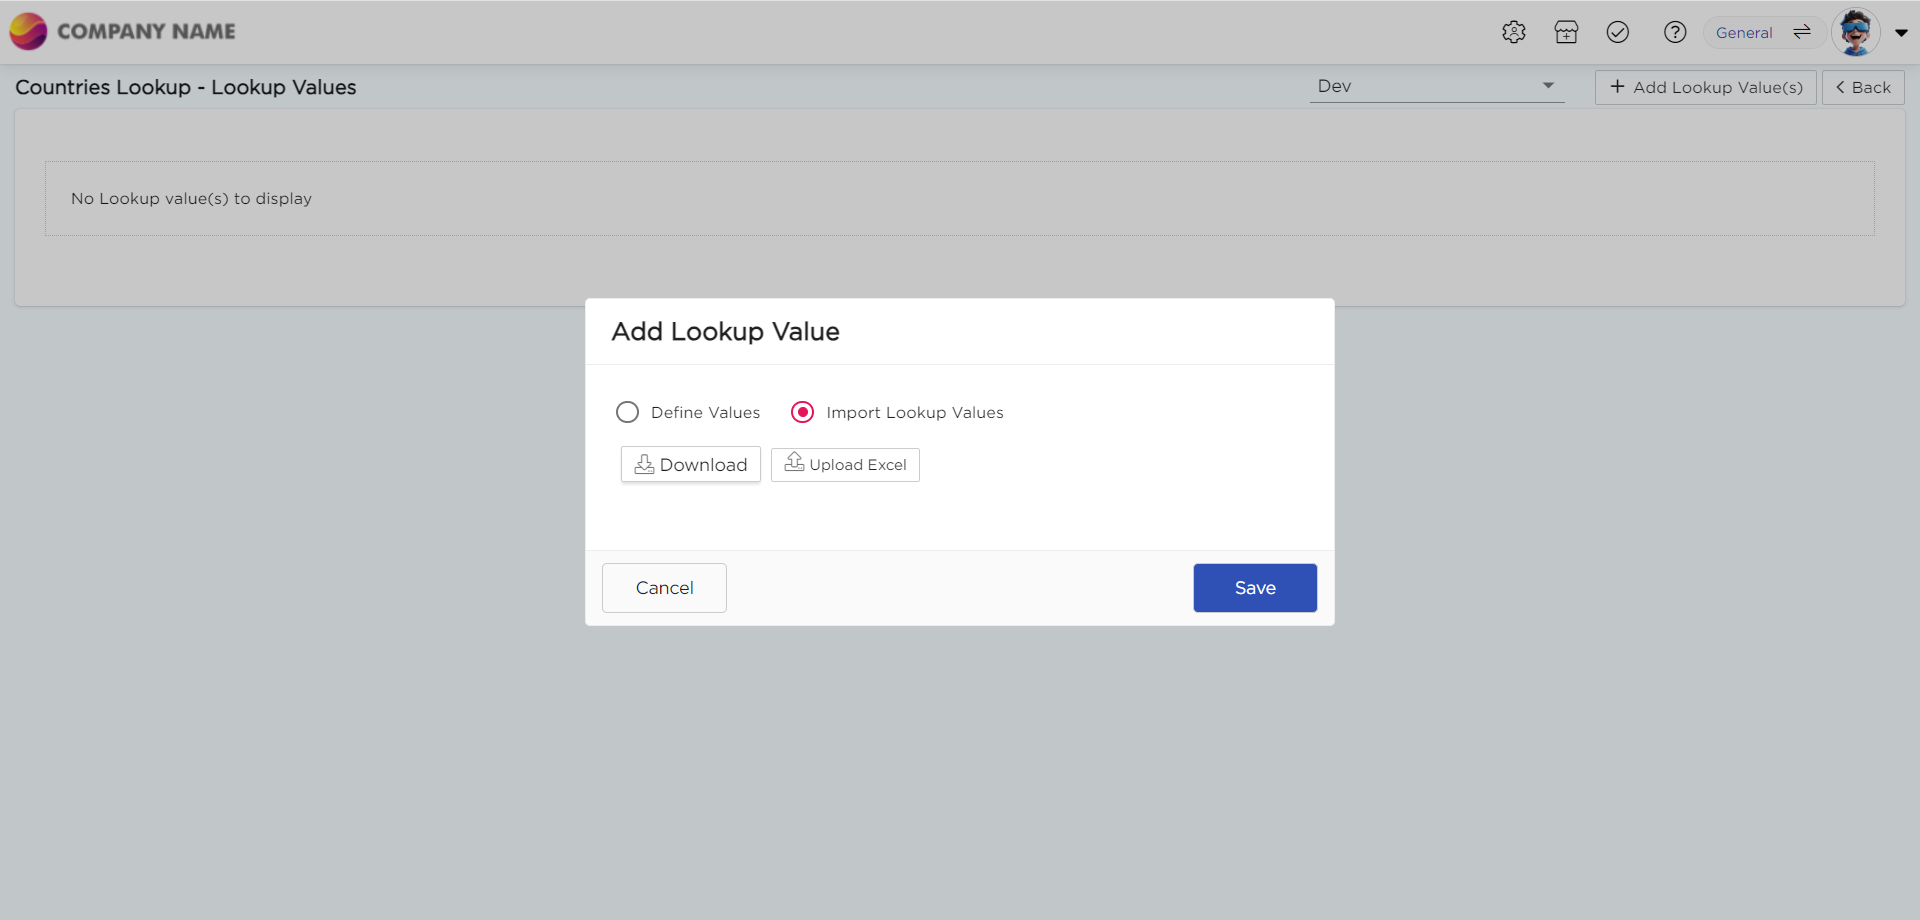
Click the Download button to download an Excel template. Open the Excel file and add your single-columned values.

Save the Excel file with the values you want to use, such as countries or weekdays.
Back in the platform, click the Upload Excel button on the Add Lookup Value pop-up.
Select the Excel file with your values and upload it.
The imported values will be displayed on the Add Lookup Value pop-up.
Finally, click Save to save the lookup values.


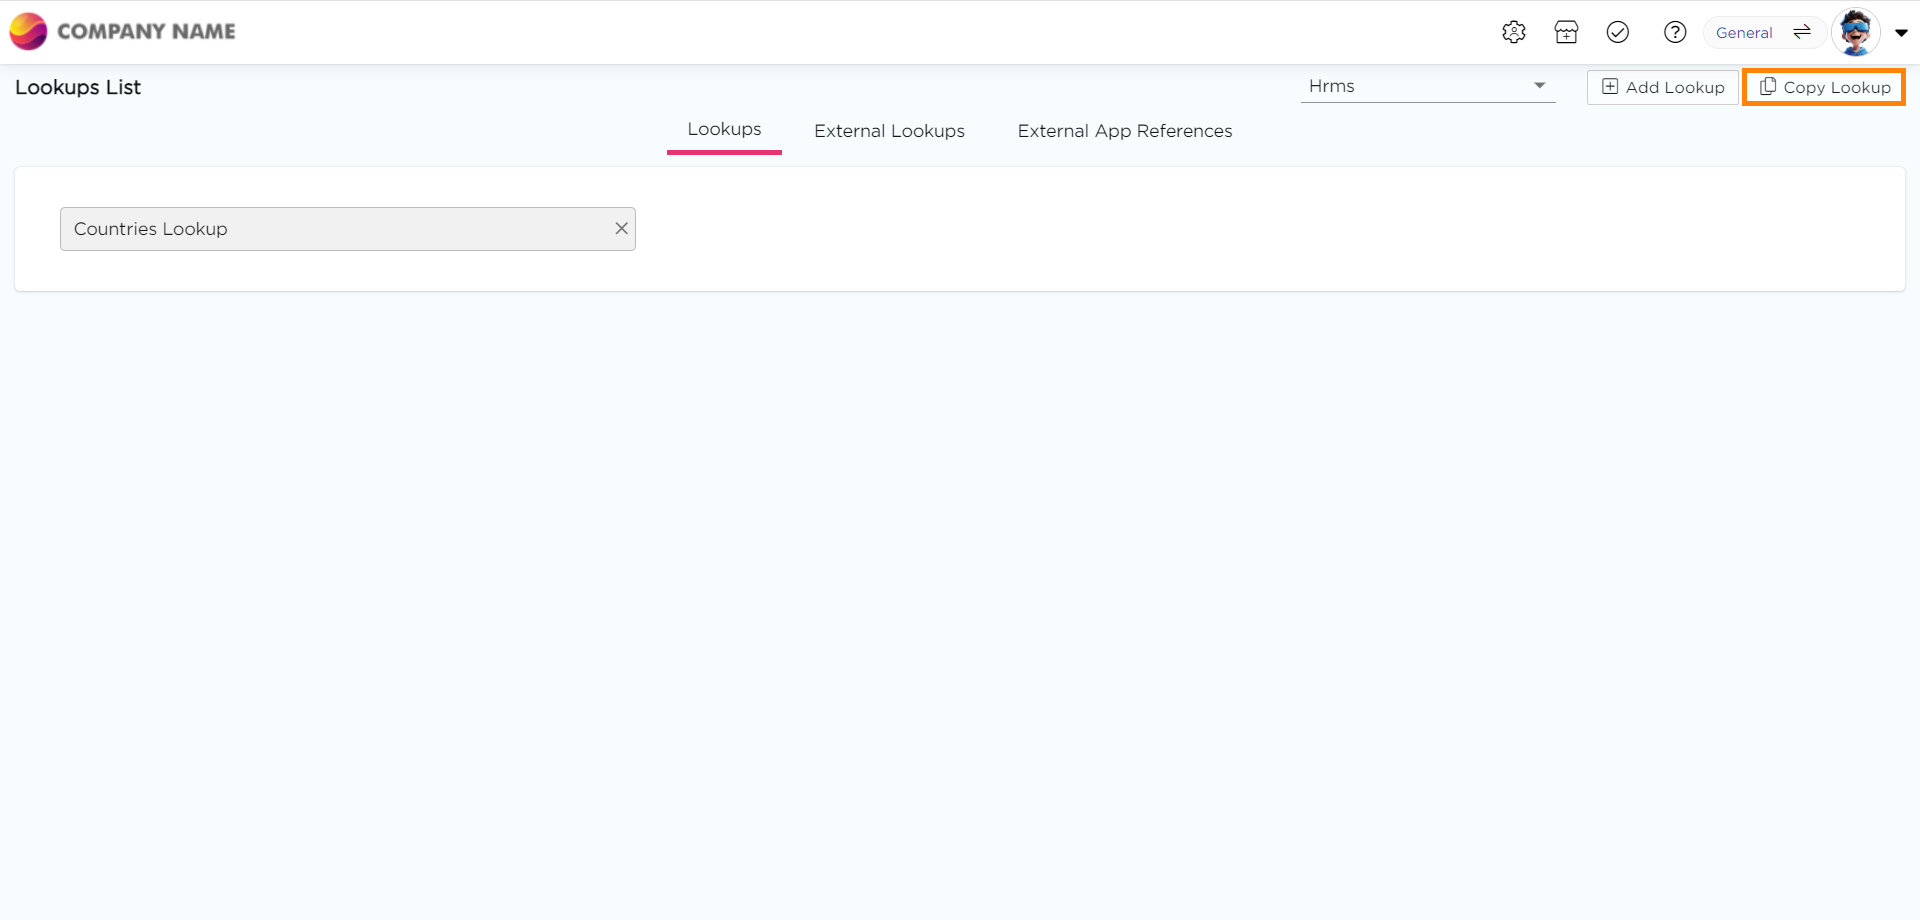
Copy a Lookup
Go to the lookup list page.
Click on Copy Lookup.
A pop-up titled Copy Lookup will appear.
Choose the workspace where you want to copy the lookup.
Select the lookup you want to copy.
Provide a name for the copied lookup.
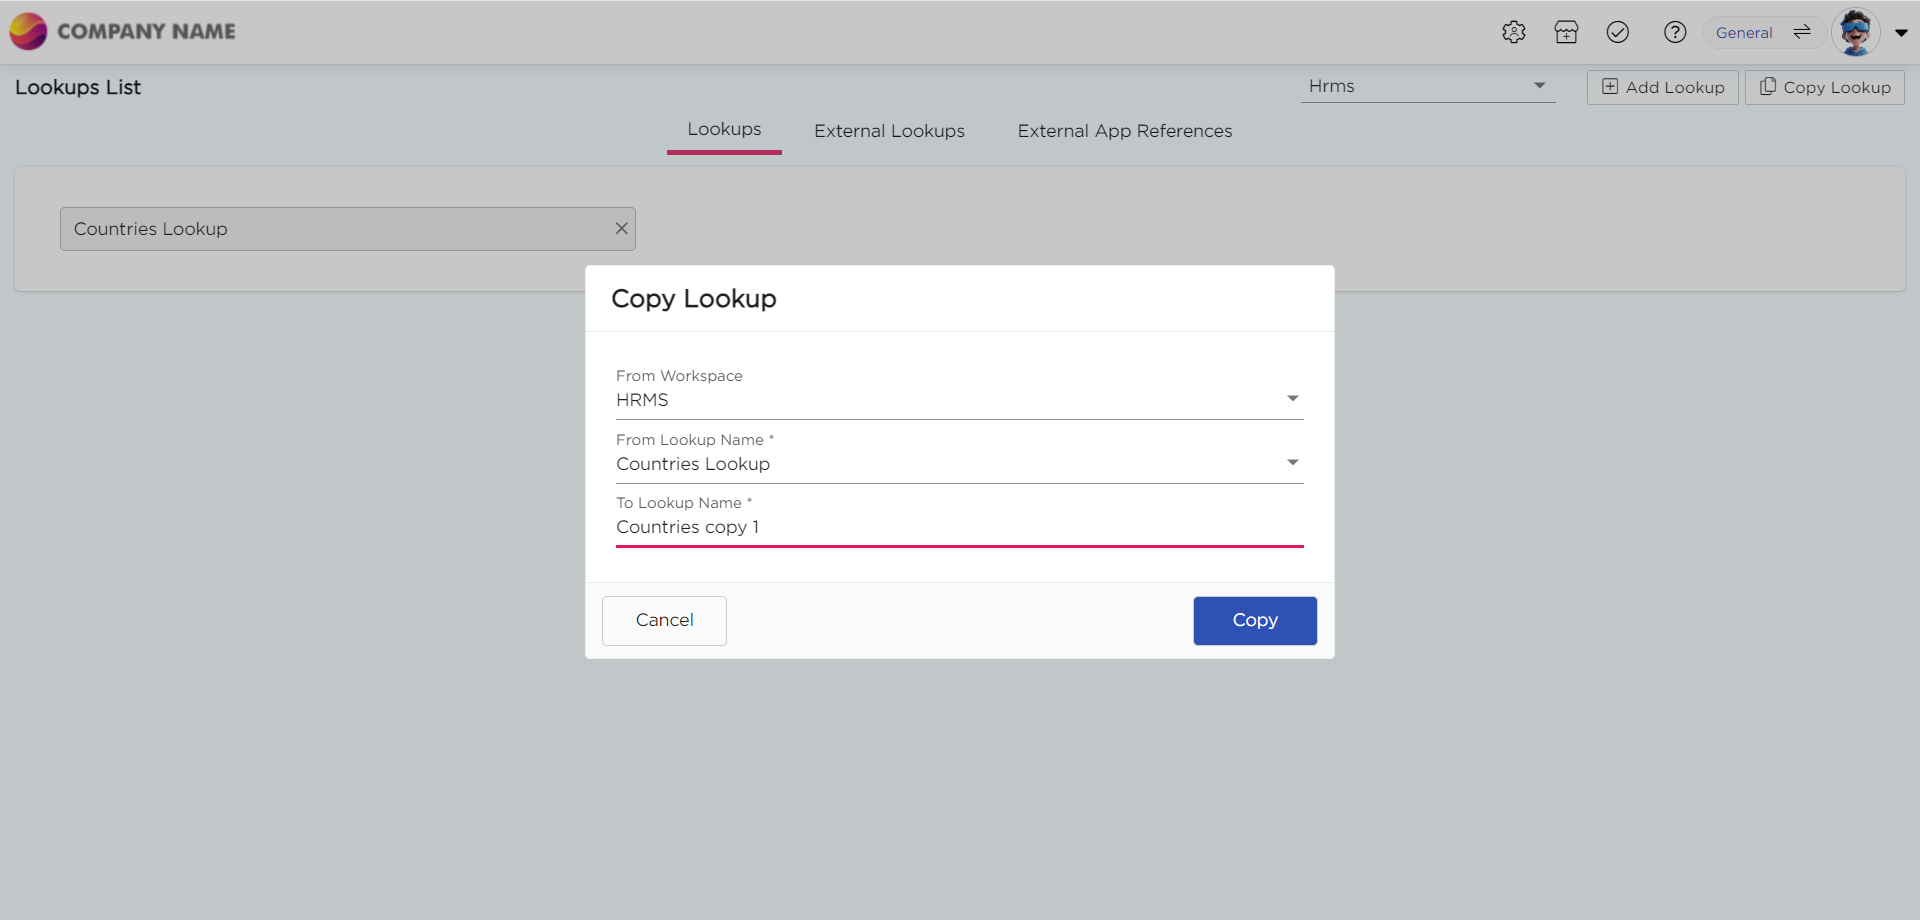
Click Save.


How does lookup implementation work within an application?
Was this article helpful?
