¶ An overview of how to personalize calendars to define business hours
The motive of this calendar feature is to define the working days and holidays in a week or year and assign them to a user in an organization.
For example, there is an organization whose employees work in 3 different shifts (morning, evening, and night) on a working day. The organization admin can create 3 different calendars with 3 different timelines (9 AM to 6 PM; 2 PM to 11 PM; and 6 PM to 3 AM) and allocate those calendars to their respective employees.
Calendars play a vital role across the platform in various scenarios. A few scenarios are listed below:
¶ How to configure a calendar?
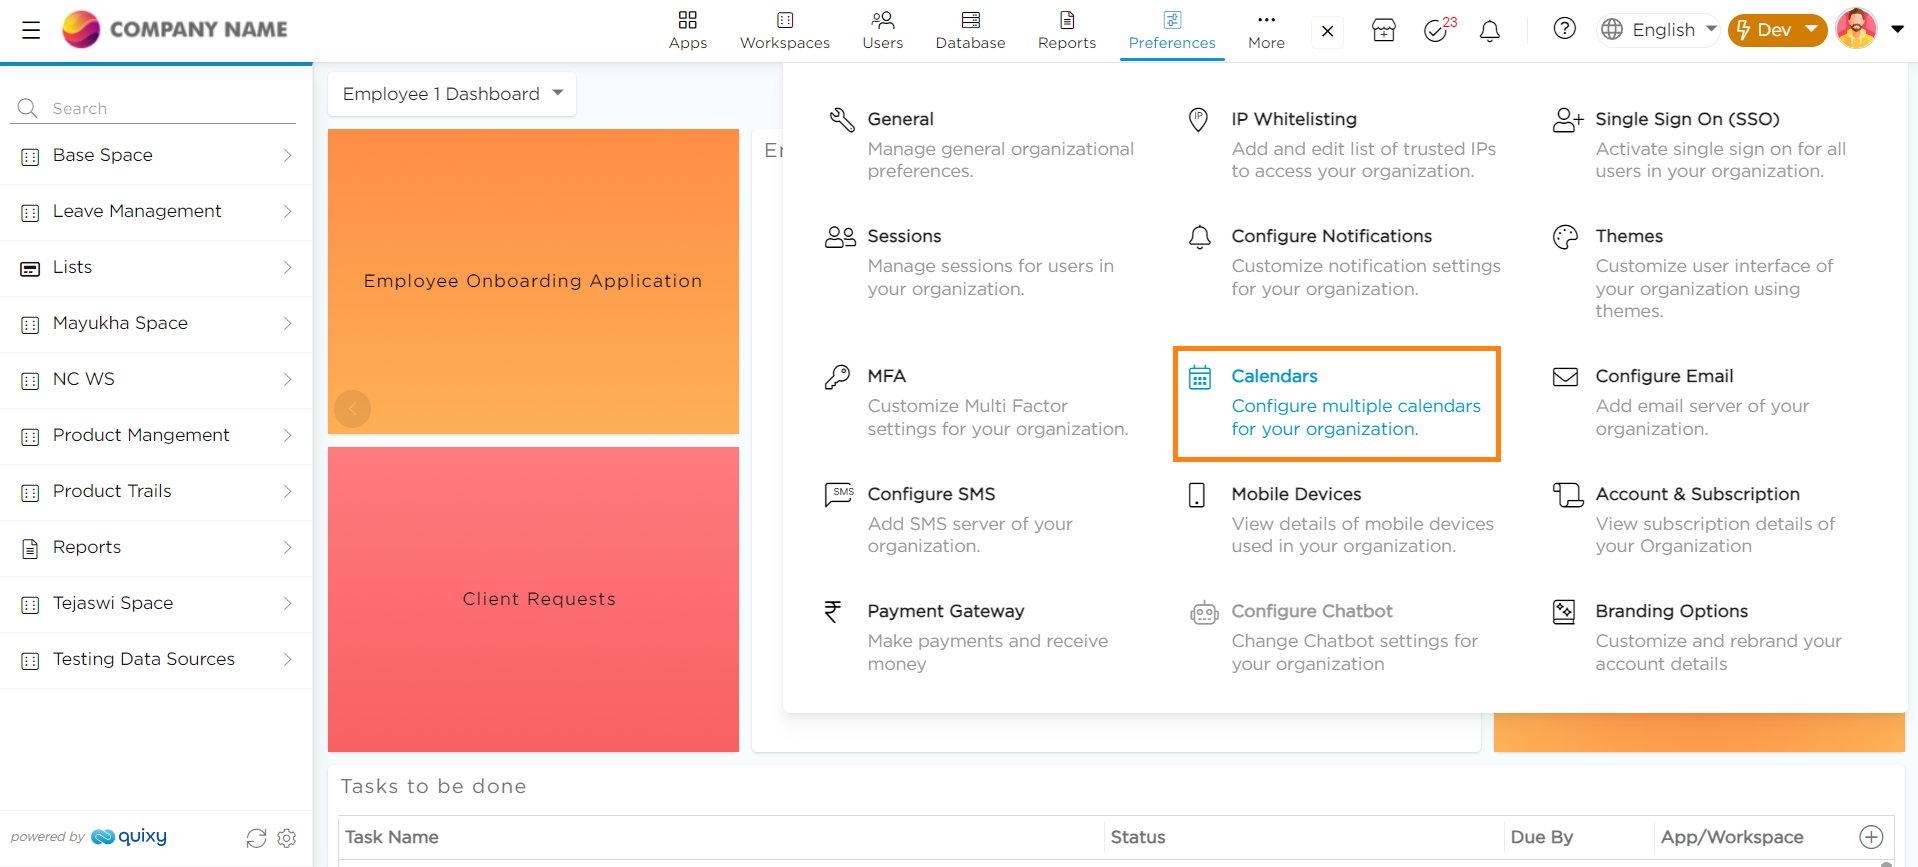
- On the dashboard page, click on the Admin Menu -> Preferences -> Calendars.
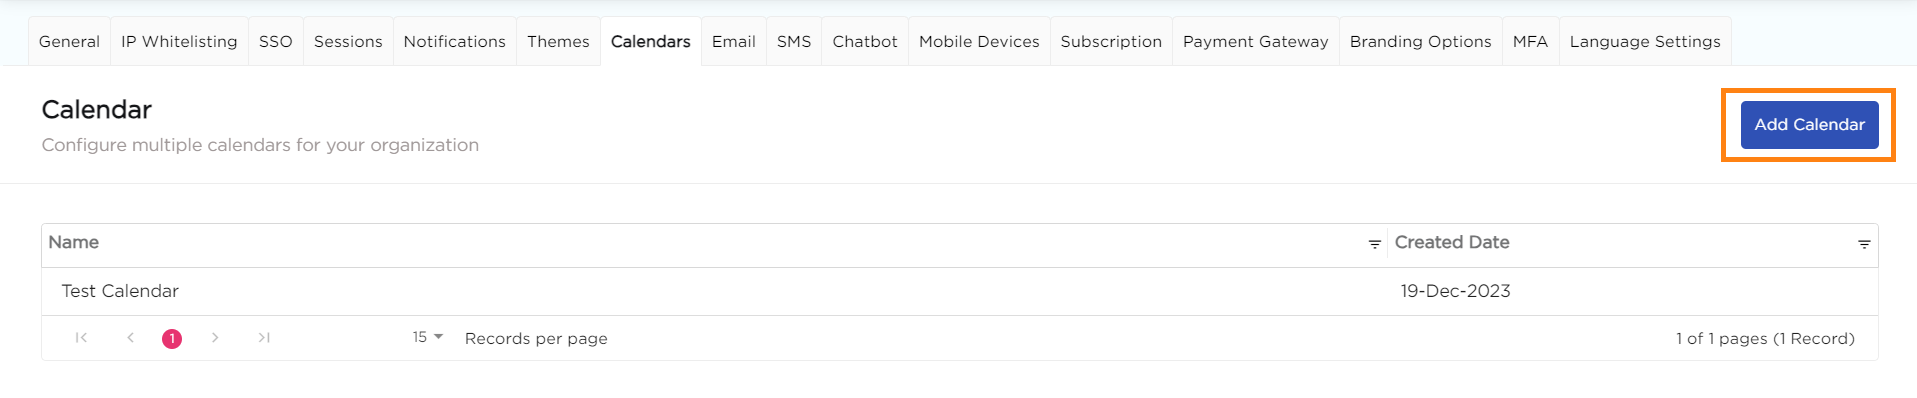
- On the Calendars page, click on the Add Calendar button on the top right corner.
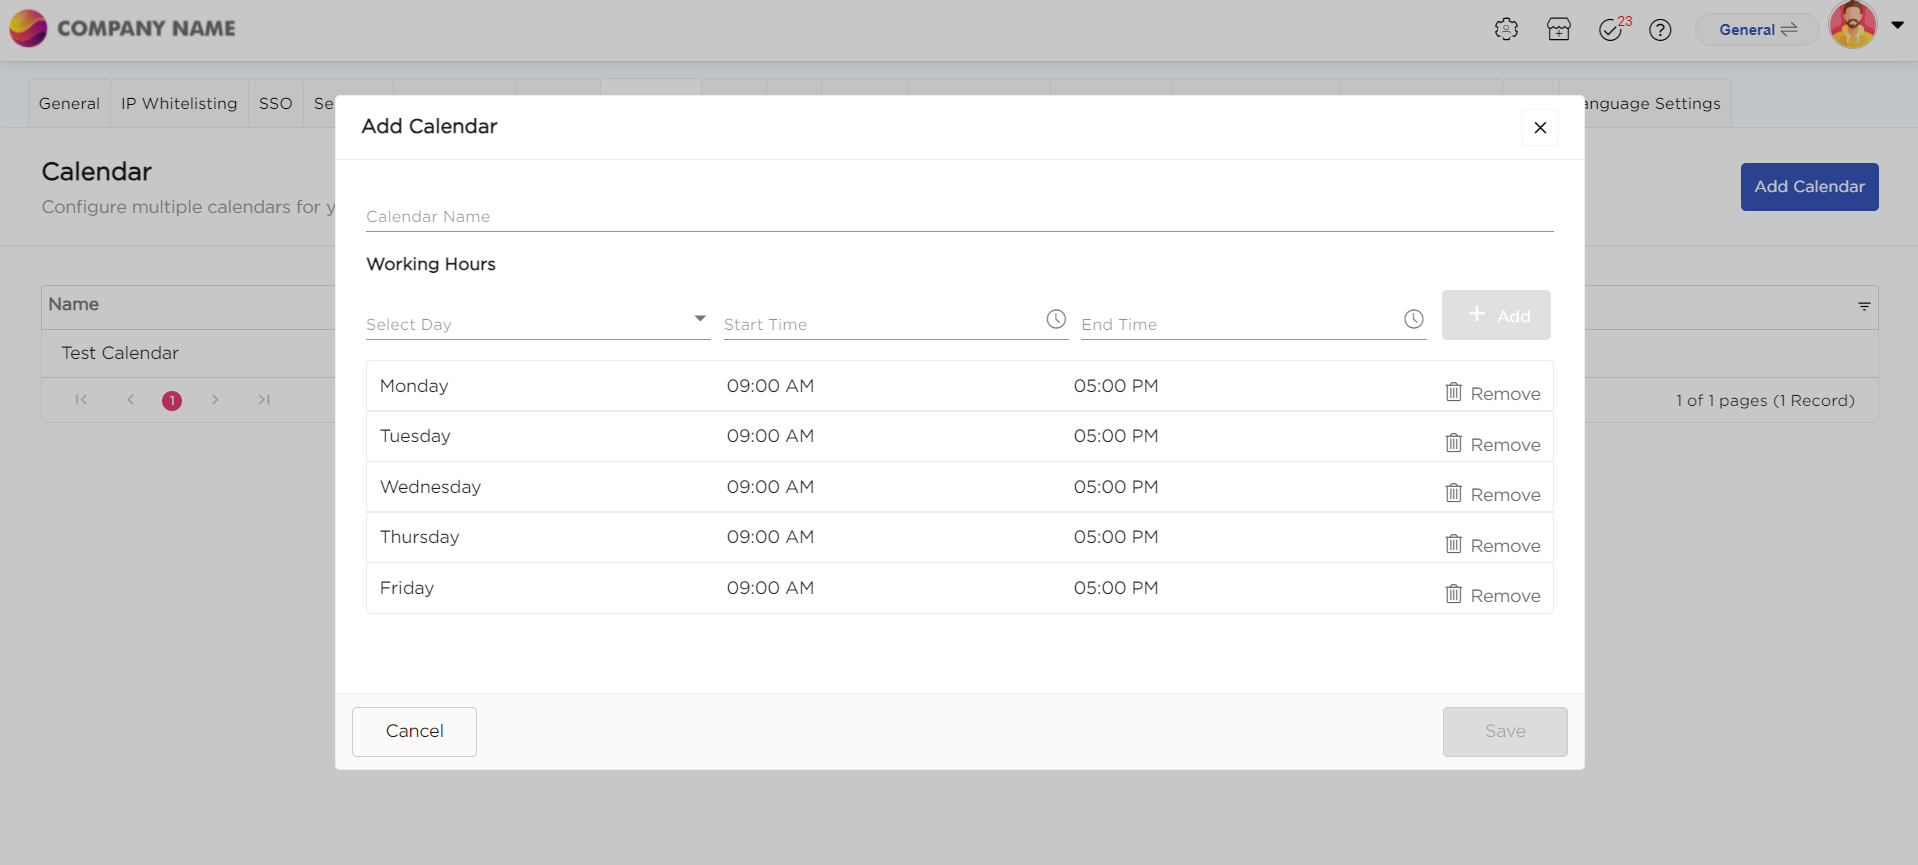
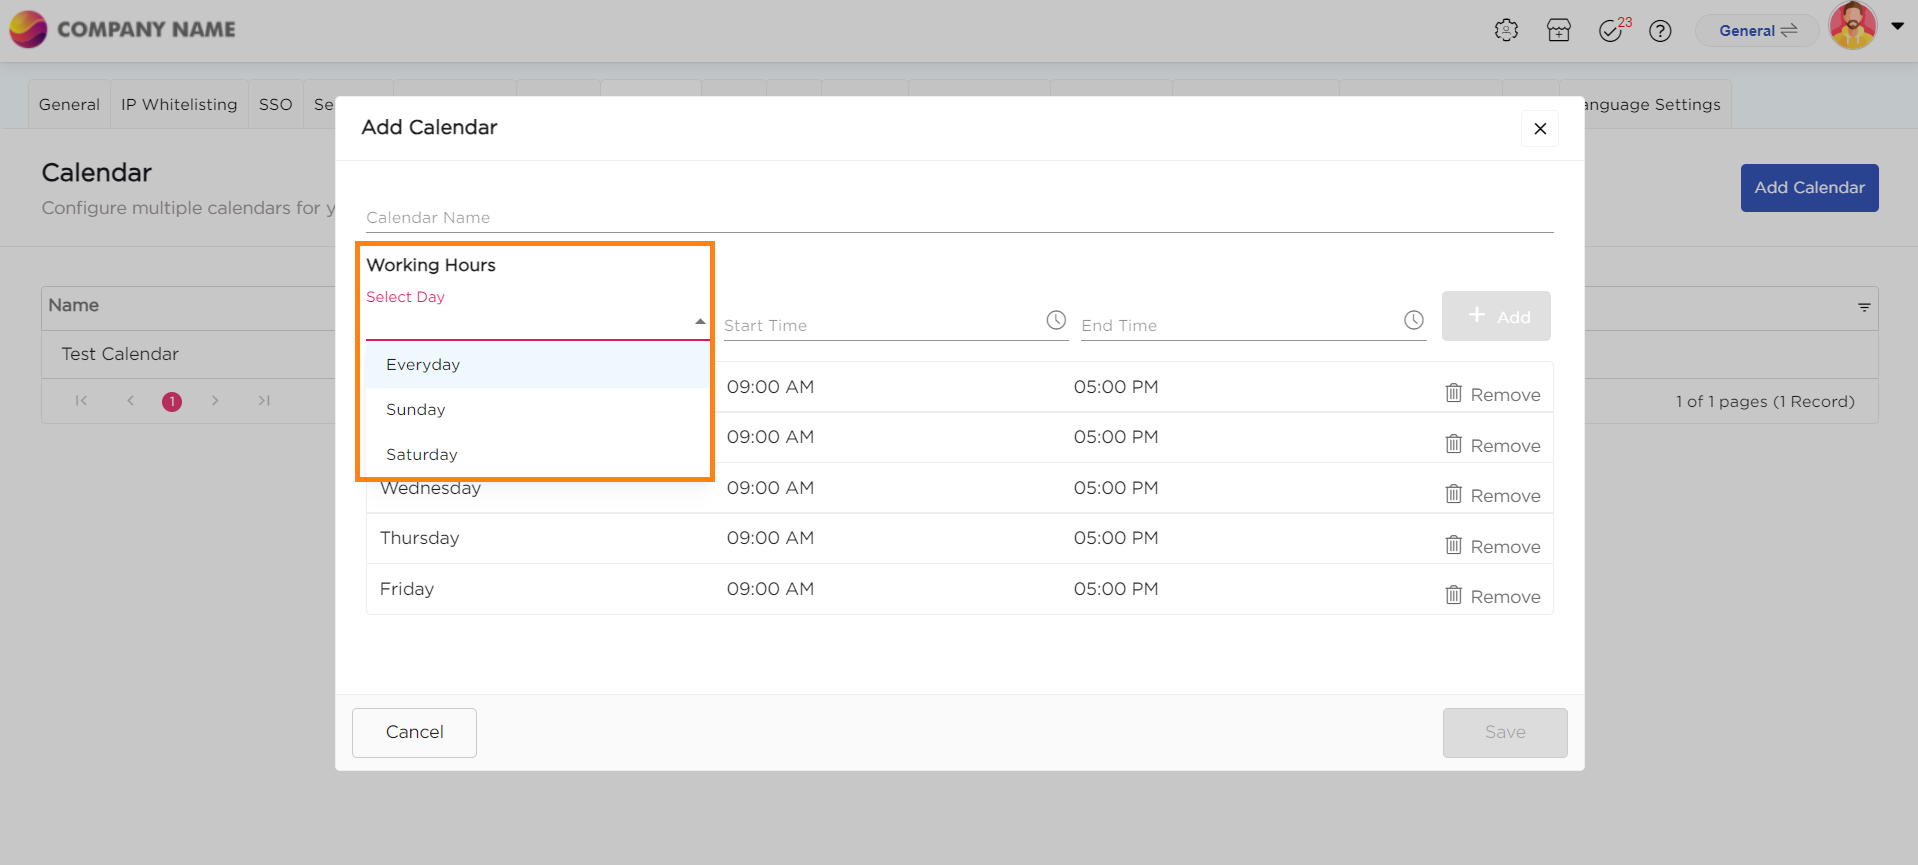
- An Add Calendar pop-up will display on the screen asking to define the Working Hours.
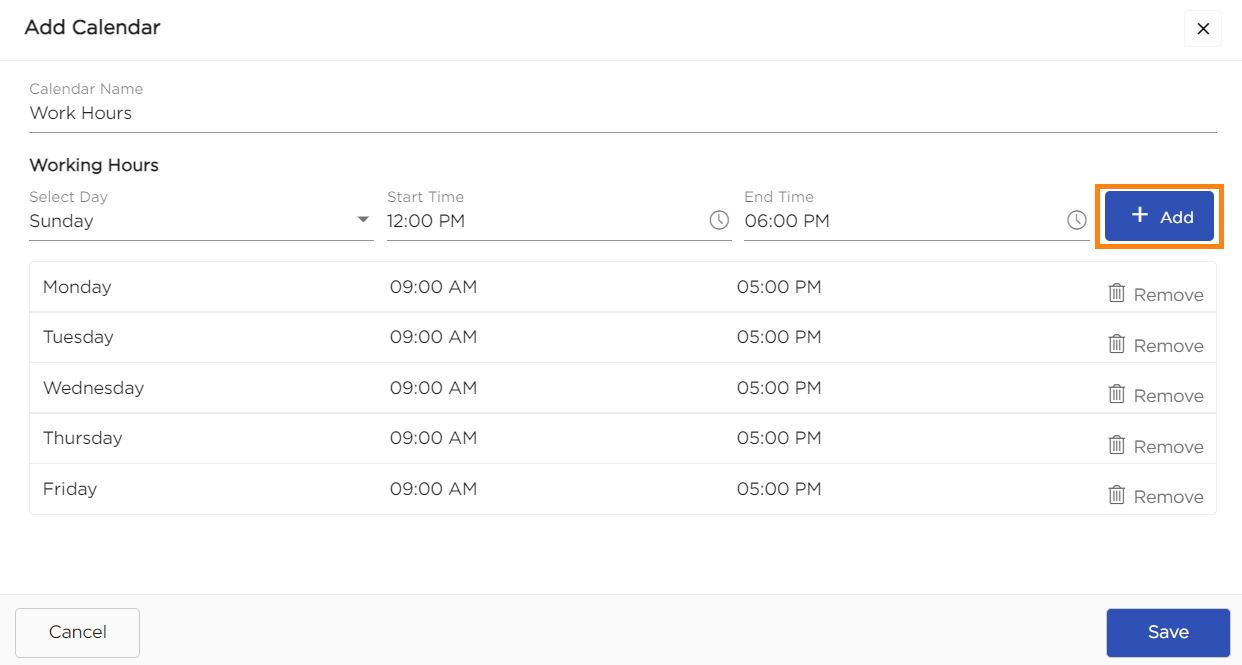
- Start by giving a Name to the calendar.
- You will be able to see the weekdays with pre-defined timings.
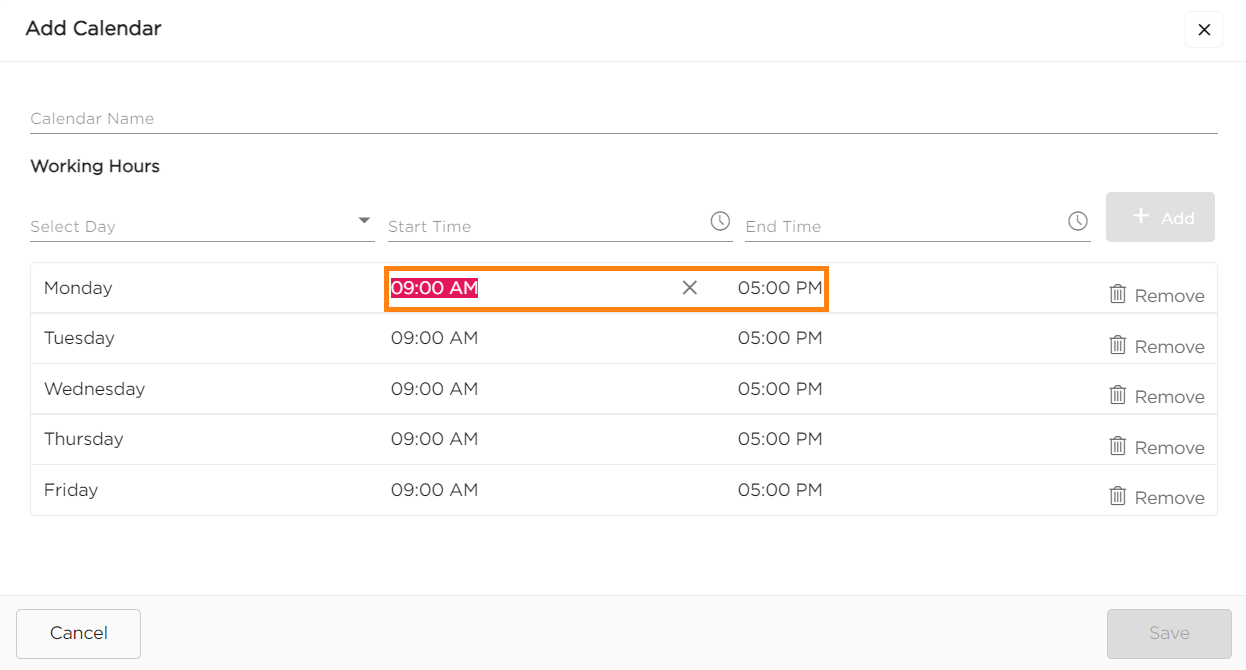
- If you wish to change the timings of the weekdays, select the time slot and change the time.
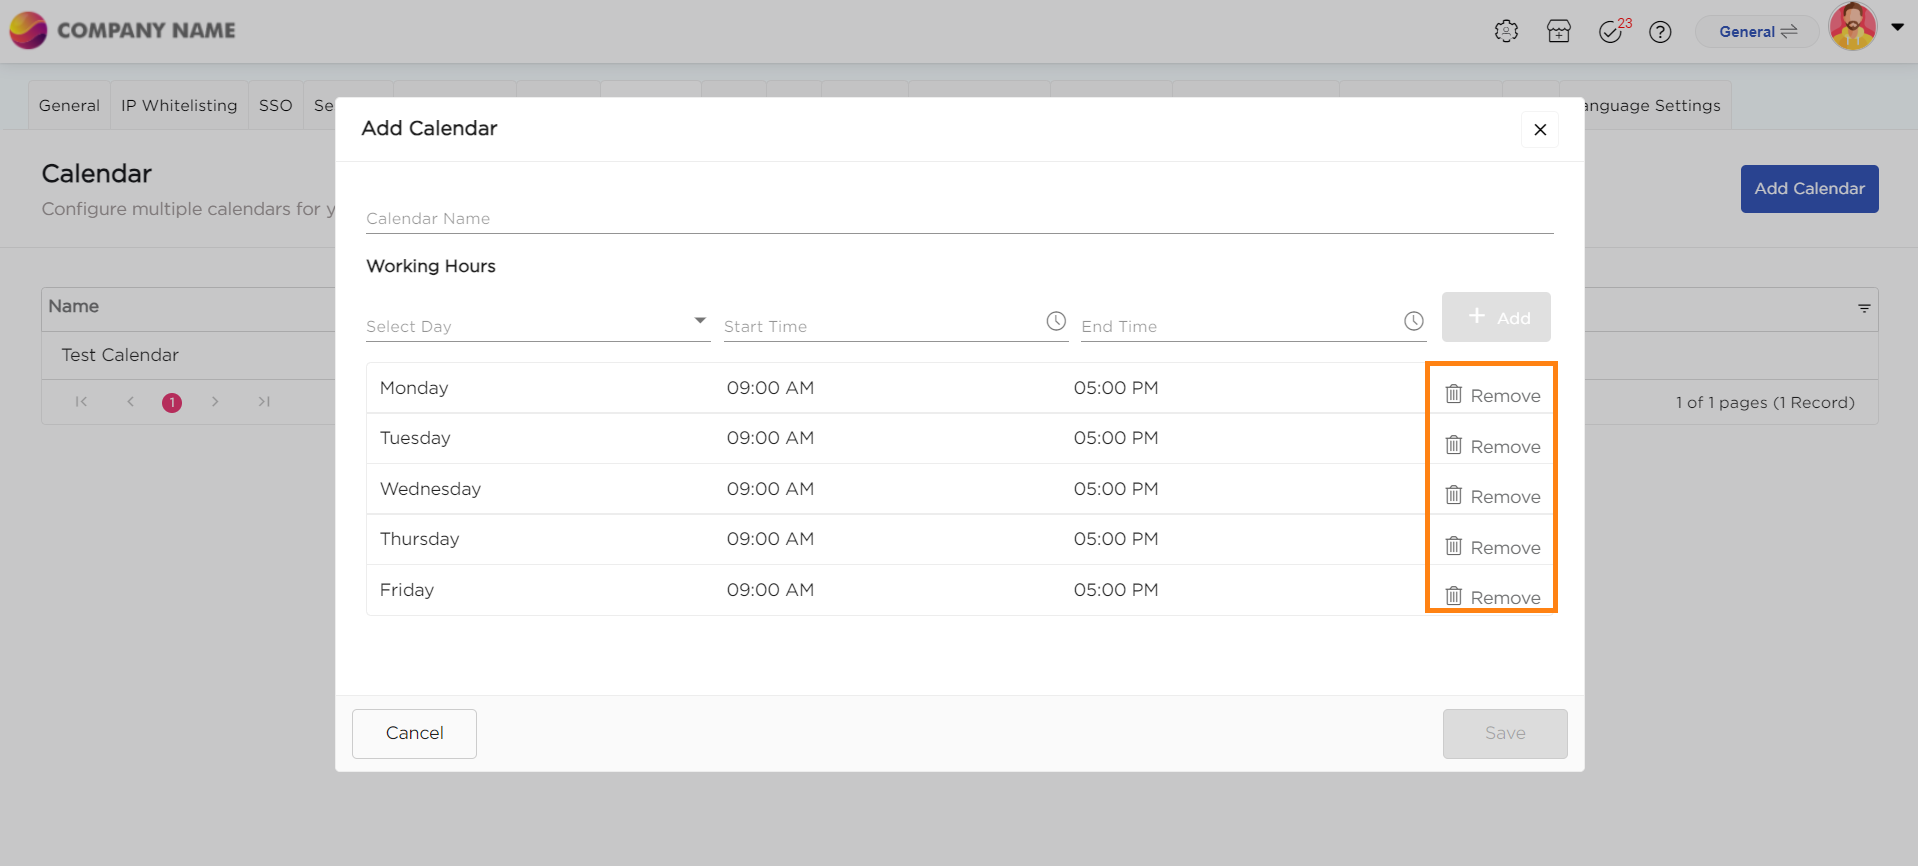
- To delete any default weekdays (Ex: Thursday & Friday), click on the Remove button corresponding to the weekdays.
- To add any new working days (Ex: Saturday & Sunday), click on the Select Days drop-down under Working Hours section and select a day.
- Once, you select the day, select the work timings form the time slots and click on Add button to add the day among the working days.
- Once completed with defining the workdays in a week, click on Save button to save the calendar.
- You will be able to see the newly created calendar in the calendars list page.
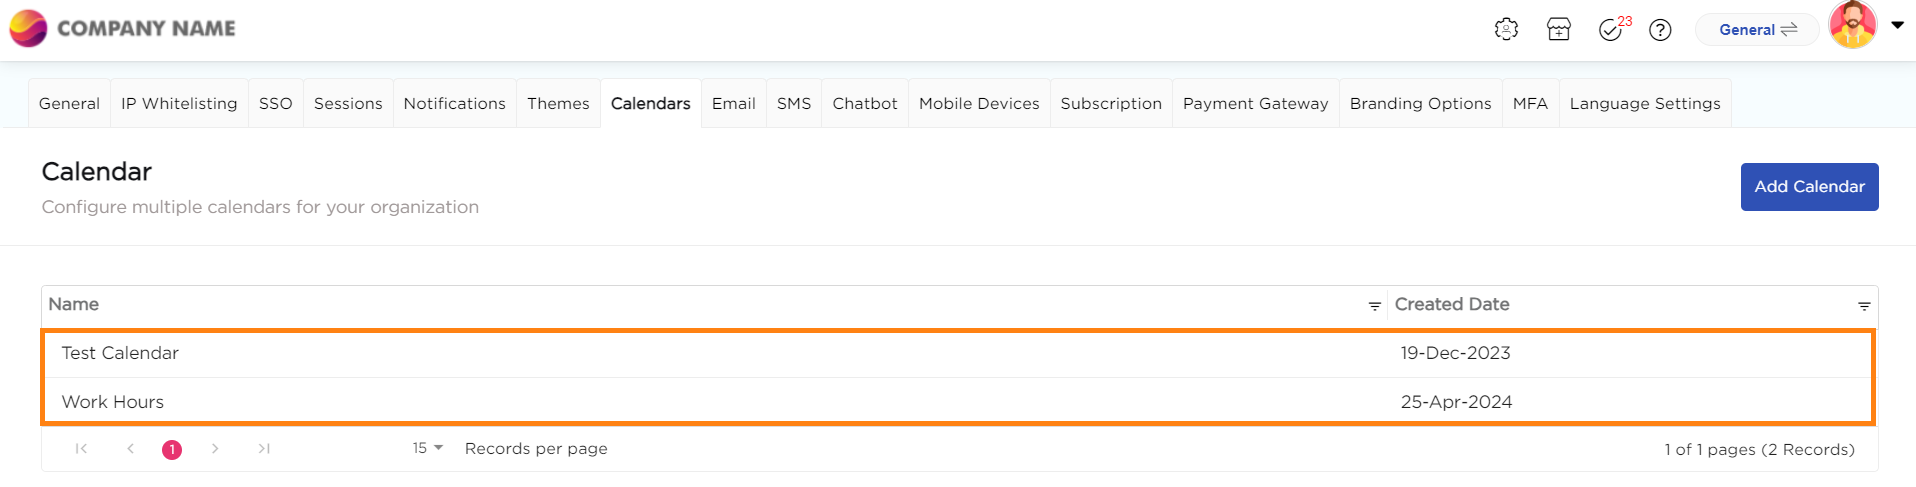
- You have successfully defined the working days in a week.
- Now, to define any public holidays in a calendar year apart from the week-offs, you need to define the holidays in the calendar.
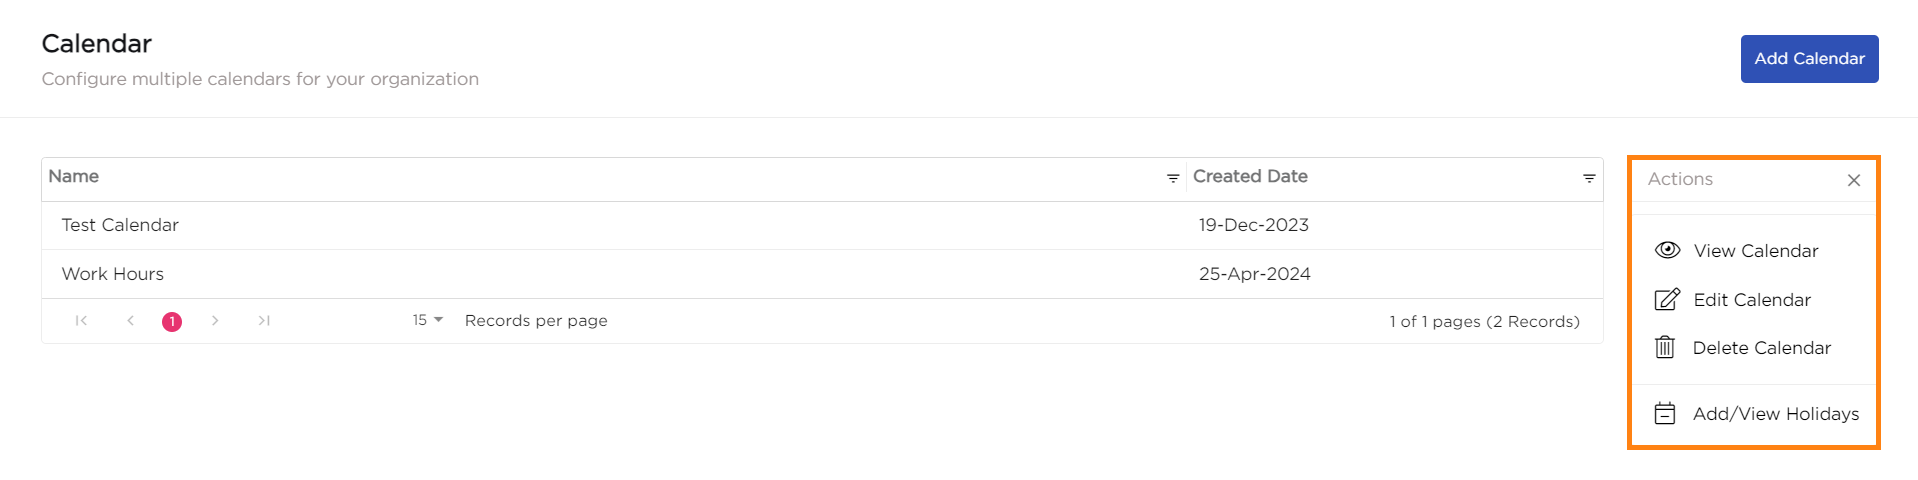
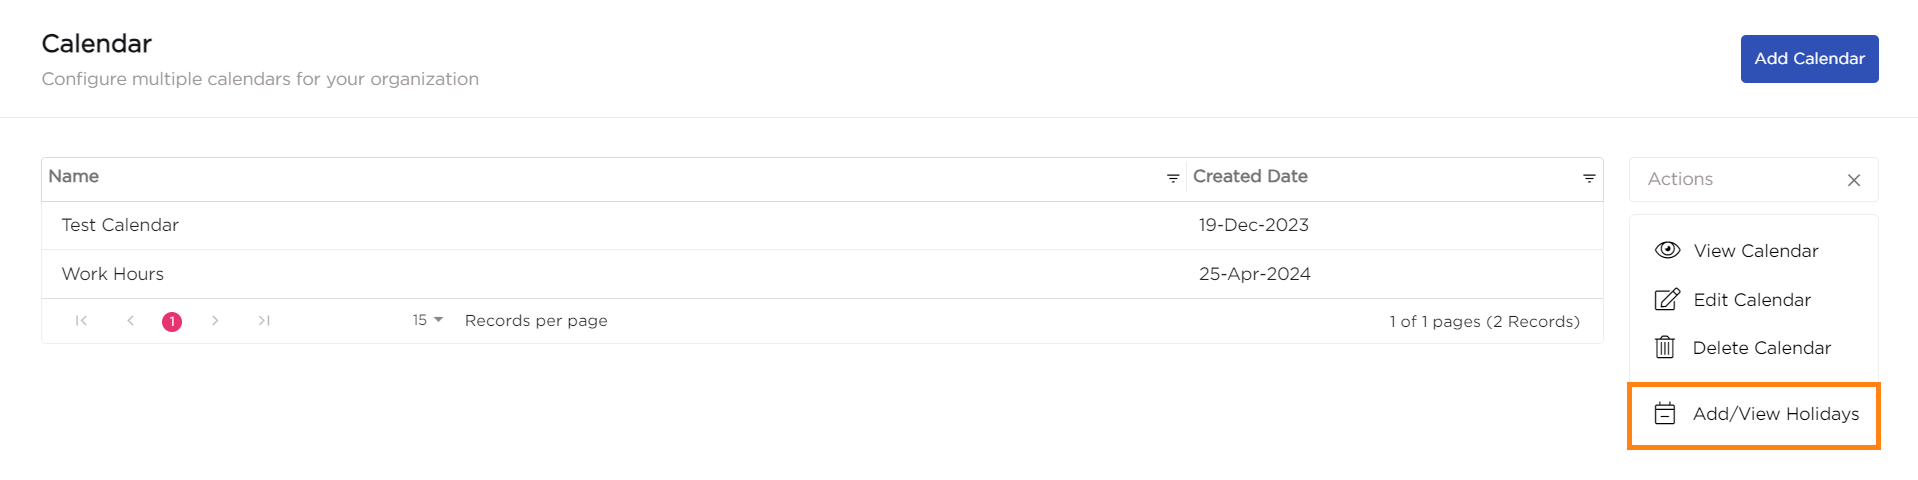
- Click on the calendar to open its Actions.
- In Actions, click on the Add/View Holidays option.
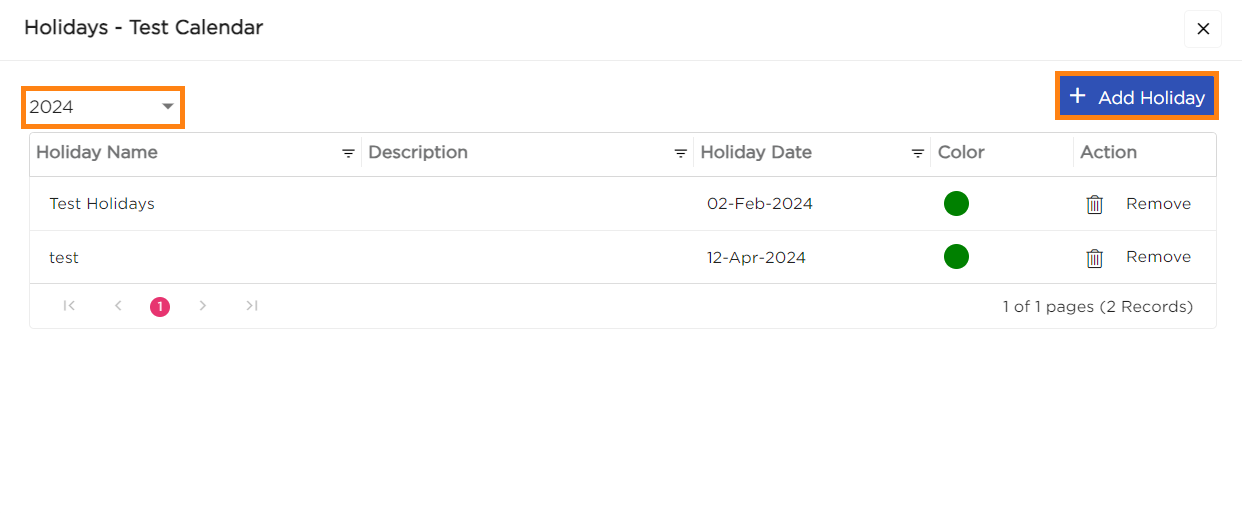
- A pop-up will display on the screen to add the holidays, select the Year and click on Add Holiday button.
- A pop-up will display on the screen asking you to select the holiday date.
- Give a Name to the holiday (e.g.: Independence Day)
- Select the date
- Give a description, if required.
- Save the holiday.