¶ UI/UX improvements in Mobile App
¶ UI/UX improvements in Tasks
We have made significant changes to the user interface and added multiple new options in Tasks.
¶ Changes in menu
Before
After
Multi-select checkboxes added in tasks
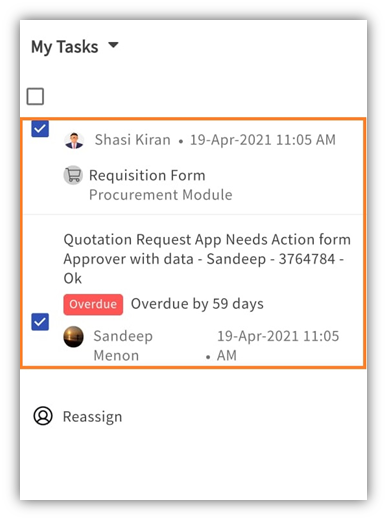
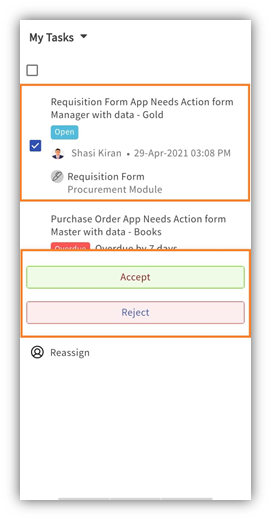
We have added checkboxes to tasks to select multiple tasks at once. When user selects multiple tasks at once, user will be able to see only the Reassign button in the pop-up, which is used to assign the selected tasks to another user in the same workspace, as shown in the image below.
Select and long press on a task to select a particular task, action buttons related to that task will pop-up on the screen, as shown in the image below. User can click on the action button to perform the task directly from this screen.
Provision to see Task Created User and Created Date
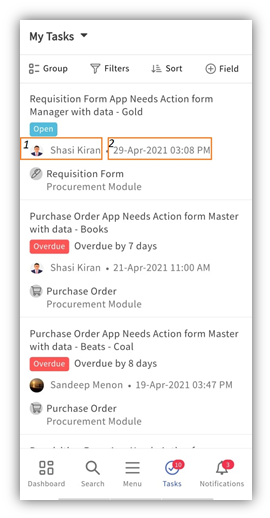
Users will be able see
- Profile picture and name of the user who created the task.
- Date and time on which the task is created, as shown in the image below.
Task Status
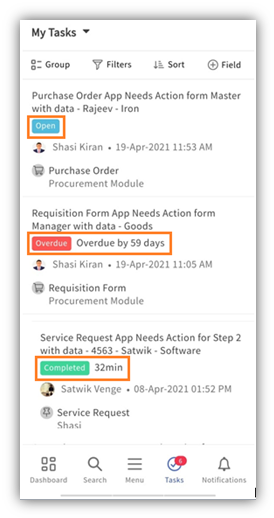
Users will now see the different colors for the task status according to its stage (e.g.: Open, Overdue, Completed), as similar experience given in web. There are 3 different status stages, as shown in the picture below.
Provision to see App/Workspace info
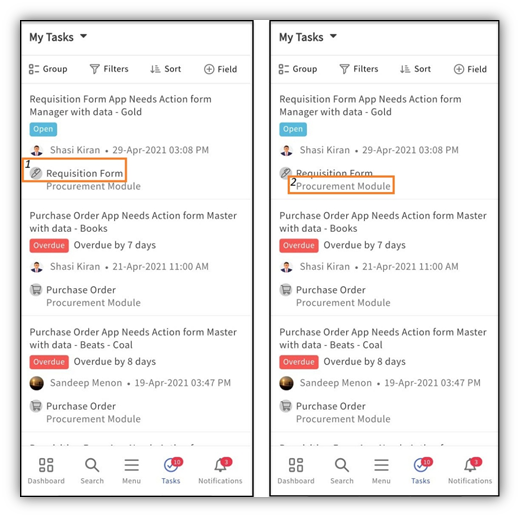
Users will also be able see
- App Icon and App Name from which the task is created.
- Workspace Name, as shown in the image below.
Provision to add more fields to tasks
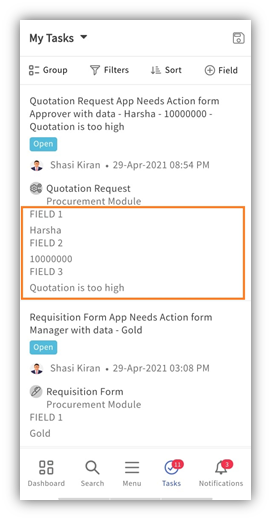
Users will be able to add multiple extra fields to tasks to see more information about the task, as shown in the image below.
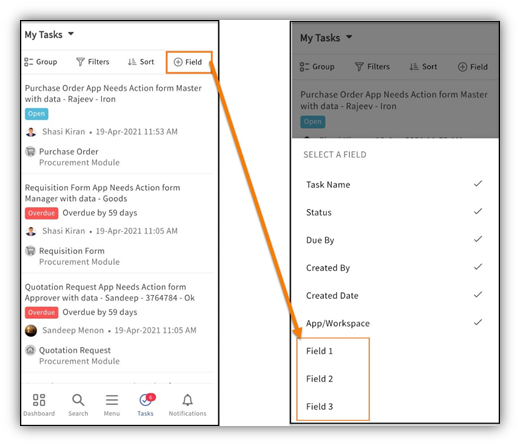
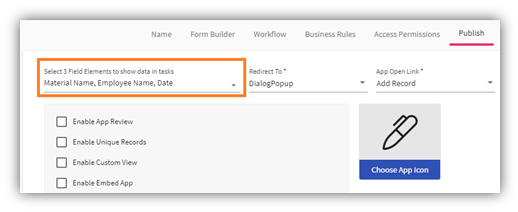
The 3 fields selected in an app while app publish by app-builder (i.e., in Select 3 Field Elements to show data in tasks drop-down) will display against each field (I.e., Field 1, Field 2, Field 3).
The selected fields will add to the tasks, as shown below.
Provision to Group the tasks
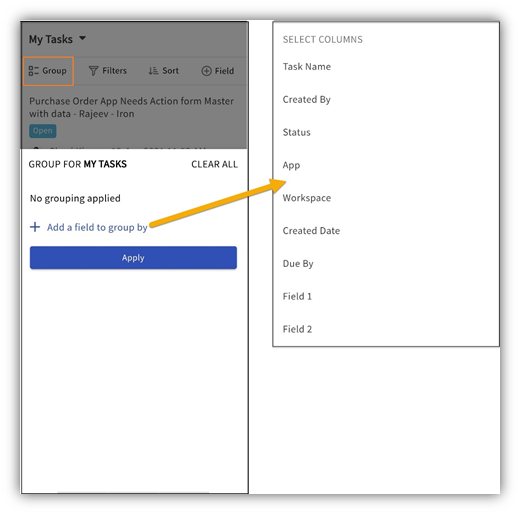
User can select the columns (values) and group the tasks, accordingly, as shown in the above image.
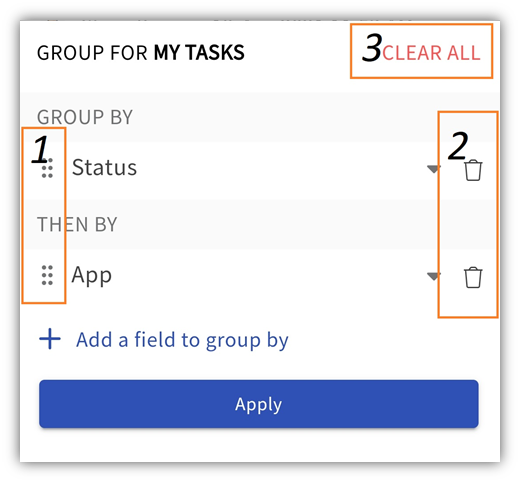
As shown in the picture above:
- Users can re-arrange the groups by holding rearrange icon provided.
- Users can delete the configured groups one at a time by clicking on the delete icon.
- Users can clear all the configured groups at once by clicking on the Clear All option.
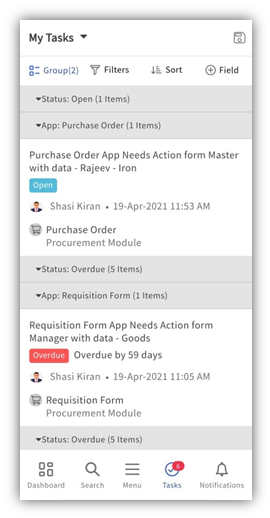
The tasks which are grouped according to the selected value is shown in the picture below.
Provision to Filter the tasks
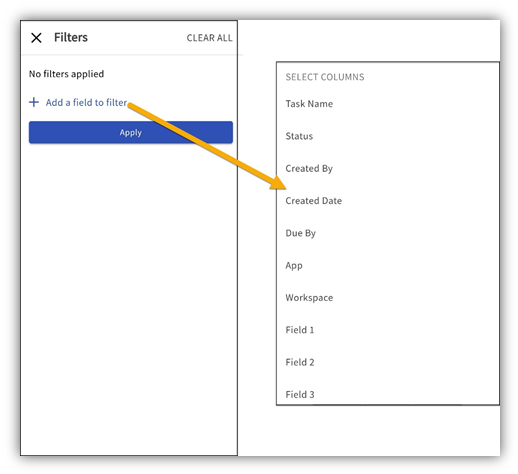
User can select the columns (values) and filter the tasks accordingly.
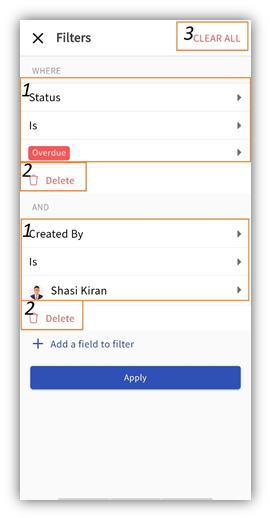
As shown in the picture above:
- Users can define the filters using different conditions provided.
- Users can delete the applied filters one at a time by clicking on the delete icon.
- Users can clear all the applied filters at once by clicking on the Clear All option.
The tasks which are filtered according to the selected value is shown in the picture below.
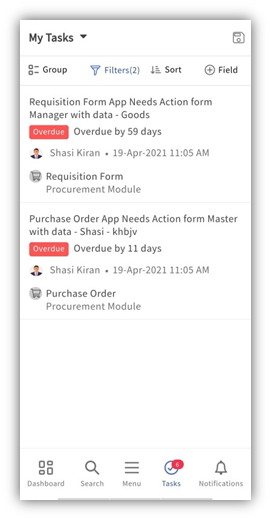
Provision to Sort the tasks
Users can Sort tasks based on the selected fields.
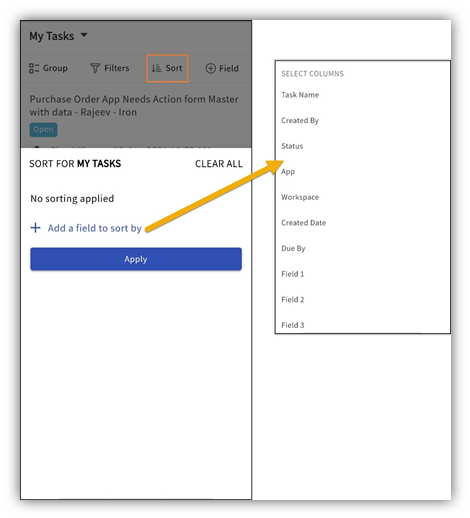
User can select the fields and Sort the tasks accordingly.
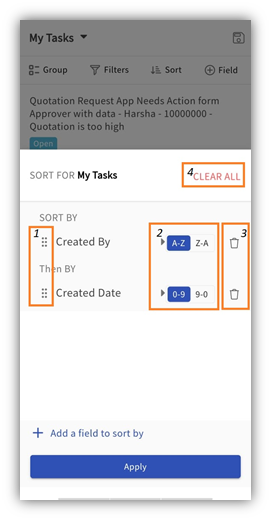
As shown in the picture above:
- Users can re-arrange the Sort by values.
- Users can select the alphabetical order (e.g.: A-Z or Z-A) or the number order (e.g.: 0-9 or 9-0) by which the tasks have to be sorted.
- Users can delete the sorted values one at a time by clicking on the delete icon.
- Users can clear all the sorted values at once by clicking on the Clear All option.
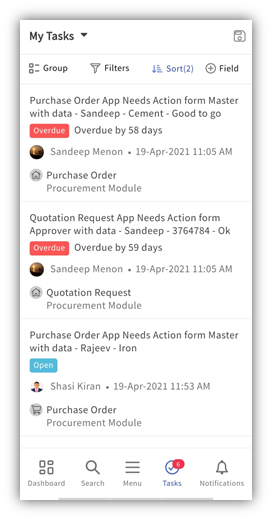
The tasks are sorted according to the selected value as shown in the picture below.
Provision to manage your team tasks
If any user is a manager in an organization and has employees reporting to the user, the manager will now have a new option My Team Tasks to manage his/her team tasks directly in the My Tasks page, as shown in the picture below.
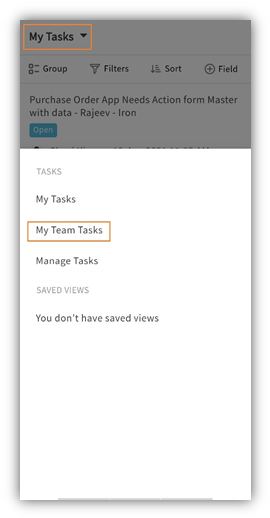
In My Team Tasks, the manager will have the provision to perform tasks on behalf of his employees or reassign the tasks to other employees.
Provision to Manage Tasks
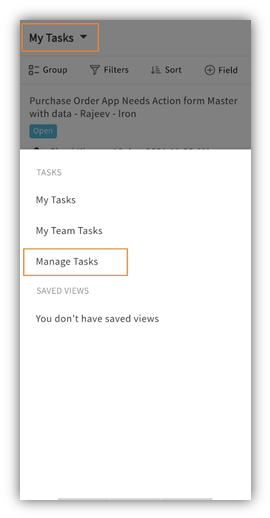
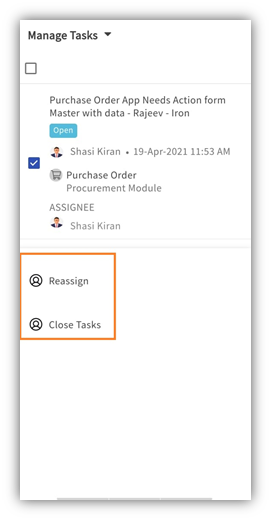
If a user is an organization admin or workspace admin, the admin can see the tasks of all the users present in that organization or workspace. The admin can either close any task or reassign the tasks to other users, as shown in the image below.
Provision to create multiple views from tasks list using groups, filters, sort and new field
Users will now have an option to save a custom view.
- Users can Group, Filter or Sort the tasks according to their requirements.
- The tasks are grouped according to the user who created the task, as shown in the picture below.
- Users can save the customized view. Every time when the user opens the tasks page, the saved view will open on the task page.
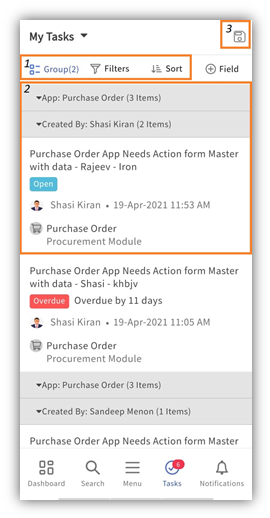
Users can see the saved view under the My Tasks drop-down, as shown in the picture below.
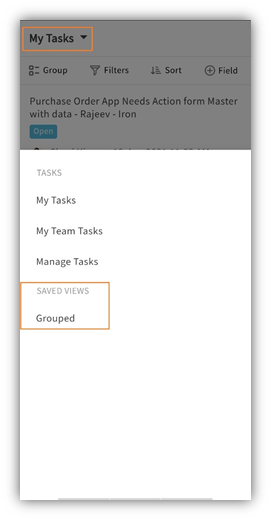
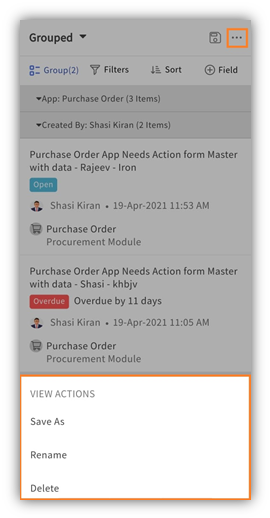
In the saved view page, users can make changes in the saved view and use the option Save As form the 3-dot menu to save the changes, rename the saved view, or delete the saved view.
¶ UI/UX improvements in Menu and User Profile
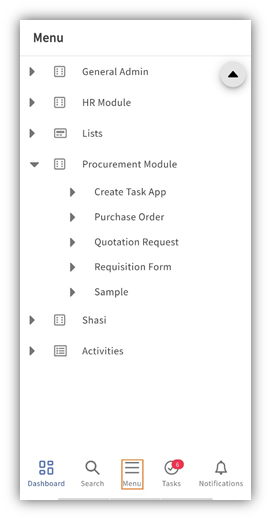
We have divided the Menu option into 2 parts.
- Custom Menu (Menu

- ): We have placed the easy access links to Apps, Reports, Lists and Activities under the Menu option.
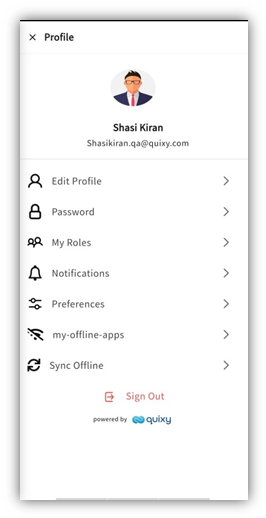
User Profile

: We have placed the profile settings like Edit Profile, Password, My Roles, My-offline-Apps etc., under User Profile option.
¶ UI/UX improvements in Notifications
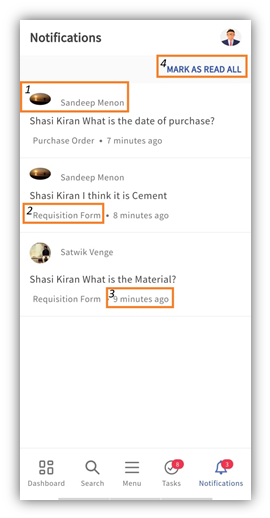
From now on, in the Notifications section, users will be able see:
- A profile picture and Name of the person who mentions you in a comment.
- The App name in which your team members mentioned you.
- The timestamp of the comment.
- ‘MARK AS READ ALL’ option to clear all the notifications at once.
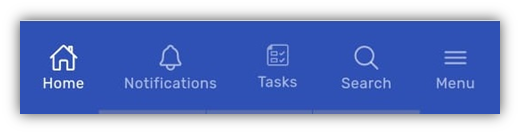
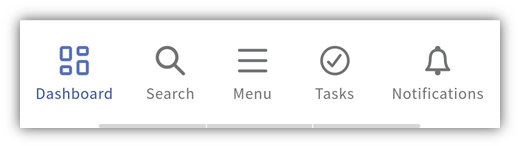
¶ UI/UX improvements in Top bar and Bottom bar
Table
| Before | After |
|
|
|
¶ UI improvement in List Screen
Table
| Before | After |
|
|
|
¶ Improvement in List screen
Table
| Before | After |
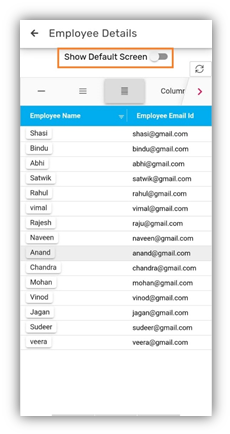
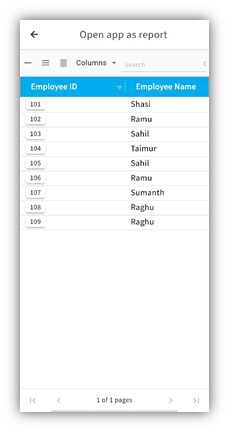
| When users saved a view in the list screen in the web app, the system displayed a Show Default Screen Switch option in both the web app and the mobile app, as shown below. | When users save a view in the list screen in the web app, the system will display a Show Default Screen Switch option only in the web app but not in the mobile app, as shown below. |
|
|
|
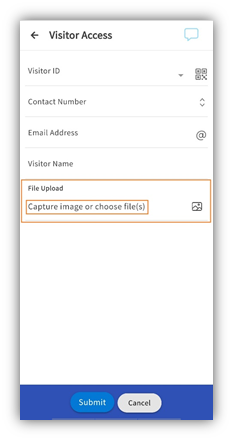
Improvement in File Upload Element (File Type: Image)
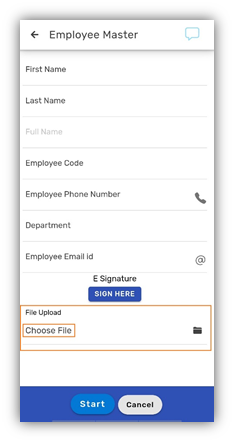
We have changed the text shown inside the File Upload element (File Type: Image) in an app.
| Before | After |
|
|
|
¶ New functionalities added in Reports for both mobile and web
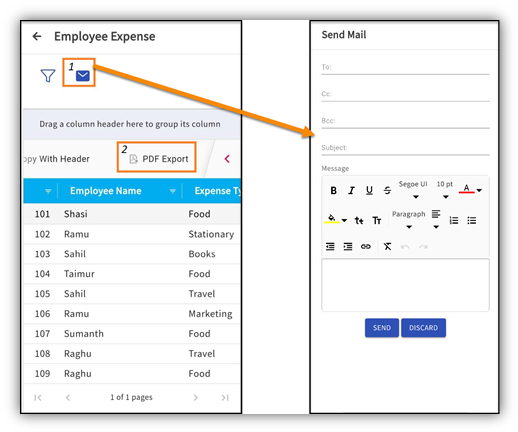
Users can now send the report in an email using the Email option or download the report as a PDF using Download as PDF option from report view mode. Email and Download as PDF options are available only for Grid Report and Pivot Report.
The image shown below is a Grid Report.
¶ Enhancement in Read-Only Fields
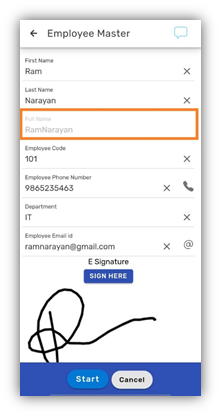
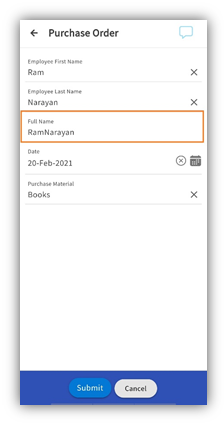
We improved the field color, text font size, and font thickness in Read-Only fields to match those in editable fields in mobile application.
| Before | After |
|
|
|
QR Code Scanner to perform an action in app
In the form element properties, we have an Enable Scanner property, and we have added a new Submit On Scan option under the Enable Scanner property.
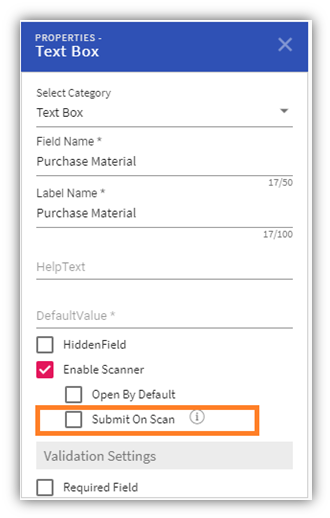
Check this option, and in the Add Record mode of the application as soon as you scan the QR Code the record will submit automatically by performing the action.
¶ Improvements in Web App
¶ Filters in List Scree
We have added Filter option in list screen.
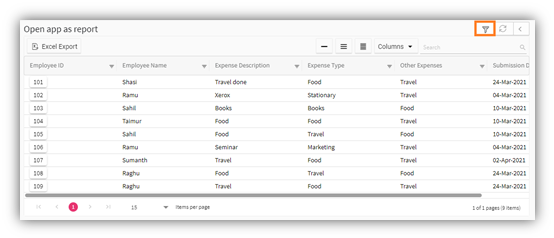
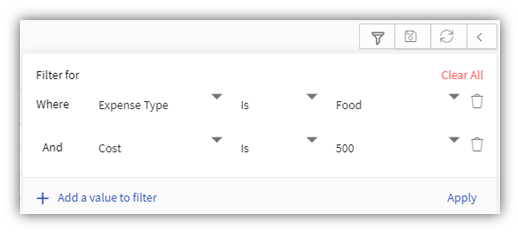
Users can now filter the data in the data-columns of list screen to see only the required data in a list screen.
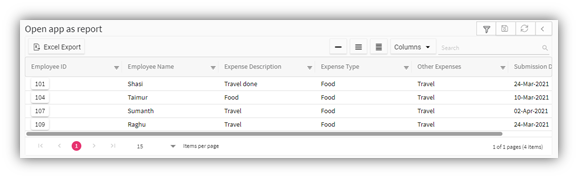
The filtered data can be seen in a list screen, as shown below.
¶ Validation Settings property added for few Output Reference Elements
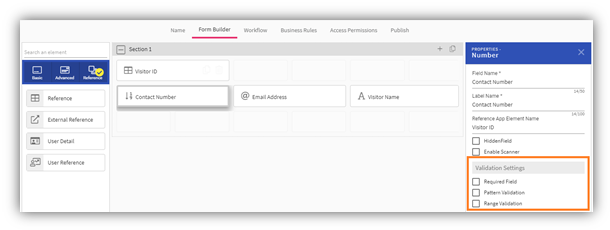
When a Data table/Data source reference form element is added to the form builder, the Output Reference Elements are added to the form builder. We have added Validation settings in the properties of Output Reference Elements such as Text Box, Text Area, Number, Date, and File Upload.
The following are the Validation Settings that have been added for the Output Reference Elements:
- Text Box: Required Field, Length Validation, Pattern Validation.
- Text Area: Required Field, Length Validation.
- Number: Required Field, Pattern Validation, Range Validation.
- Date: Required Field.
- File Upload: Required Field, File Size, File Type.
With this, now it is simplified to enable validations on output reference elements.
¶ Custom option for File Types in File Upload Form Element
In the File Type property of the File Upload Form Element, we have added a new Custom option.
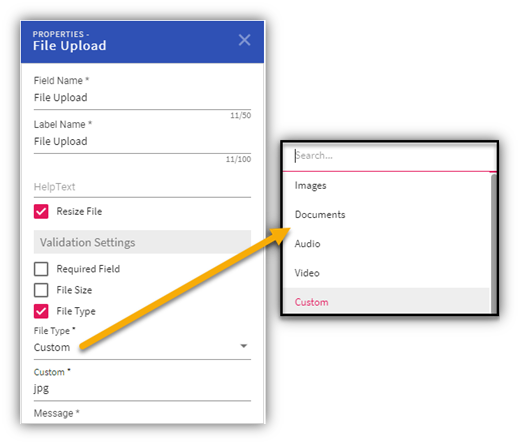
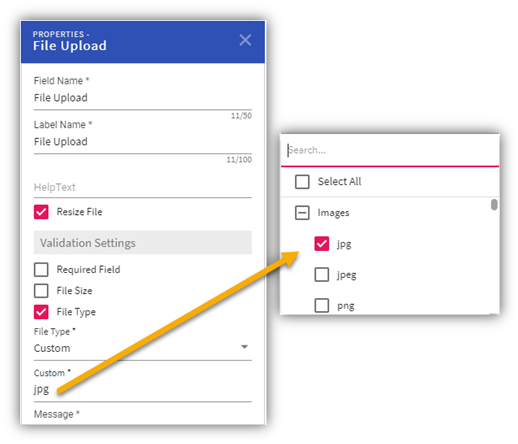
In addition to the File Type, app developers can now drill down further using the Custom option to select the file formats that their end users will be allowed to upload while using the app.
The following are the custom file formats that have been added for each file type:
- Image: jpg, jpeg, png, gif, icon
- Document: doc, docx, odt, txt
- PDF: pdf
- Excel: xls, xlsx, csv
- PPT: ppt, pptx
- Audio: mp3, m4a, ogg, wav
- Video: mp4, m4v, mov, wmv, mpg, ogv, 3gp, 3g2
¶ Account subscription details in Preferences
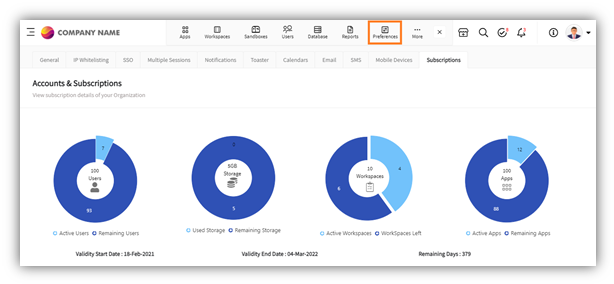
We have added a new Accounts & Subscriptions option under Preferences in the Admin Menu for Admin Users to view their organization's subscription details.
The admin users will be able to see the information like:
- Users: Total number of users, Active users, and Remaining users.
- Storage: Total storage, Used storage, and Remaining storage.
- Workspaces: Total workspaces, Active workspaces, and Workspaces left.
- Apps: Total apps, Active apps, and Remaining apps.
- Validity Start Date: Start date of the subscription.
- Validity End Date: End date of the subscription.
- Remaining Days of the subscription.
¶ Collapse/expand properties window in Form Builder
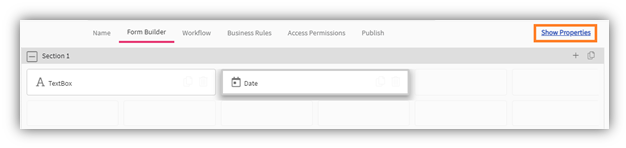
When the app creator is simply arranging form elements in the form builder, he or she does not need the properties window to be opened for each element; in such cases, the app creator will now have the option to close the properties window so that the properties window is in collapse mode for all form elements and expand the properties window at any time by clicking on Show Properties link.
This enhancement will also improve the performance of the Form Builder.
¶ Enhancement in Dashboard’s Dashlets
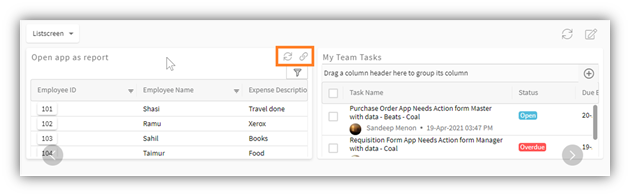
Users will be able to see the Refresh icon

and Open dashlet icon

on the Dashlets only when the mouse cursor is hovered on the dashlet.
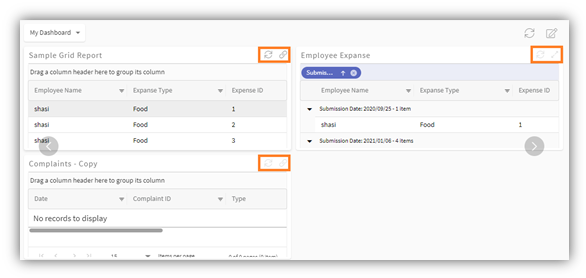
Previously, these icons used to be present on the dashlets by default, as shown below.
¶ Quick Flows in Apps
We have revamped the Print Report option with Quick Flows by adding more options to it, under 3-dot menu in app view mode.
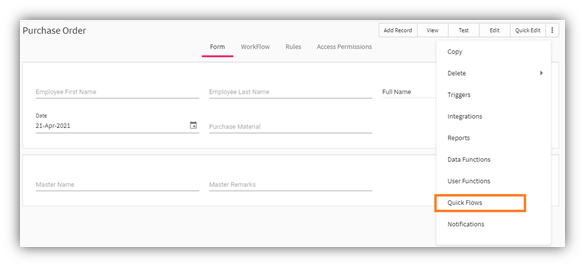
Direct Print option is changed to Print Report and Quick Print option is changed to Print App Report, but their functionality remains same.
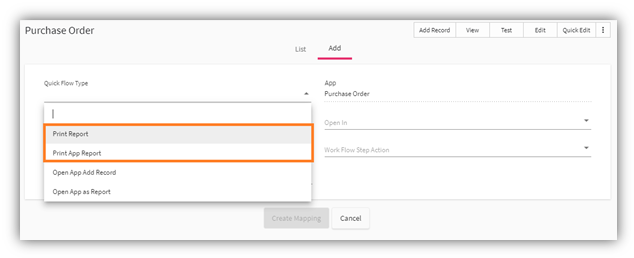
We have added couple of new options under Quick Flow types:
- Open App Add Record: Users can configure this option for an app through Quick Flows if they want to open another app in add record mode as soon as they submit a record in the current app.
Example: If a user has created an app to create tasks and another app to create sub tasks by referencing tasks. The user can create a task in the first app, and the second app to create sub tasks on top of the task, user will automatically be navigated to add record mode of create sub task app as soon as the user creates a task.
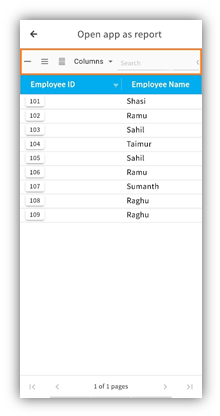
2. Open App as Report: Users can configure this option in an app through Quick Flows if they want to open any app as a report which does not contain any action buttons to take any action but will be able to see the data in the app, as shown below.