¶ Creating a Data Table from an External Database
- On the Quixy dashboard page, navigate to Admin Menu → Database → Create Data Table.
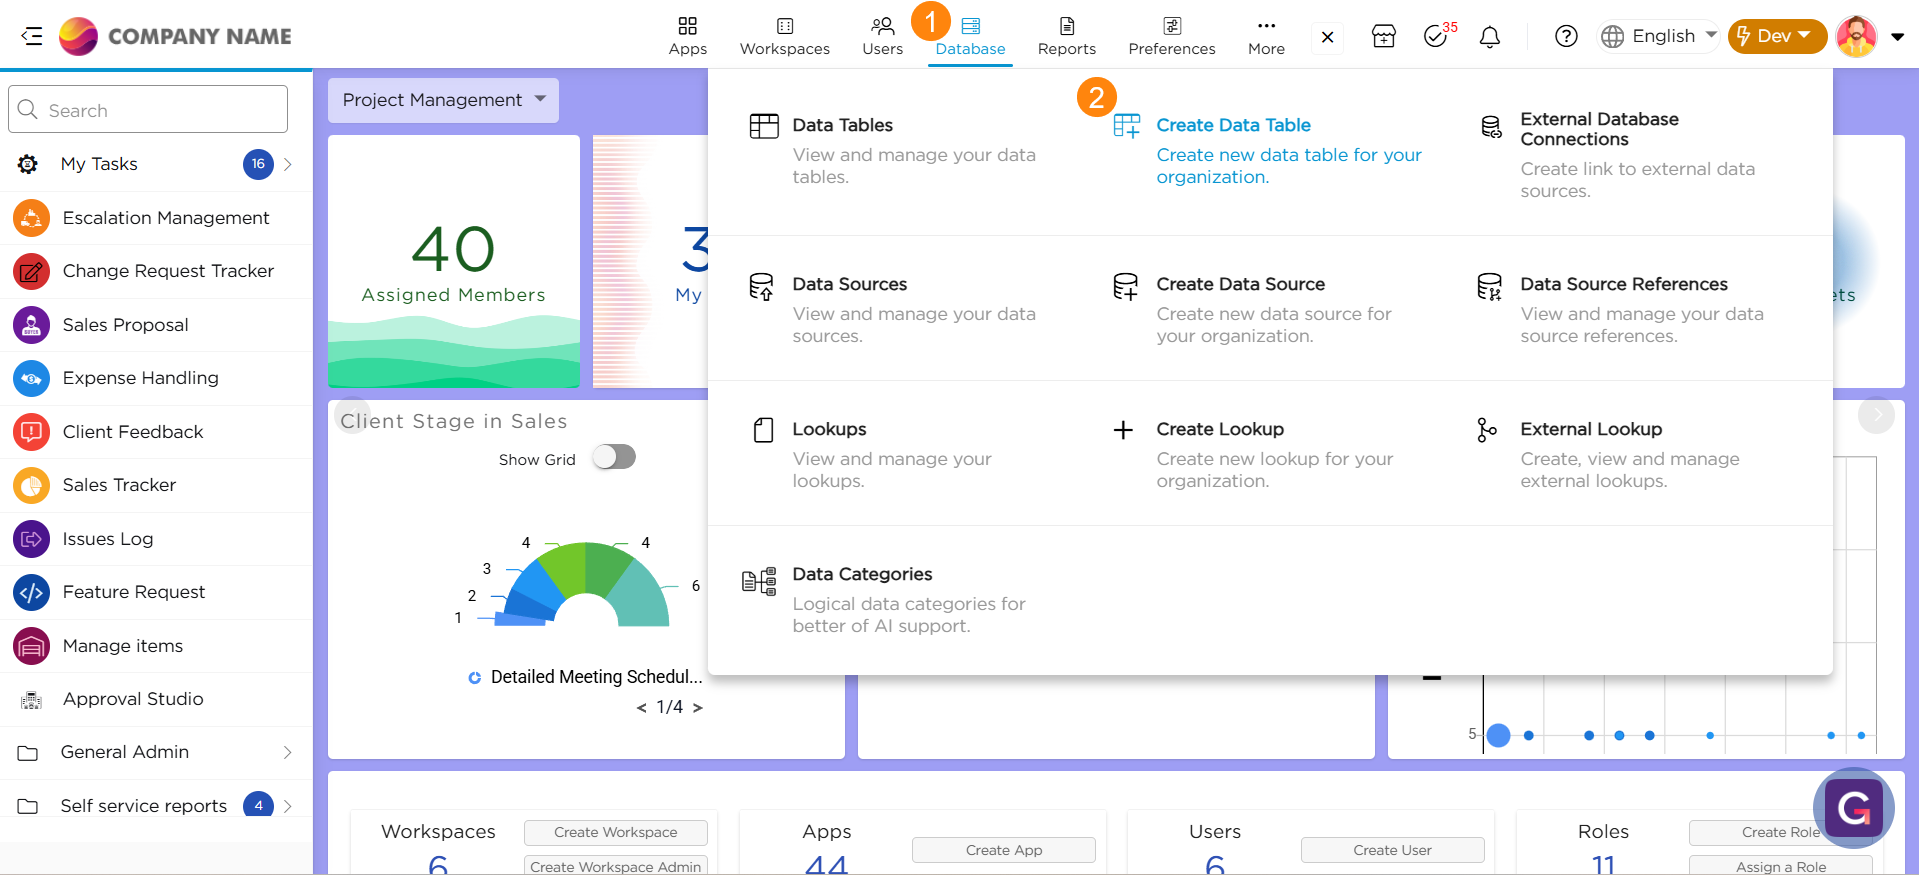
2. Select Create from External DB to proceed.
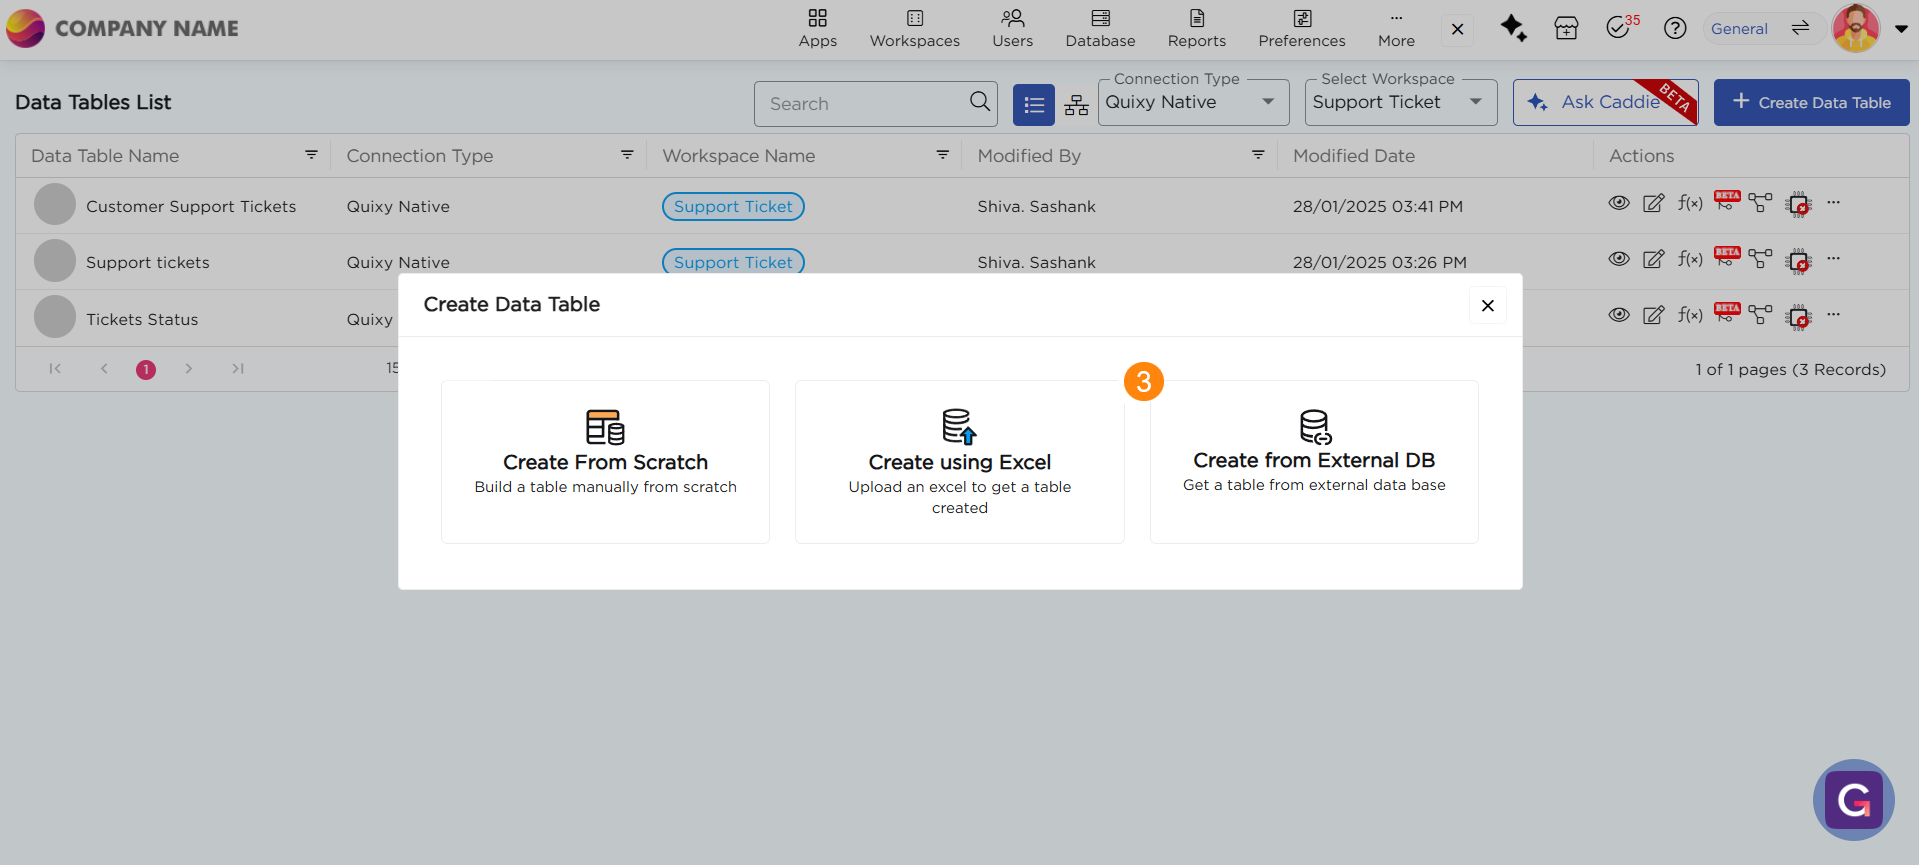
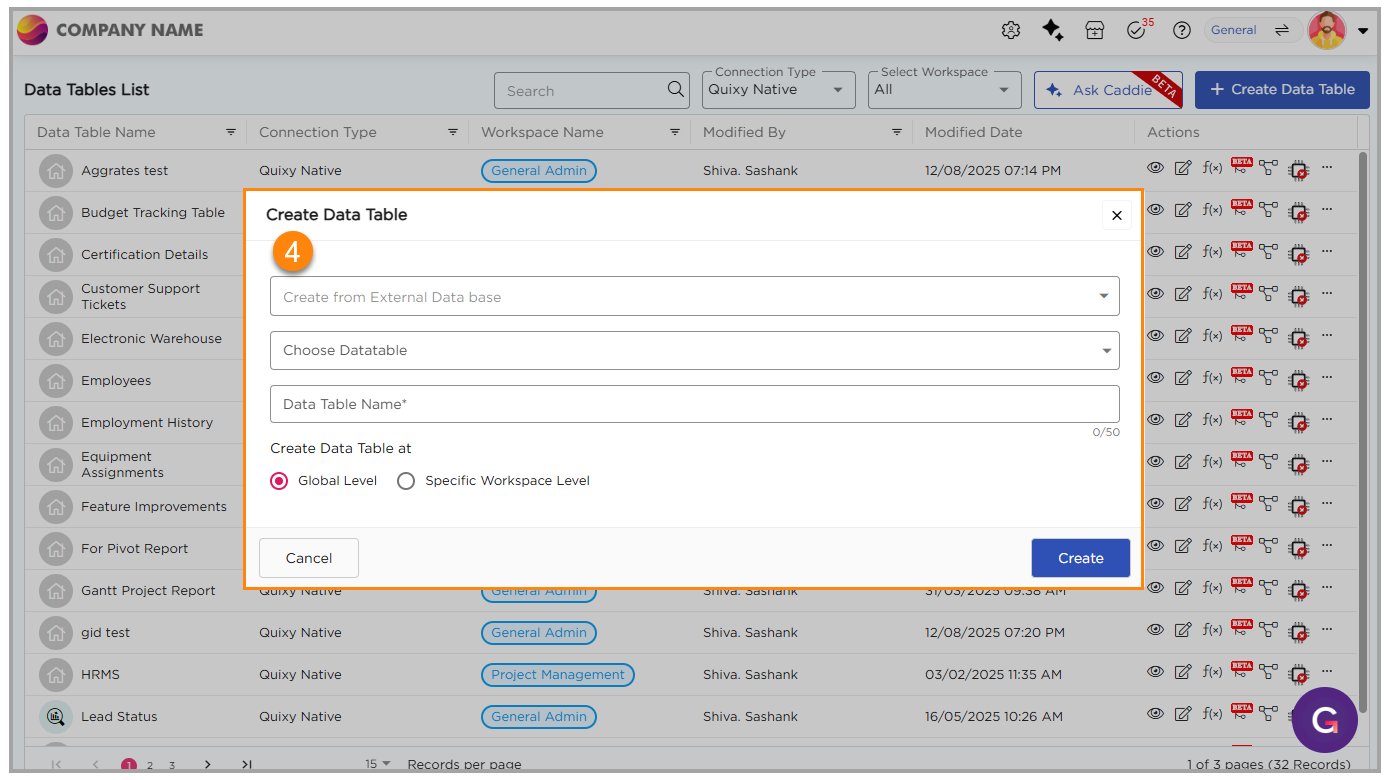
3. From the Create from External Database dropdown, select the external database connection created. Learn how to Create an External Database Connection.
4. From the Choose Datatable dropdown, select the required table fetched from the connected database.
5. Provide a name for the table and choose where to save the data table
- Global Level:
A globally saved data table can be accessed by any application across any workspace. It is ideal for datasets that are shared across multiple apps or departments. - Specific Workspace Level:
A workspace-level data table is confined to a specific workspace. It can store or retrieve data only from applications linked to that same workspace.
6. Click Create. The selected table opens with its Data Table Elements.
7. Click Save to finalize the table.

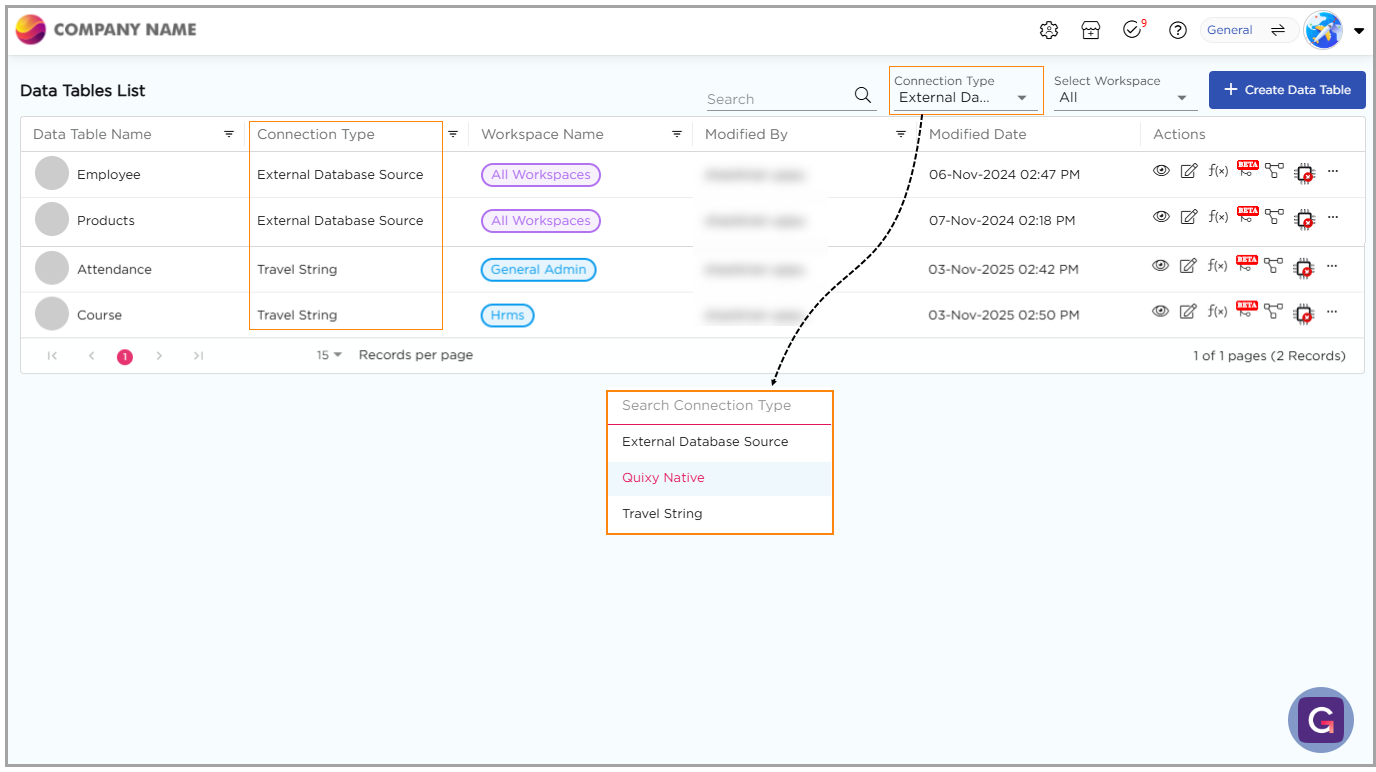
8. To view the created table in the in the Data Tables List:
- From the Connection Type dropdown, switch from Quixy Native to the External Database Connection you created.
- From the Select Workspace dropdown, choose the workspace where the table was created. The created data table appears in the list along with its connection type and workspace details.