¶ Adding Records to Data Tables in Quixy
Important
Only a Data Admin can add records manually, if not added while adding record in the application.
¶ Adding Single Records:
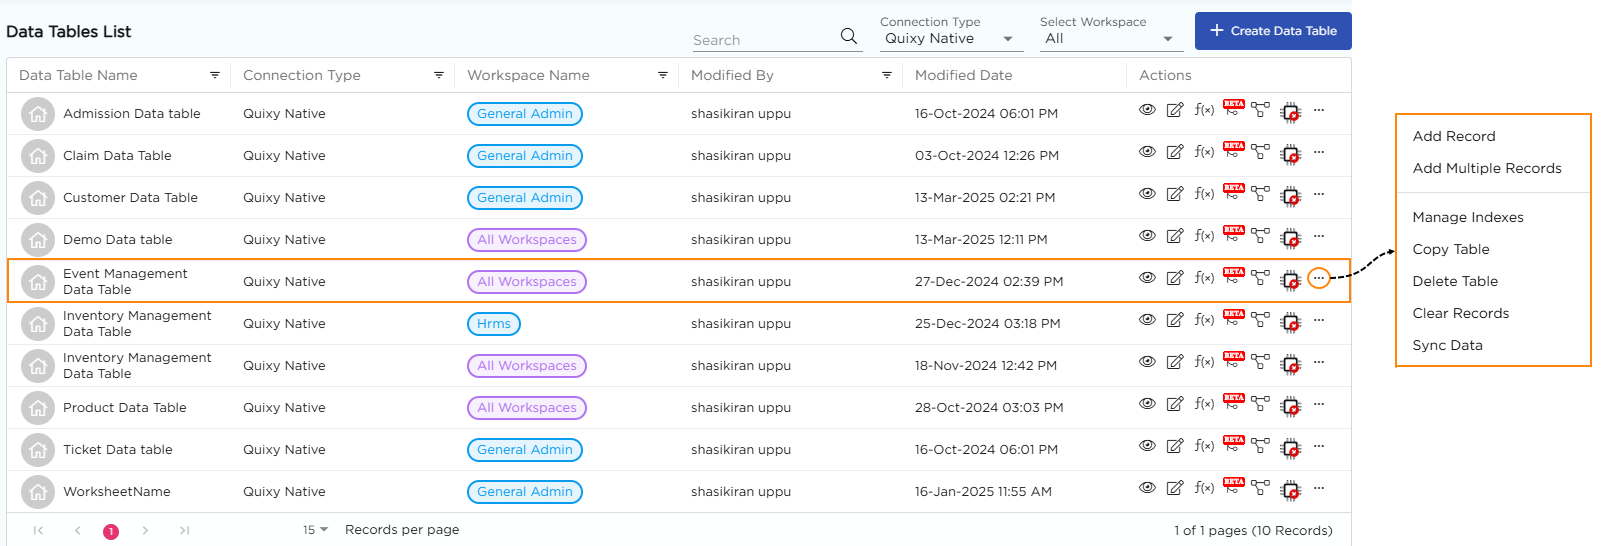
- Go to the data tables list page in your Quixy workspace.
- Choose the data table where you want to add a record.
- Click the 3-dot icon next to the data table.
- Select Add Record from the options provided.
- Fill in the required data on the Add Record page.
- Click Save to add the record to the data table.
- The new record will now appear in the data table records.
¶ Adding Multiple Records:
¶ Method 1: Manual Entry
- From the data tables list page, choose the target data table and click the 3-dot icon.
- Choose Add Multiple Records from the options.
- Click on an empty row in the grid.
- Fill in the data for each row.
- To add more rows, click +Add Row and continue entering data.
- Click Save to add the multiple records to the data table.

¶ Method 2: Using Excel
- Choose the data table and click the 3-dot icon.
- Select Add Multiple Records.
- Click Download Excel to get the Excel template for the data table.
- Open the downloaded Excel file.
- Enter the relevant data in the Excel sheet.
- Return to the Quixy platform and click Upload Excel.
- Select the Excel file containing the data.
- The uploaded data will now appear as multiple records in the data table.

Note
Ensure that the field names in the Excel file match exactly with the field names in the data table, including case sensitivity. Date fields should be in the format (DD-MM-YYYY)