¶ What is a Connector Data Source?
A Connector Data Source links Quixy with external systems or APIs to fetch real-time data without storing it locally.
It’s ideal for values that update often, such as stock levels, account balances, or order details.
Unlike Basic, Merged, or Query Data Sources, Connectors don’t store or sync data inside the platform. They fetch live values directly from external systems each time a report, dashboard, or chart loads.
Example:
Display the latest inventory from your ERP or live customer details from your CRM.
¶ Why Use a Connector Data Source
Use a Connector when you:
- Need live data from an external platform or API.
- Want to avoid syncing or storing data inside the platform.
- Work with fast-changing information such as finance, logistics, or sales data.
- Need reports or dashboards to always show current values.
¶ Configuring a Connector Data Source
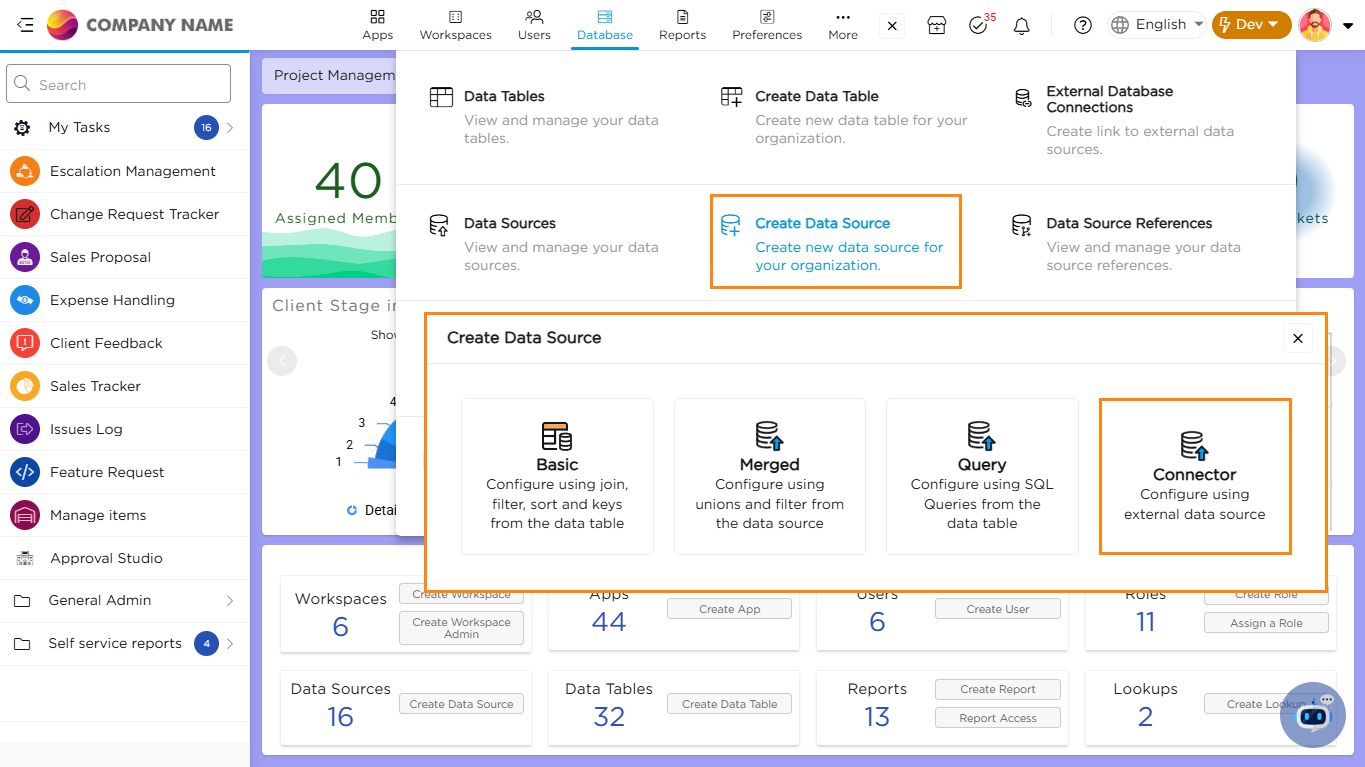
- Navigate to Admin Menu → Database → Create Data Source.
- From the list of data source types, select Connector. This opens the configuration page.
3. Provide a unique name for your Connector Data Source.
4. Choose the Request Type: GET or POST, based on how the API should be called.
- GET – Retrieve data directly from an external API.
- POST – Send data or parameters in the request body to get specific results from the API.

Note:
Depending on your API, configure either a GET Request or a POST Request as explained below.
¶ Configure a GET Request
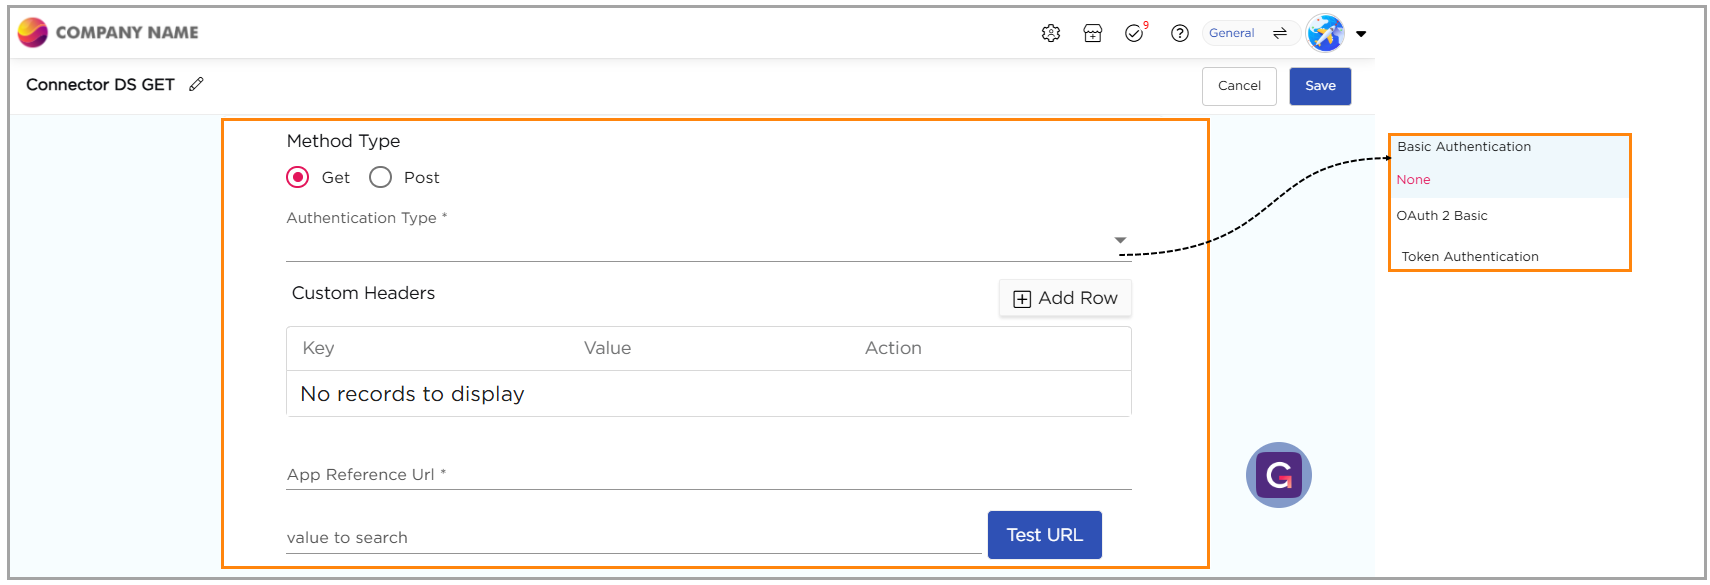
- Under Method Type, select GET.
- Choose the Authentication Type based on the API requirement:
- None – For public APIs. No credentials are needed.
- Basic Authentication – Enter the username and password.
- OAuth 2 (Client ID and Secret) – Enter the token endpoint credentials.
- Token Authentication – Enter the access token.
- Add Custom Headers if the API requires them.
- In App Reference URL, enter the API endpoint.
- If the API accepts a search parameter, enter it in Value to Search.
Example:
https://api.example.com/customers?customerId=12345
- Click Test URL to verify the connection.
“A success message confirms that the API connection works.”
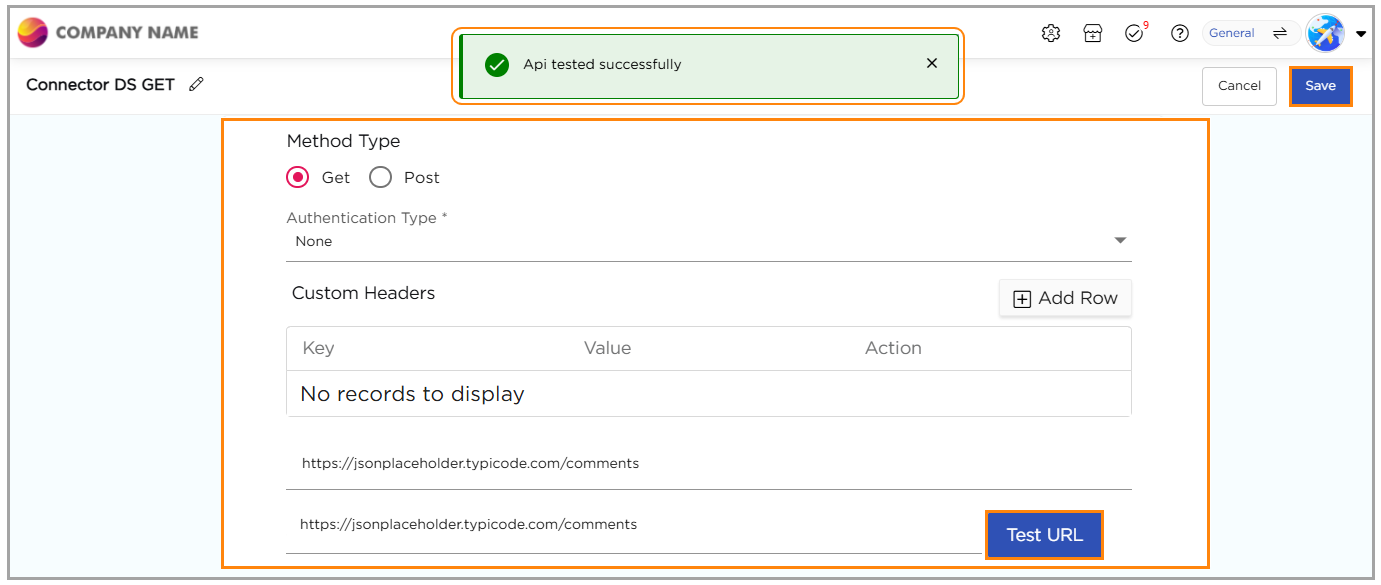
- Once the connection is successful, the response fields appear under Element Mapping.
- In the Element Mapping section:
- Each field from the API response is listed automatically.
- You can rename a field using the Alias Name column for easier identification in reports and dashboards.
- Click Save to complete the Connector Data Source setup.
¶ Configure a POST Request
- Under Method Type, select POST.
- Choose the Authentication Type based on the API requirement:
- None – For public APIs. No credentials required.
- Basic Authentication – Enter the username and password.
- OAuth 2 (Client ID and Secret) – Enter the token endpoint credentials.
- Token Authentication – Enter the access token.
- Add Custom Headers if required by the API.
- In App Reference URL, enter the API endpoint where the data should be sent.
- Select how to send parameters:
- URL – Sends parameters directly in the URL.
Example:
https://api.example.com/addCustomer?name=John&city=Dallas
- Body – Sends parameters inside the request body, usually in JSON format.
Sample JSON:
{
"name": "John",
"city": "Dallas"
}
- Click Test URL to verify the connection.
“A success message confirms that the API connection works.”
- Once the connection is successful, the response fields appear under Element Mapping.
- In the Element Mapping section:
- Each field from the API response is listed automatically.
- You can rename a field using the Alias Name column for easier identification in reports and dashboards.
- Click Save to complete the Connector Data Source setup.