.png)
Configuring Digital Signature
- 4 Minutes to read
- Contributors


Configuring Digital Signature
- 4 Minutes to read
- Contributors
Article Summary
Share feedback
Thanks for sharing your feedback!
A digital signature is commonly used to securely sign a document and enable its secure viewing after signing. To achieve this, a response mapping is required. A response mapping is simply the process of retrieving the document that was sent for digital signing.
IMPORTANT
Before configuring digital signatures, it's crucial to set up the application correctly. The application should have two main sections: one for document signing and another for capturing response data.
When creating an application for digital signatures, two sections should be included:
Document Signing Section: This section should include elements such as a text field for the signer's name and a file upload element for uploading the document for signature. Additional form elements can be added as needed.
Response Mapping Section: This section is for creating response mapping to allow users to retrieve the signed document. It should include form elements such as a file upload to receive the signed document, transaction status (text), transaction number (text), reference number (text), and error message (text). These elements are essential for retrieving the signed document and related details. Additional elements can be added based on requirements, but the file upload feature is crucial for accessing the signed document.

Create an application with the following fields included in it. Learn how to create an application.
NOTE
The uploaded PDF document needs to be in base64 string format.
Configuration
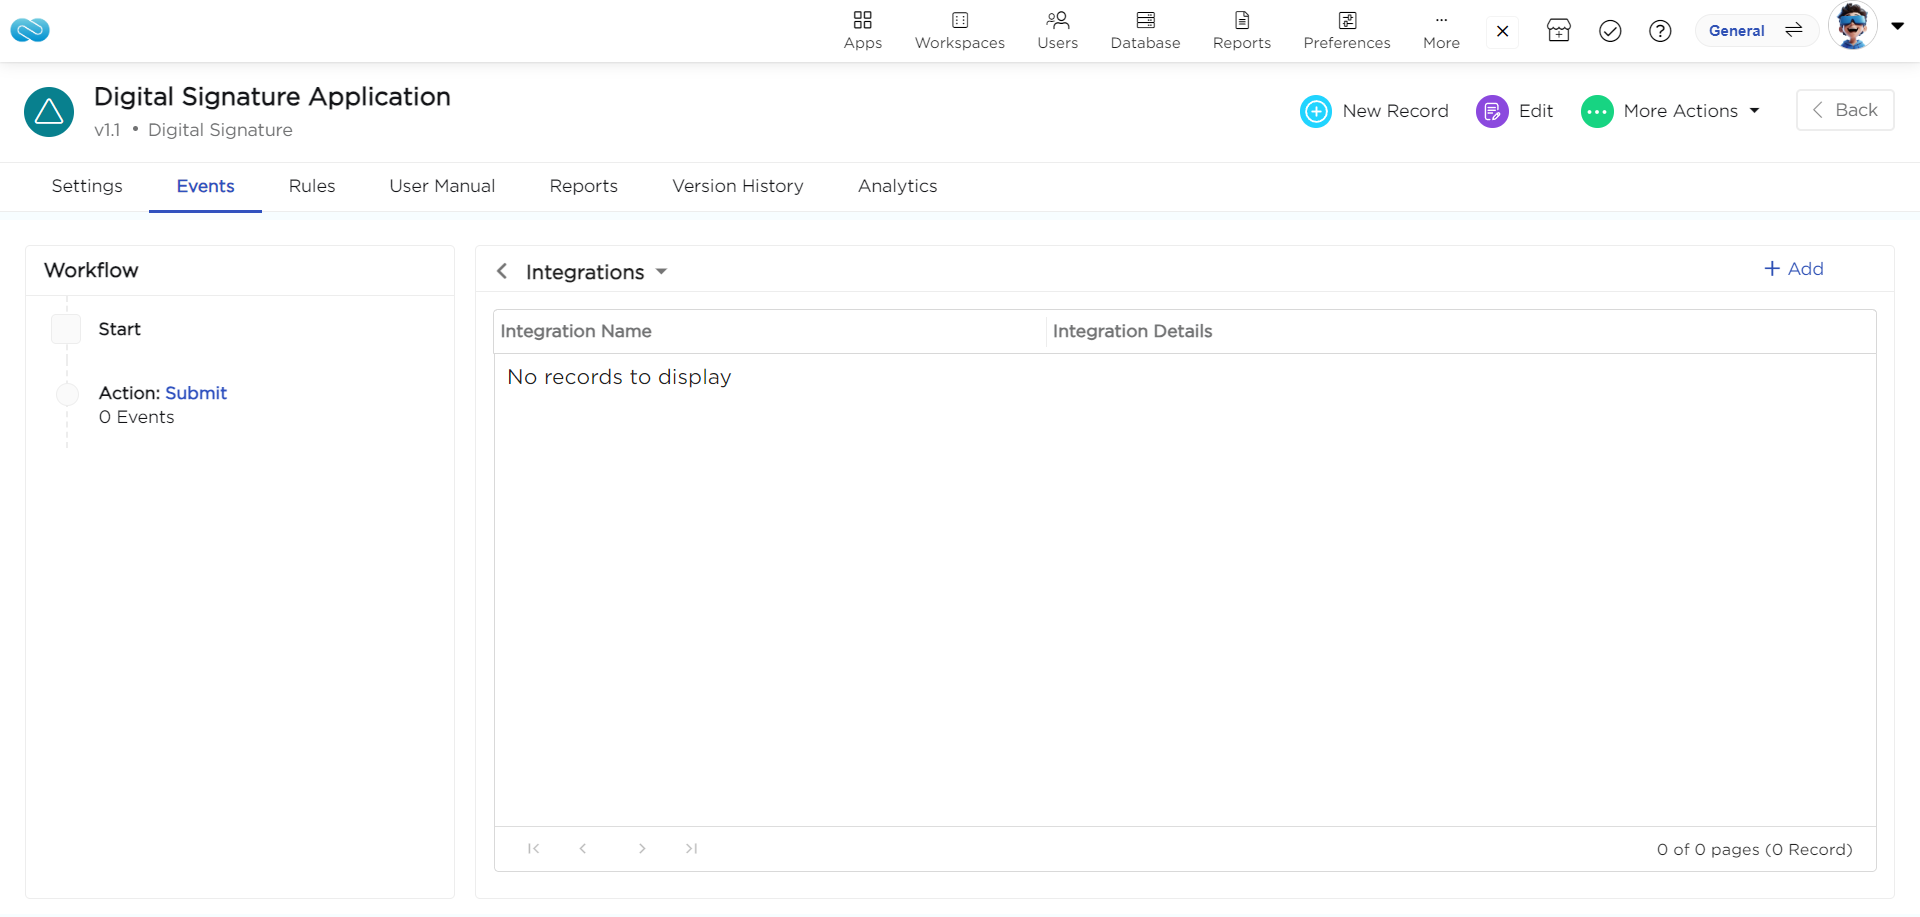
- Navigate to App Events -> Integrations -> Add Integration.
- Select Integration type -> Signer Gateway, and choose eMudhra as the provider.
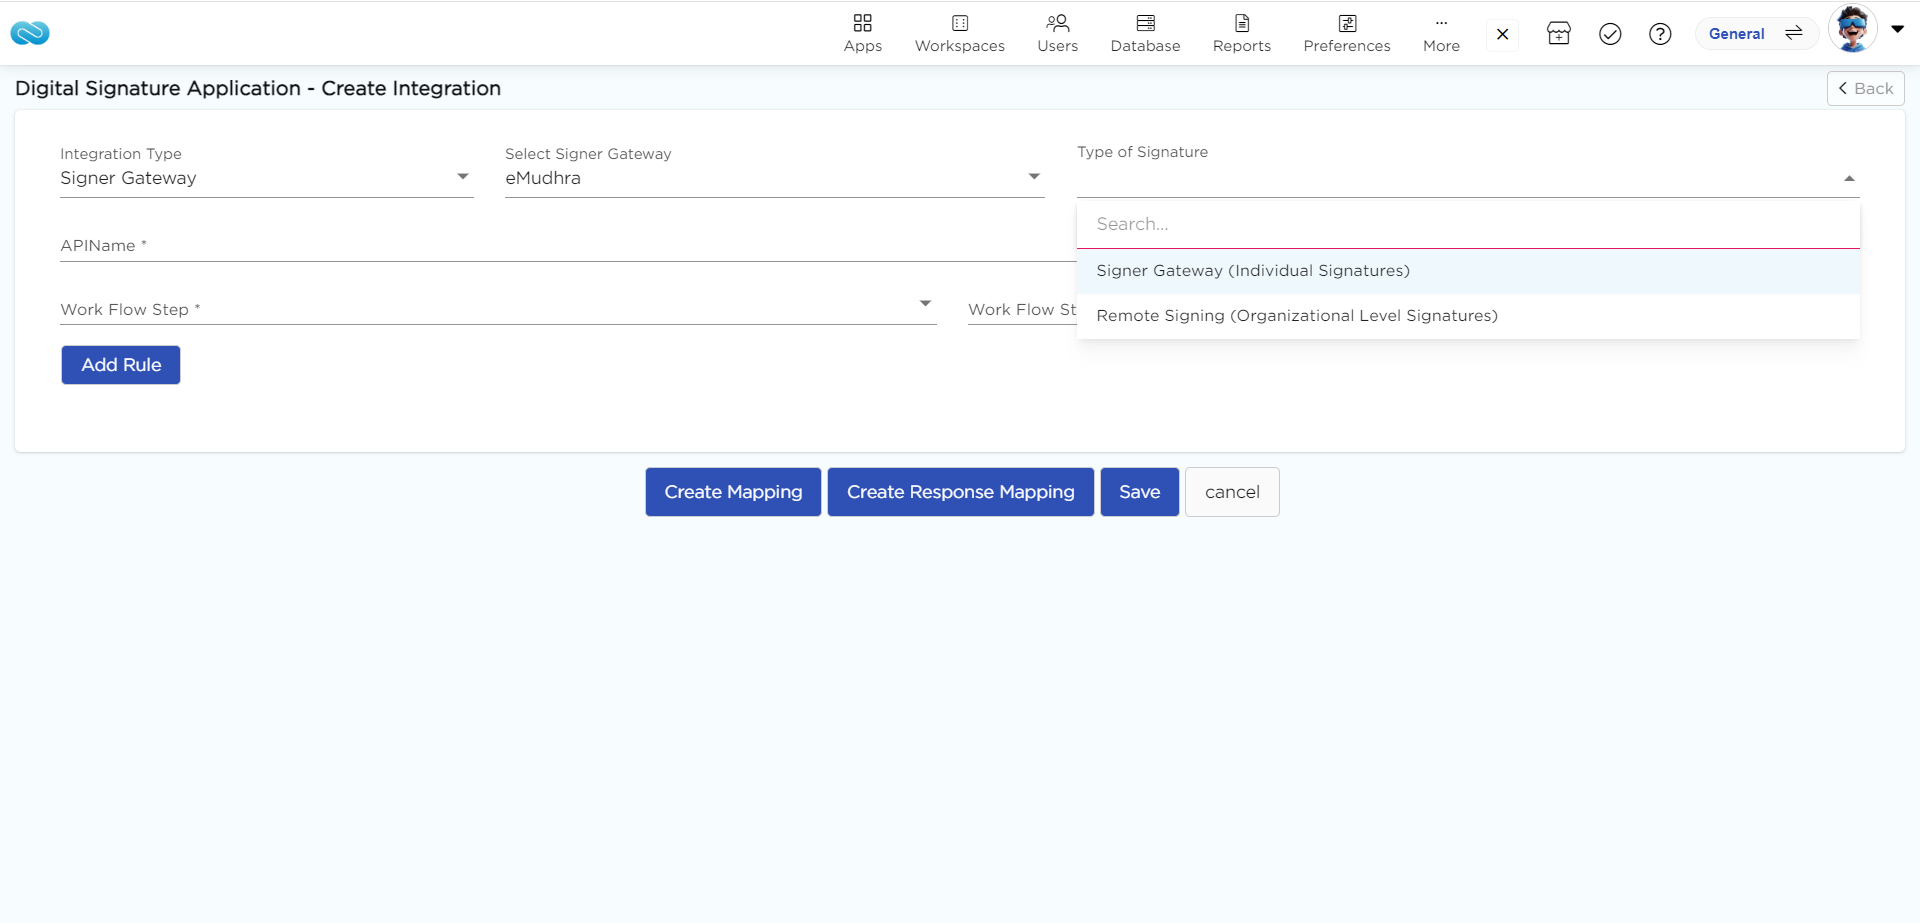
- Choose the type of signature required, either remote signing for Organizations or signer gateway for Individuals.
- Provide a name for the API to identify it within your application.
- Choose the workflow step and action in your application that will trigger the digital signature process.
- Add rules if required. See the note below for details on the purpose of rules and how they can be implemented.


NOTE
Rules can be added in the below use cases:
Use case 1: In a finance application, a rule can be set where documents requiring approval from a manager or executive are only signed if the amount mentioned in the document is within their approval limit.
Use case 2: In a contract management system, a rule can be configured to automatically trigger the renewal process if the contract end date is approaching. The document can only be signed for renewal if certain conditions are met, such as no outstanding issues or disputes.
Signer Gateway
- Select Signer Gateway: After choosing the signer gateway, an API URL will be automatically populated.
- Name API: Provide a name for the API.
- Workflow Step and Action: Choose the workflow step and action where to trigger the integration.

Custom Configurations
- File Type: Choose PDF.
- Authentication Token: Provide the Authentication Token provided by the third-party platform.
- Signature Type: Choose the signature type from the options provided.
Signature Placeholder Options
- Select Page: Choose the pages where the signature should appear.
- Select Signature Position: Set the position of the signature on the page.
Signing Options
- Enable Co-sign: Check this if multiple signatories are signing the document at different workflow steps; otherwise, leave it unchecked.
Preview Options
- Preview Required: Allow previewing the document before signing.
- Enable View Document Link: Provide a link to access the document after signing.
Signature Options
- Enable Upload Signature: Allow users to upload a handwritten signature.
- Enable Font Signature: Allow users to select or create a signature using a font.
- Enable Draw Signature: Allow users to draw a signature on the Signer Gateway page.
- Enable eSignature Pad: Allow users to connect to third-party signature pads (e.g., Topaz signature pads).
Storage Options
- Store to DB: Store data with e-Mudhra for later retrieval in case of failure or data loss.
Create Mapping
- Map Signatory Name to Text Field: Map the signatory's name to a text field.
- Map Document to File Upload: Map the document to be signed to a file upload element.
Response Mapping:
- Map Return Value to File Upload: Map the return value to the file upload element.
- Map Transaction Status to Text: Map the transaction status to a text field.
- Map Transaction Number to Text: Map the transaction number to a text field.
- Map Reference Number to Text: Map the reference number to a text field.
- Map Error Message to Text: Map the error message to a text field.
Click on update after filling in all the necessary details.
Remote Signing
Preconditions: The administrator should have obtained the API URL, Client ID, Key ID, and Access Key from eMudhra as part of their subscription.

Configuration steps
- Select Signer Gateway: After choosing the signer gateway, an API URL will be automatically populated.
- Name API: Provide a name for the API.
- Workflow Step and Action: Choose the workflow step and action to trigger the integration.
Custom Configurations

- Upload License: Upload the license file.
- Provide Key ID: Enter the Key ID obtained from eMudhra.
- Provide Access Key: Enter the Access Key obtained from eMudhra.
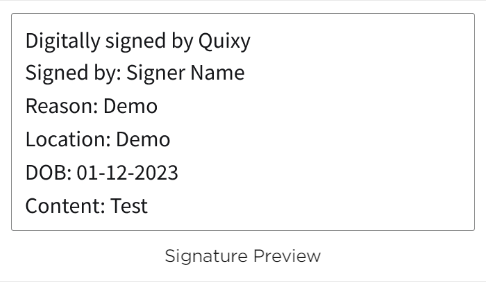
Signature Type: Choose a signature style from the options provided
- One Liner: Enter the default text to be signed in one line.

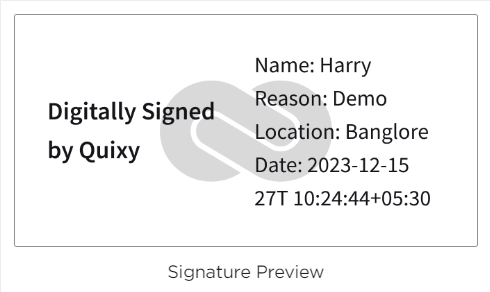
- Signature Image:
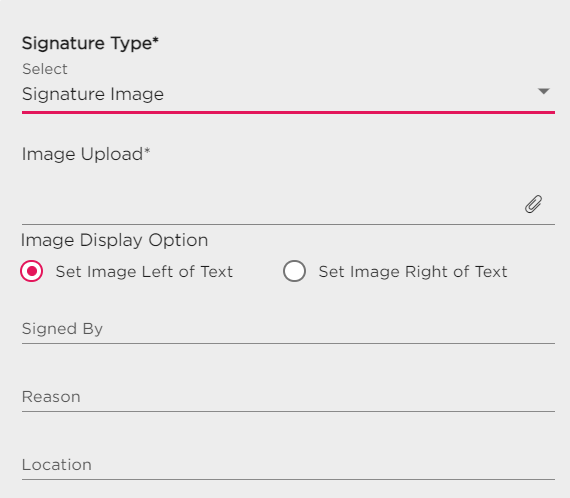
- Upload an image from your local folder.
- Choose the display position of the image (left or right of the text).
- Include custom content such as signer's name, reason for signature, and location.
- Custom Content: Add custom content as part of your digital signature.
- Advanced:
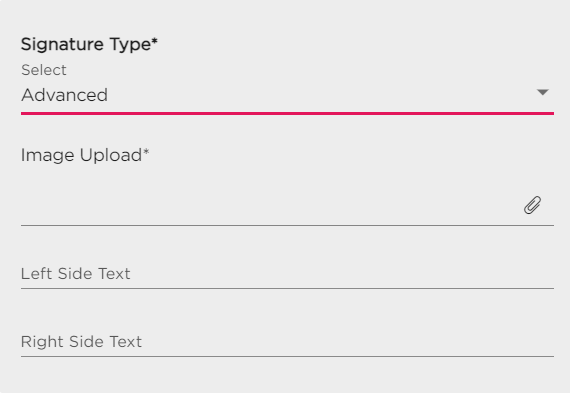
- Upload an image from your local folder.
- Include content to the left and right of the digital signature within the signature box.


Signature Settings
- Border: Enable a border for the digital signature.
- Co Sign: Allow co-signing on the document.
- Content Search: Enable content search on the document to be signed.
Select Page: Choose the page numbers where the digital signature needs to be appended.
Select Coordinates: Specify the position on the page where the digital signature should be appended.
NOTE
The Select Page and Select Coordinates fields will not be displayed when the Admin checks the Content Search option.
Font Color: Color of the font in the signature can be chosen in this drop-down.
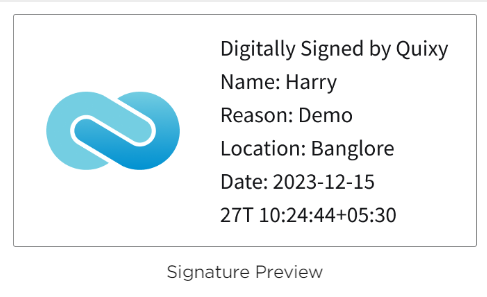
Signature Preview: Preview for the type of the Signature is visible.
Create Mapping
- Map Document to File Upload: Map the document to be signed to a file upload element.
Response Mapping:
- Map Return Value to File Upload: Map the return value to the file upload element.
- Map Transaction Status to Text: Map the transaction status to a text field.
- Map Transaction Number to Text: Map the transaction number to a text field.
- Map Error Message to Text: Map the error message to a text field.
Click on update after filling in all the necessary details.
Was this article helpful?
