Sandbox
  • 8 Minutes to read
  • Contributors

    Sandbox


      Article Summary

      At its core, a Sandbox is a secluded space within the Quixy platform which is called the development stage where users can unleash their creativity without the fear of disrupting existing workflows or applications. It serves as a virtual playground, enabling citizen developers to build, modify, and test new applications or features without any impact on the live environment. This isolation ensures that citizen developers, business analysts, and other stakeholders can collaborate and iterate freely, fostering a culture of innovation.

      NOTE

      Quixy's Sandbox revolutionizes software development by streamlining the traditional process with Continuous Integration/Continuous Deployment (CI/CD), typically involving coding, building, testing, and deploying. Instead, Quixy's Sandbox simplifies this process for no-code development.

      Featuring a Multi-Stage Sandbox, Quixy replicates development environments such as Dev, QA, UAT, and Live for controlled testing and release. With one-click deployment, changes made in the development stage can seamlessly propagate to the Live app, eliminating the need for manual updates. This real-time update mechanism ensures that changes made in the development environment instantly impact end-users.

      In essence, Quixy's Sandbox serves as a no-code CI/CD solution, offering faster updates, improved collaboration, and higher-quality applications, all without the complexity of traditional coding practices.

      Key Benefits of Quixy Sandboxes:

      Risk-Free Experimentation: Sandboxes provide a risk-free environment for users to experiment with new ideas. Whether it's tweaking existing processes or creating entirely new applications, users can explore without the worry of unintended consequences.

      Collaborative Development: Teams can collaborate seamlessly within Sandboxes. Developers and business users can work together, refining concepts and features in real-time. This collaborative approach accelerates the development process and ensures that the final product meets everyone's expectations.

      Enhanced Productivity: By eliminating the fear of disrupting live applications, Sandboxes boost productivity. Users can focus on innovation, confident that any missteps or changes won't impact the day-to-day operations of their organization.

      Streamlined Testing: Sandboxes are invaluable for testing new functionalities and features. Users can conduct rigorous testing, identify potential issues, and refine their solutions before deploying them in the live environment. This meticulous approach enhances the overall quality of applications.

      Iterative Development: Sandboxes support an iterative development cycle. Users can continuously refine their applications based on feedback, ensuring that the final product aligns perfectly with the organization's needs and goals.

      In Quixy, Sandbox comes in two variants as given below, and although the functionality of both variants is the same, there is a slight difference in the way they work.

      1. Basic Sandbox
      2. Advanced Sandbox

      In this article, we will discuss basic sandbox. Use the link above to understand the Advanced Sandbox.

      In the basic sandbox, we have two environments/stages i.e., Dev (development), and Production (Live). All users, i.e., Organization Admin, Workspace Admin, and End-Users will have access to the live stages; However, only Organization Admin and Workspace Admin will have access to the Dev environment as they are the creators in the platform.

      Any user (End-User, Organization Admin, Workspace Admin) who log in to the platform will initially land on the live stage where they can perform live interactions and transactions. However, the citizen developers, i.e., Organization Admin, and Workspace Admin will have the option to shift from the Live stage to the Dev stage to develop solutions and test it before moving the solution to the live stage for actual use.

      Sandbox%20Stages%20GIF

      How does Basic Sandbox works?

      The below image represents the working model of the basic sandbox.

      Sandbox%20XML

      • Any user login into the platform will land on the live environment as shown in the GIF above.
      • The Organization Admin or Workspace Admin must switch to the Dev environment to start developing the solution that requires creating artifacts.

      Screenshot%20(208)

      • Once switched to Dev stage, the platform will move into developer mode where in you will find the developer option, i.e., Admin Menu.

      Screenshot%20(209)

      • Now, in the Dev stage, creating artifacts is same as old times.
      • Go to Admin Menu, create workspaces, roles, users, applications, data tables, data sources, reports, and establish app-data table relations, etc. Configuring the account Preferences, and other aspects in different environments/stages is explained later in the article.
      • Once the artifact creation part is complete, test the artifacts in the Dev environment itself to understand their functioning credibility before deploying it to the Production (Live) environment for actual use or live usage.
      • In Sandbox, since all the artifacts don't move to the Production (Live) stage instantly after creating them, they get parked in a space called Branches till the solution/artifact is deployed to the Live environment for real-time usage.
      • Branches hold all the newly created artifacts and modifications made to any existing artifacts till published to the Live environment. In other words, we can say that branches will hold the artifacts summary and can be called artifacts summary page.
      • Basic Sandbox has a default General branch where all the newly created artifacts and modifications you make to any existing artifacts parks.
      • You can navigate to the General branch from any respective artifact's list page such as Apps, Data tables, Data sources, DS-Reports, DS-References, DS-Views, App Events, Lookups, Dashboards, Custom Menu, Preferences, Workspaces, Users, etc.
      • For example, navigate to the Manage Apps page; in the top right corner to the left of the Profile Picture, you will find the option to navigate to the General branch.

      • In the General branch, you will find the list of various newly created artifacts and modifications made to any existing artifacts ready to be published to the Live environment.

      • From the list of all the various types of artifacts, you can publish the artifacts you wish to.

      • Not everything that you do on the platform needs to be published so that it will be available in the live environment for actual usage. There are specific artifacts you create that need publishing. Below is the artifacts list:
      S. NoArtifactS. NoArtifact
      1Apps13Data source AddOns
      2Data tables14External Lookups
      3Data sources15External App References
      4DS-Reports16User Manuals
      5DS-References17App Reports
      6DS-Views18Toaster Configurations
      7App Events19Organization Themes
      8Lookups20Workspaces
      9Public Dashboards21Data table Sync
      10Custom Menu22Report Schedulers
      11Data table Functions23Role
      12Payment Gateways24Low Code Function

      Understanding placeholders in the Artifacts Summary page

      S. NoOptionDescription
      1ArtifactsHere is a compilation of newly generated items or alterations implemented in the pre-existing artifacts.
      2Artifacts Category Drop-downThis dropdown menu encompasses a variety of artifact categories. Upon selecting a category, the corresponding list of artifacts for that specific category will be displayed.
      3SearchThe search field enables you to input keywords, facilitating the extraction of relevant artifacts based on your input.
      4Expand allThis feature offers essential details regarding the nature of modifications made to the relevant artifact, such as whether it was created anew or updated.
      5Deploy to LiveThis button is utilized to publish, deploy, or transfer the artifact to the live environment.
      6AdminThe hamburger menu provides an option to discard all changes made to the artifacts (both created and updated) in the branch.
      7Deployment Log

      A deployment refers to either an individual or a set of artifacts that are collectively published to the Live environment. This interface furnishes details about a deployment (publish) from the Development (Dev) branch to the Live environment, including the timing and the specific artifacts deployed during that operation.

      To reverse a deployment, utilize the "Rollback" option, which allows you to undo the most recent deployment. This action removes the published artifact creations and modifications from the Live environment. It's important to note that rollback is applicable only to the latest deployment.

      8Regular View & Timeline ViewRegular View: Within this view, you'll discover a roster of all the artifacts that have been either newly generated or modified, along with the timestamps indicating when they were created.
      Timeline View: Within this view, you'll encounter a compilation of individuals who have either created or updated the artifacts, along with the respective timestamps indicating when these actions were performed.
      9Manage StagesThe Dev and Live sandbox environments or stages are distinguished by colored buttons. If you wish to customize these default colors according to your preference, you can utilize the Manage Stages option to update the colors associated with the stage icons.

      Managing Artifact Dependencies for Deployment

      In Quixy, we collaborate and link diverse types of artifacts to create a functional solution. These artifacts are interconnected and depend on one another to achieve specific functionalities.

      As the sandbox necessitates the deployment of artifacts to the live environment after their creation or modification, it's crucial to deploy related artifacts either simultaneously or ensure that the parent artifact is deployed first, followed by the dependent (child) artifact.

      In the event of a discrepancy during artifact deployment—attempting to deploy a dependent (child) artifact to the live environment before deploying the parent artifact—the platform will present an error dialogue box, indicating a dependency issue. This error notification not only alerts about the problem but also furnishes information on the artifact dependency within the dialogue box. This ensures awareness and prompts users to proceed with deploying or publishing the dependent artifact before deploying or publishing the actual artifact.

      The following examples illustrate how the artifact dependency mechanism operates:

      1. When attempting to deploy an "App," the system will verify the availability of the workspace in the next stage. If the workspace is not available, the system will generate an error message prompting the deployment of the workspace.
      2. In the case of deploying an "App (with Look ups)," the system will examine the availability of look-ups in the next stage. If the look-ups are not present, the system will issue an error message, necessitating the deployment of look-ups.
      3. For the deployment of an "App event (Data function)," the system will validate the availability of both the App and the data table in the next stage. If either is unavailable, the system will prompt an error, urging the deployment of both the App and the data table.
      4. When deploying a "Report," the system will check for the availability of the data source in the next stage. Should the data source be absent, the system will generate an error message, indicating the need to deploy the data source.
      5. In the deployment of a "List Screen (with App and Report used in Data action)," the system will verify the availability of both the App and the Report in the next stage. If either is not available, the system will display an error message, signaling the necessity to deploy both the App and the Report.

      Managing Account Preferences in Sandbox

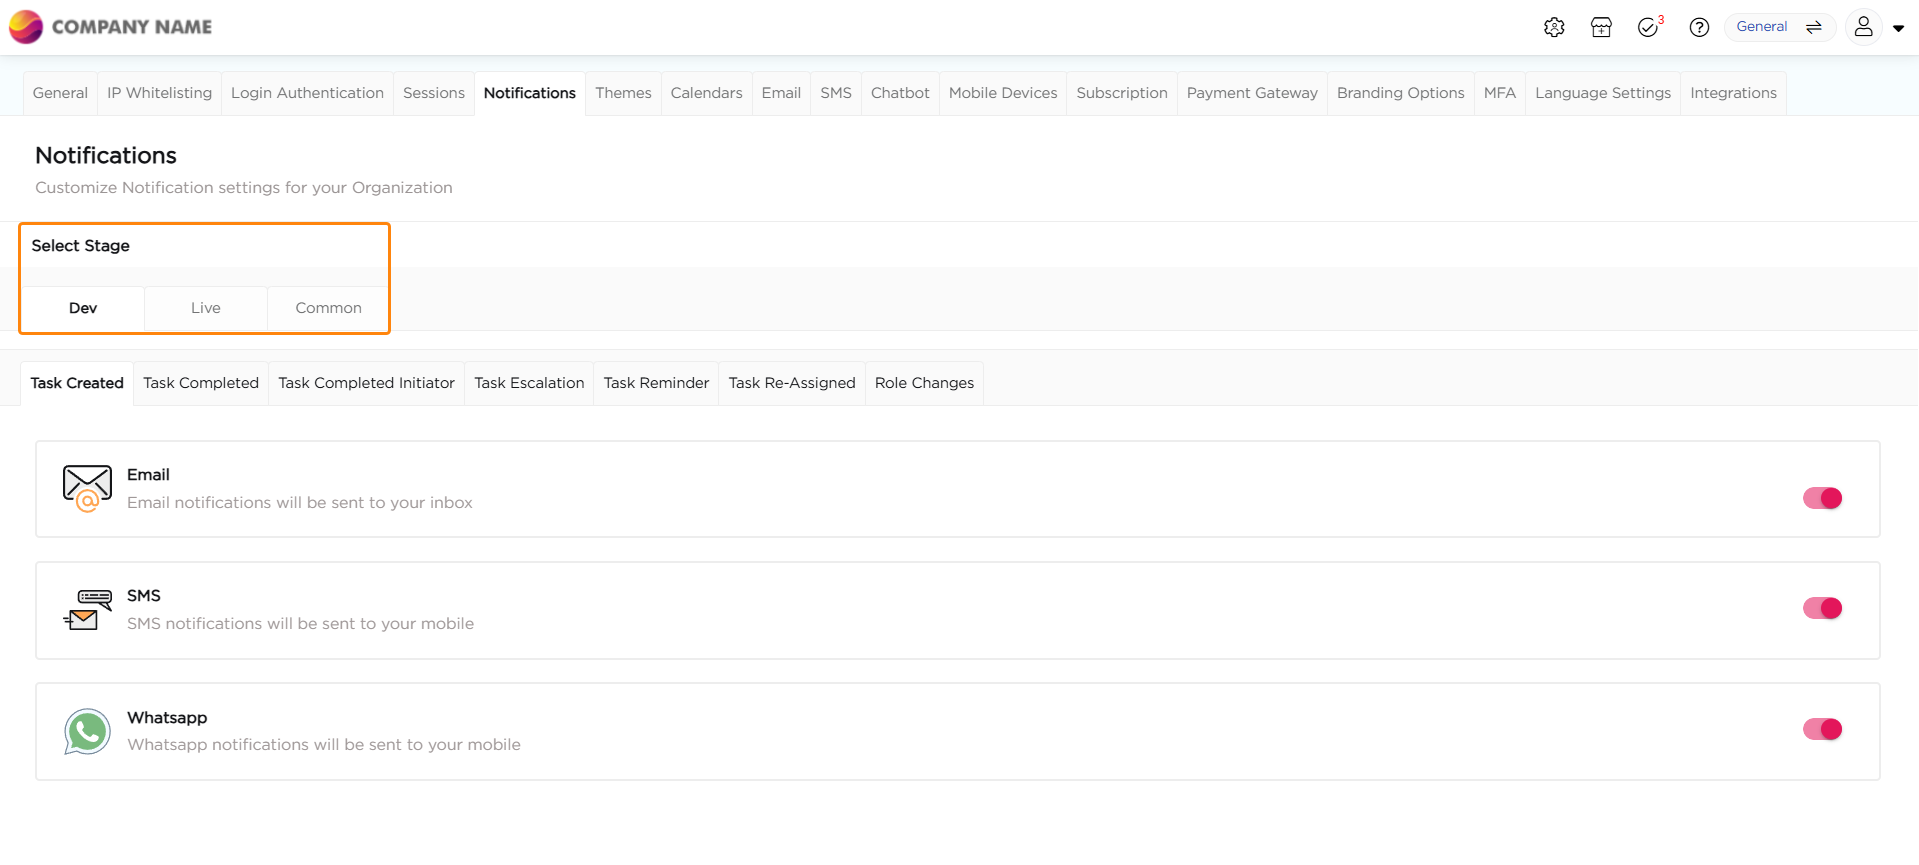
      When adjusting account preferences, three specific preferences necessitate either configuring the environment or deploying to the live environment.

      1. Notifications

      When configuring notification preferences, you are required to specify the environment for which you intend to enable or disable notifications.

      2. Payments Gateway

      Configured payments gateway requires deploying/publishing from the General branch.

      3. Themes

      Configured organization Themes requires deploying/publishing from the General branch.

      Data Administration in Sandbox

      Sandbox has made managing data a lot better. Now, we've got a more private and secure way to handle the data with help of Data Admin. The new Data Admin role has changed things for the better. Learn more about Data Admin role here...


      Was this article helpful?