.png)
App Creation
- 5 Minutes to read
- Contributors


App Creation
- 5 Minutes to read
- Contributors
Article summary
Did you find this summary helpful?
Thank you for your feedback!
Creating an application on the platform is a 6-step process. The steps are as given below.
Step 1 (Name): Naming the application.
Step 2 (Form Builder): Build the UI of the application using a simple drag-and-drop method.
Step 3 (Workflow): Design the process flow of the application.
Step 4 (Business Rules): Define the business logic.
Step 5 (Access Permissions): Set the user's access to the app sections.
Step 6 (Publish): Publish the app.
Users can follow different ways to start creating or downloading an application from app store.
Download an Application from App store
Upon logging in to the account and landing on to the Dashboard page.
Click on the App Store
 .
.You will have two options:
Download a ready-to-use solution
Build an application from scratch.
To download a ready-to-use app (solution), select any available solution.
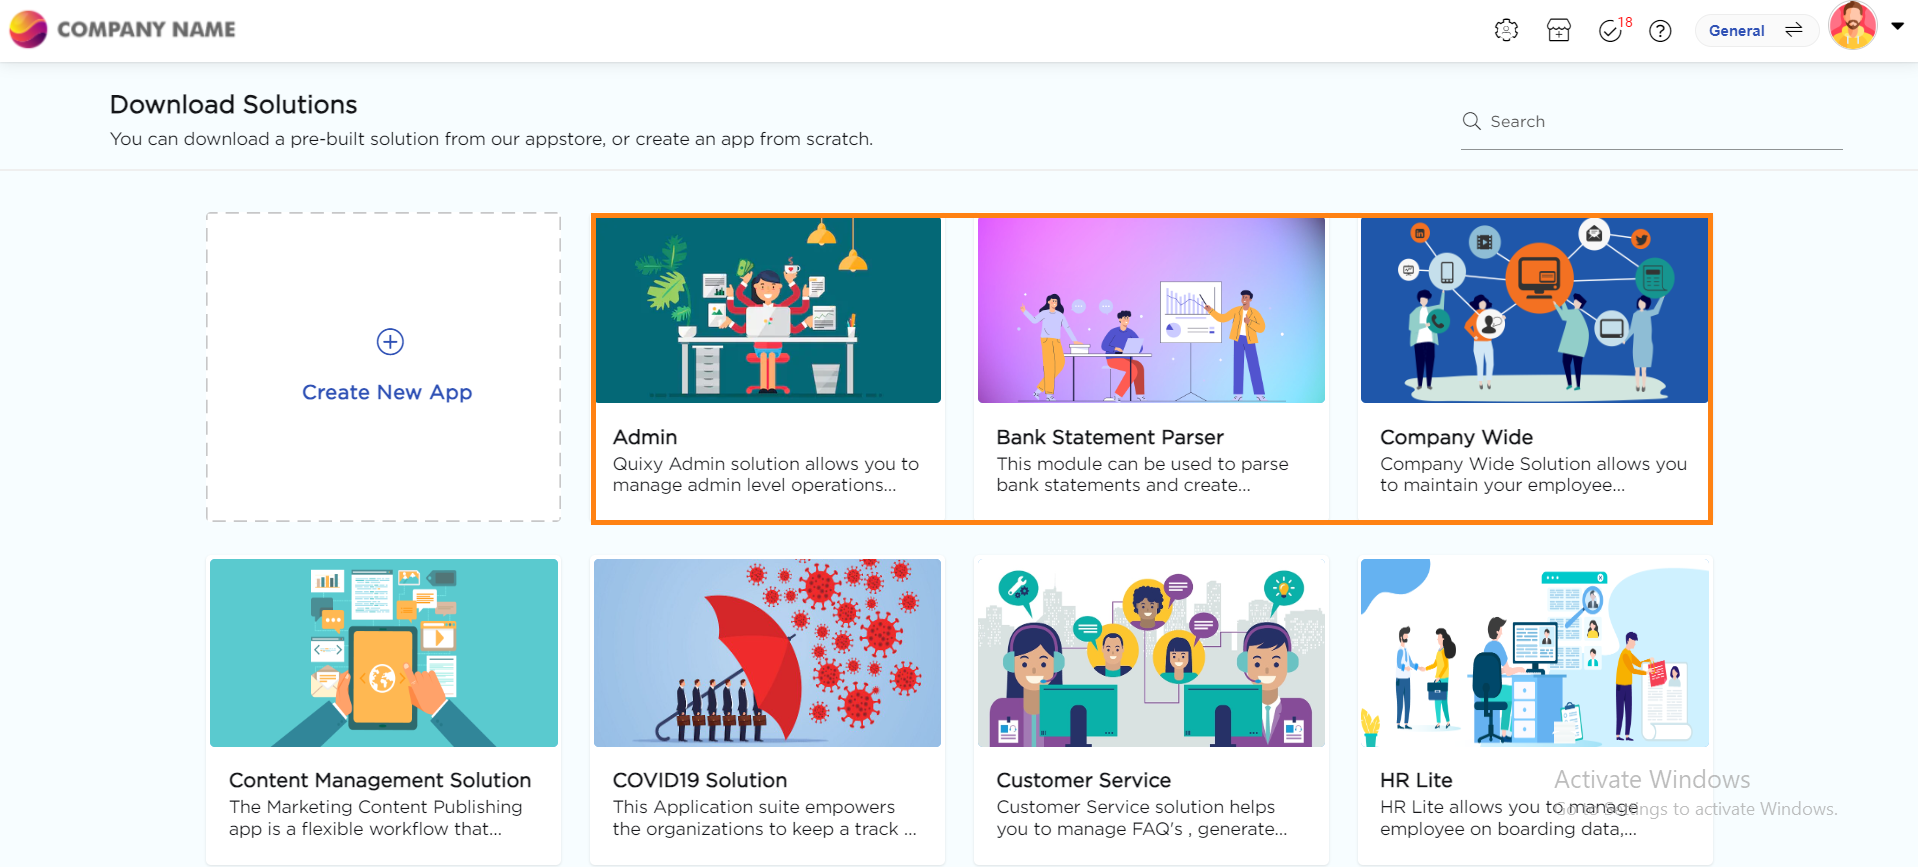
Download the solution.
 .
.
Create an Application
On the dashboard page, click on the Admin Menu

Hover your cursor on the Apps option and click on the Create App option.


Name Step
It is a mandatory field to select a workspace from the Select Workspace drop-down list.
Enter a Name for the application, enter a description to define the application (if necessary), and click on Next.
You will land on the Form Builder page, which is the second step in the application building process.
Form Builder Step
On this page, you have the ability to design your app's interface effortlessly by dragging and dropping elements from the left pane of the Form Builder onto the Form Builder canvas itself. The properties of each element are conveniently located on the right side. Additionally, along with these properties, you'll find other useful features such as Templates, From File, Reset, and a Preview for mobile and web (coming soon). Furthermore, there is an additional feature called Themes in the right pane.
Themes offer an opportunity to go beyond basic fields and elements, enabling customization with various fonts, images, and more. You have the flexibility to apply themes to the entire form, specific sections, or individual fields. Learn more about Themes..
Go through the picture and guide below for better understanding.

Element Pane: All essential Elements required for constructing a Form Builder are categorized into three phases: Basic, Advanced, and Reference.
Builder Canvas: This serves as the canvas where you can effortlessly drag and drop the necessary elements to construct a well-structured form.
Element Properties: Clicking on fields reveals a pop-up containing properties for each field you've utilized. Additionally, clicking on an individual element field opens a pop-up displaying the properties specific to that element.
Right Pane: Here, you'll discover various upcoming features aimed at enhancing usability. Currently available features include "Properties" and "Themes."
NOTE
You can preview the app form to understand the look and feel of the app either as a desktop view or a tablet view by clicking on the preview button at the bottom of the page.
NOTE
Form elements are the fields in an application where the user's information is saved when the user enters it while using the application.
CAUTION
The functionalities of the form elements are explained separately, and links are given below.
Essentials to build an Application
2.1. Form Elements (Basic, Advanced, Reference)
2.2. Workflow Step: Workflow is the step where you define the business process flow (from one step to the other) in a series of steps that need to be completed sequentially, parallel, or conditionally as a tree structure to access the application.
2.3. Business Rules Step: A Business Rule is a statement or condition that imposes limitations on specific aspects of the app's form, such as the elements entered in the field of a particular element field or the characteristics of a given relationship in the element fields.
2.4. Access Permissions Step: You can define the Access Permissions according to the steps defined in the workflow page. You can allow and deny access to each step of the workflow to perform different actions with a section.
2.5. Publish the application.
NOTE
Quixy, despite being a no-code platform, offers a unique capability—a unified codebase for developing applications that are both responsive in web and native mobile app for Android and iOS. This means that while users can create applications without writing a single line of code, Quixy harnesses the power of a unified codebase to ensure that the resulting applications are not just limited to the web but can also be seamlessly available in native mobile apps across both Android and iOS platforms.
Here's how Quixy achieves this:
No-Code Interface: Quixy provides an intuitive, drag-and-drop interface that allows users to design and customize their applications without any coding knowledge. Users can simply drag elements onto the canvas, configure their properties, and define workflows to build their desired applications.
Unified Codebase: Behind the scenes, Quixy employs a unified codebase approach, which means that the platform generates code that can be used for both web and mobile applications. This eliminates the need for users to separately develop and maintain codebases for different platforms, saving time and effort.
Responsive Design: Quixy's applications are built with responsive design principles, ensuring that they adapt seamlessly to various screen sizes and orientations. Whether accessed on a desktop, tablet, or smartphone, the applications developed on Quixy's platform provide an optimal user experience across all devices.
Cross-Platform Compatibility: Quixy's unified codebase is designed to be compatible with both Android and iOS platforms. This means apps that are deployed in web are seamlessly available in native mobile apps on both platforms without the need for additional development work.
Native-Like Performance: Despite being developed on a no-code platform, applications created with Quixy's unified codebase offer native-like performance and functionality. This is achieved through optimization techniques and the use of platform-specific features, ensuring that users get the best possible experience on their devices.
Keep Your Users Updated with Release Notes
Citizen Developers can now convey modifications made in the latest versions of applications, views, and reports with a release note after deployment to the live stage. Provide users with a brief explanation of what’s new within 72 hours (about 3 days) of deployment.
How It Works?
All users with access to the updated applications, views, or reports will receive the release notes, ensuring everyone stays informed about the latest changes and improvements.
Drafting and Attaching Release Notes
Citizen Developers can draft and attach the release notes by navigating to Artifact Summary → Deployment Log → Release Notes. Once attached and sent, end-users can view the release notes in their notification section.
Was this article helpful?
