Calendars are used to define working days, working hours, and holidays for users in an organization. After a calendar is assigned to a user, Quixy uses it to understand when the user is working.
In organizations where employees work in different shifts, you can create separate calendars for each shift. For example, an admin can create three calendars with working hours from (9 AM to 6 PM, 2 PM to 11 PM, and 6 PM to 3 AM) and assign them to users based on their shift.
Calendars are used across the platform for time-based features such as:
¶ 1. Configure a Calendar
¶ 1.1 Define Working Days and Hours
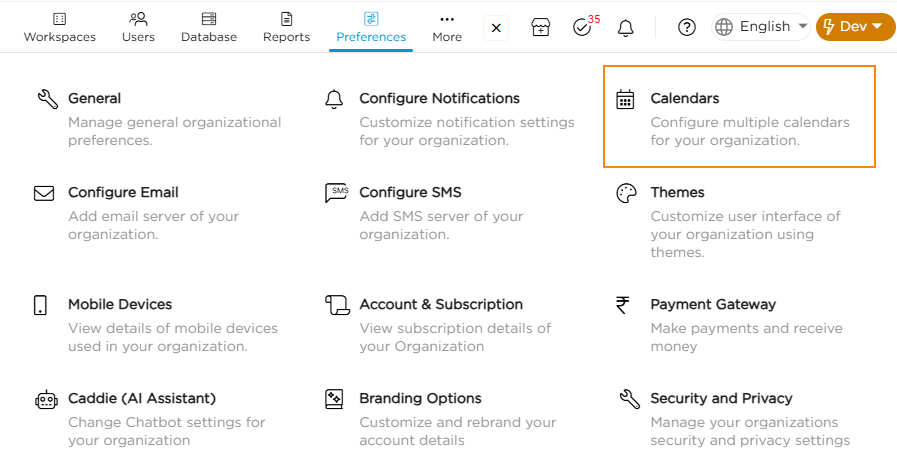
- Go to Admin Menu → Preferences → Calendars.
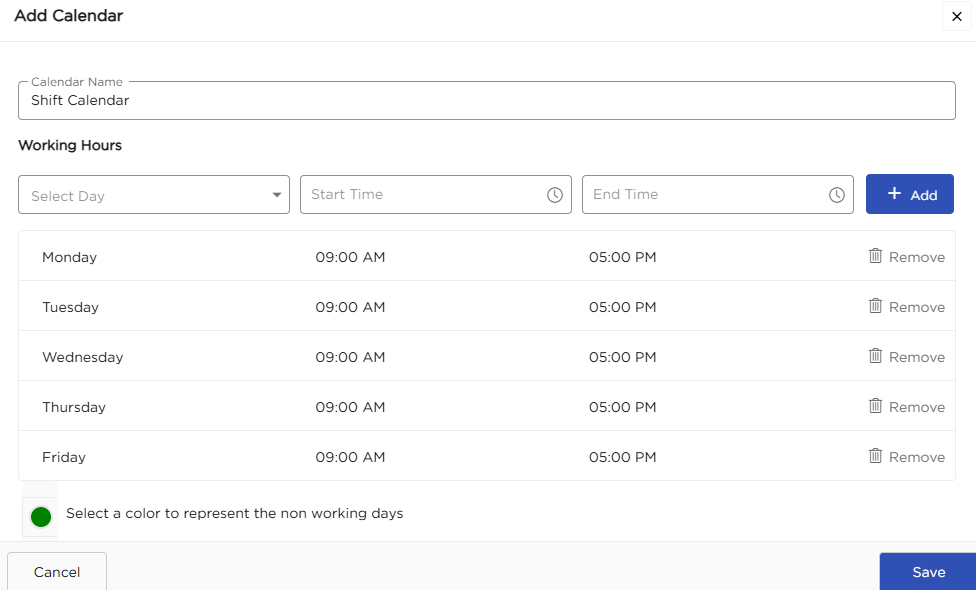
2. On the Calendar page, click Add Calendar.

3. Enter a name for the calendar.
4. Review the weekdays displayed with default working hours.
5. To change the timing of a weekday, select the time slot and update the start or end time.
6. To delete a default weekday, click Remove next to the required weekday.
7. To add a new working day, select a day from the Select Days dropdown under the Working Hours section.
8. Select the working hours from the time slots and click Add to include the day.
9. Select a color to represent non-working days.
10. After defining all working days and hours, click Save.
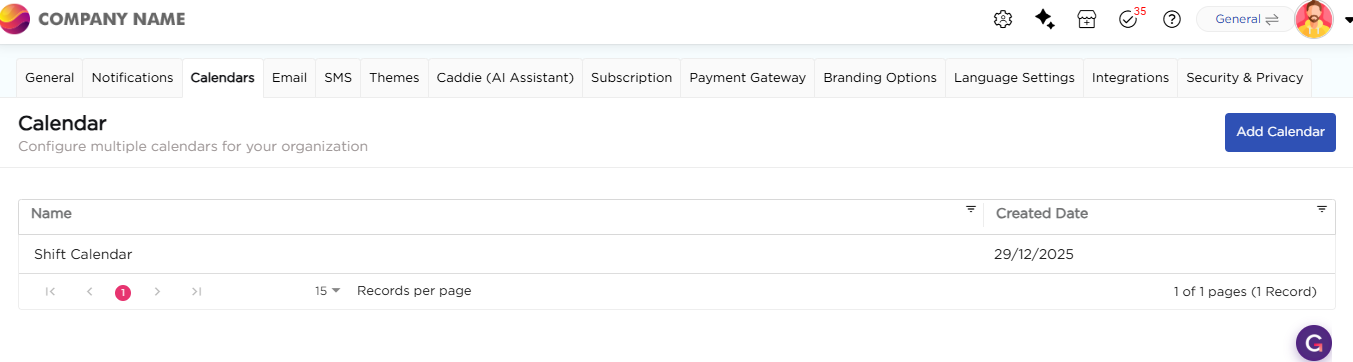
11. You will be able to see the newly created calendar in the calendars list page.
¶ 1.1 Add Holidays to a Calendar
- Click the calendar to open the Actions menu.
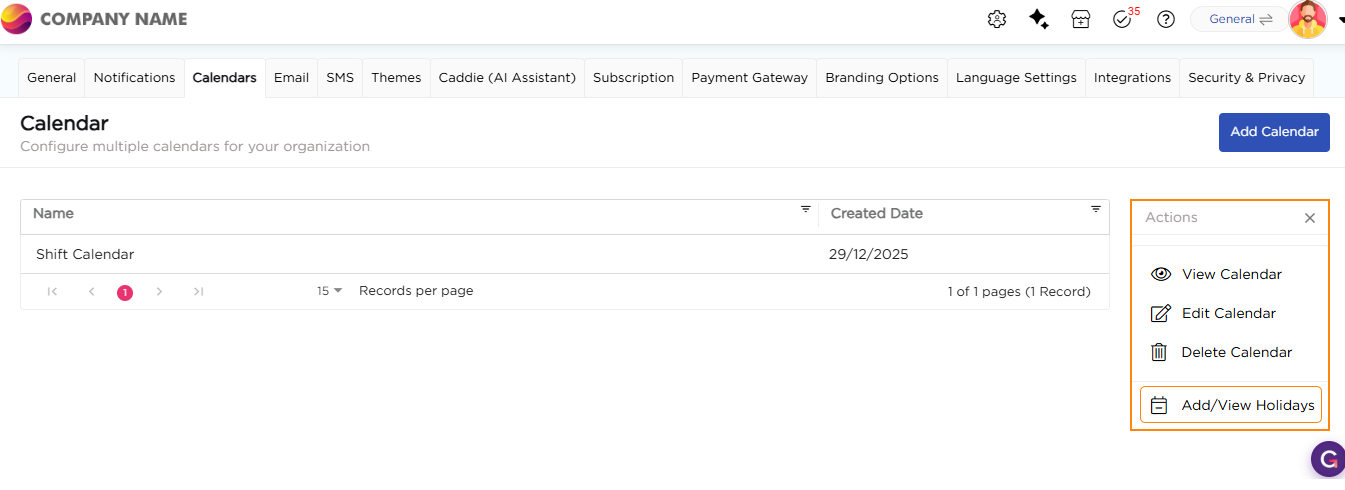
2. Select Add/View Holidays. The Holidays page opens and displays the selected year.
3. Select the year.
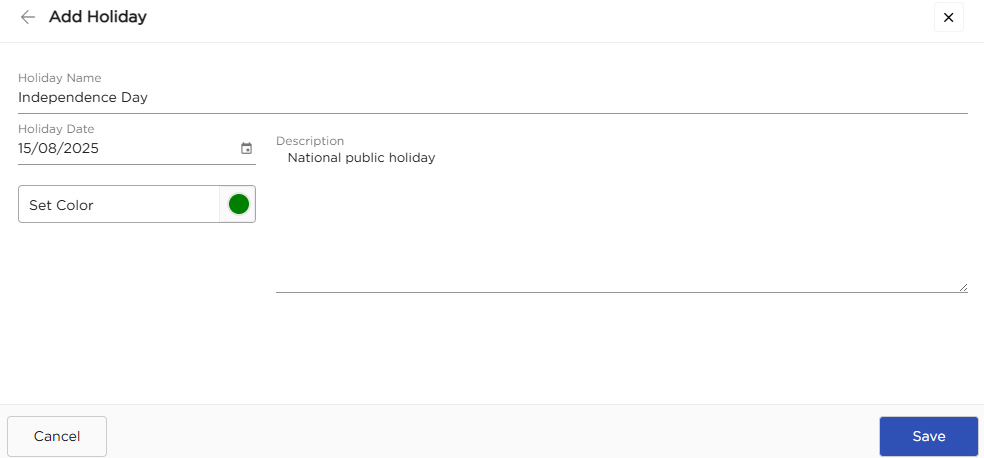
4. Click Add Holiday.
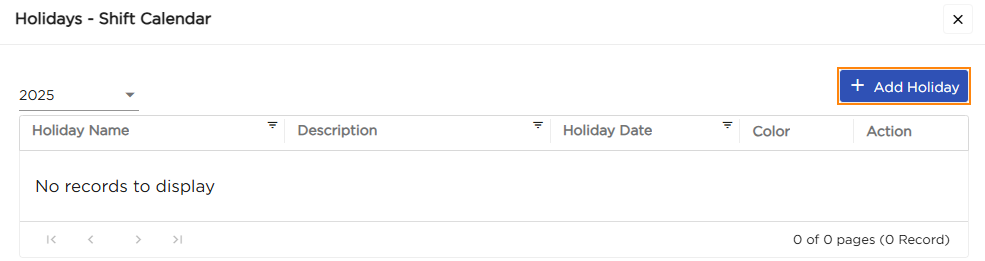
5. Enter the holiday name.
6. Select the holiday date.
7. Enter a description if required.
8. Click Save.